Add a "Draft" watermark to your document
Word comes with several common watermarks, including Draft, so you can let others know the status of your document. When you add a watermark, it'll appear on every page except a designated title page.
To add a common watermark such as DRAFT, CONFIDENTIAL, or DO NOT COPY to your document,
-
On the Design tab, in the Page Background group, choose Watermark.
For Word 2010 and 2007 versions, find the Watermark option here -
On the Page Layout tab, in the Page Background group, choose Watermark.

-
Scroll through the watermark gallery and click the watermark you want. The gallery includes horizontal and diagonal watermarks for Draft, Confidential,Sample, ASAP, Urgent, and Do Not Copy.
Word automatically applies the watermark to every page except a designated title page.
-
If you don't see the watermark applied, click View > Print Layout. This also shows how the printed watermark will look.
Create and save a custom watermark
You can create your own text watermark using Custom Watermark.
-
On the Design tab, in the Page Background group, choose Watermark.
For Word 2010 and 2007 versions,
On the Page Layout tab, in the Page Background group, choose Watermark.

-
Choose Custom Watermark.
-
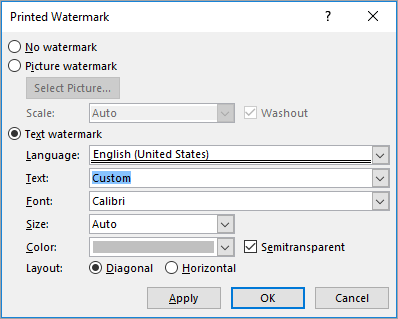
In the Printed Watermark dialog, select Text watermark.

-
Type your watermark text in the Text box. You can try different fonts, layouts, sizes, and colors while you're at it.
-
Choose OK to apply the watermark to your document.
Save a custom watermark into the watermark gallery
To save the custom watermark you created into the Watermark gallery do the following:
-
Double click the header area of the document.
-
Move the cursor over the watermark and click to select.
-
On the Design tab, in the Page Background group, choose Watermark.
For Word 2010 and 2007 versions,
On the Page Layout tab, in the Page Background group, choose Watermark.
-
Select Save Selection to Watermark gallery.

More information about watermarks
-
Choose Design tab, > Watermark.
For Word for Mac 2011, Choose Layout tab and select Watermark

-
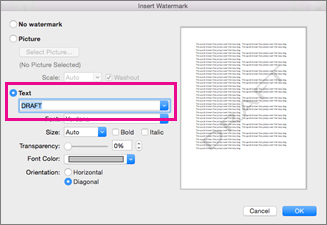
In the Insert Watermark box, select Text and then choose Draft from the list.

Customize your watermark by changing the font, layout, size, colors, and orientation in the Insert Watermark dialog

Tip: If you don't see the watermark, click View > Print Layout. This view also shows what the printed watermark will look like.
No comments:
Post a Comment