Create a basic diagram
Microsoft Office Visio provides more than 60 templates and thousands of shapes, some simple, some quite complex. This article uses the Basic Diagram template to explain what you need to get started quickly — the basics of how to open a template, put shapes in the drawing, and connect those shapes.
You can find much more information about how to use the shapes themselves in the article Shape basics. For information about using other kinds of Visio diagram templates, see the article How can I tell what each Visio template is for?. You can also learn how to use Visio by using the training courses and demos that are available on the Microsoft Office Online Web site.
-
Start Microsoft Office Visio.
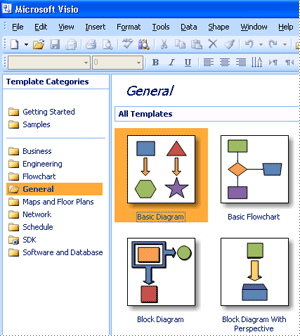
When Visio starts, several windows appear. For now, all you need to work with is the window titled Template Categories.
-
In the Template Categories window, in the list of categories, click the General category.
All the templates in the General category appear in the central window.
-
Double-click the template titled Basic Diagram.
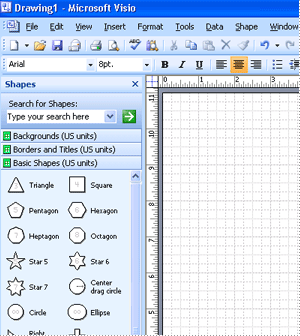
When the Basic Diagram template opens, most of the space is taken up with a blank drawing page. Because it is important to line up the shapes when you create a diagram, the page appears with grid lines on it.
Tip: If you want to turn the grid lines off, on the View menu, click Grid to clear the check box.
In addition to the drawing page, a Shapes window appears with three sets of shapes:
-
Backgrounds
-
Borders and Titles
-
Basic Shapes
Click each of these titles to open a stencil full of shapes. For now, we will work only with the Basic Shapes stencil.
-
-
Click any shape on the Basic Shapes stencil, hold down the mouse button, and drag the shape onto your drawing page.
When you release the mouse button, the shape is bounded by a dashed green line that has green squares
 , called selection handles, and sometimes yellow diamonds, called control handles
  . To learn how to use control handles, selection handles, and other important shape features, see the article Shape basics.
 -
Repeat step 4 to add another shape to the page.
-
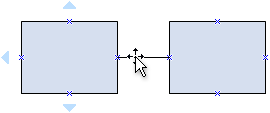
Connect the shapes together by using the AutoConnect feature:
-
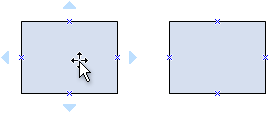
Rest the pointer over the shape that you want to connect from.
-
Position the pointer over the pale blue triangle that is closest to the shape that you want to connect to.
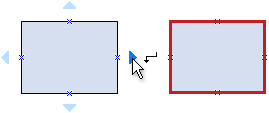
The triangle turns dark blue, and a red box appears around the shape that you want to connect to.
Note: If a red box does not appear around the shape that you want to connect to, the shape may be too far away. Move the shape closer and try again, or connect the shapes by using the Connector tool. For more information, see the article Add connectors between shapes in Visio.
-
Click the blue triangle. A connector is added and glued to both shapes. The shapes stay connected even if you drag each shape to a new location on the page.
-
-
Continue to add and connect shapes by repeating steps 4 through 6 to complete your basic diagram.
No comments:
Post a Comment