Change the look of a table
You can apply or change a style, border, or color of a table in your presentation. For example, you can apply or clear a table style (or Quick Style), erase lines from a cell, row, or column, change the border of the table, or change the background color of a table.
Select a heading below to open it and see the detailed instructions.
Apply a table style
A table style (or Quick Style) is a combination of different formatting options, including color combinations that are derived from the theme colors of the presentation. Any table that you add has a table style applied to it automatically.
-
Select the table that you want to apply a new or different table style to.
-
Select the Table Tools / Design tab on the ribbon and then select the table style that you want. To see more table styles, click the More drop-down arrow
 on the right of the Table Styles gallery.
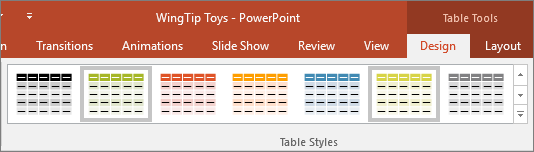
Note: To change the look of text in a table, go to Home >Font, or click the table and then select the Table Tools / Design tab and choose from the WordArt Styles.
Remove a table style
To remove a table style, select the Table Tools / Design tab on the ribbon. Then select the More drop-down arrow on the right of the Table Styles gallery, and choose Clear Table at the bottom.
Erase a line from a cell, row, or column
-
Select the Table Tools / Design tab on the ribbon. In the Draw Borders group, click Eraser.
The pointer changes to an eraser
 .
. -
Click the line that you want to erase to remove it. When you're finished, click outside the table.
Add or change a table border
-
Select the table cells that you want to add a border to (or change the border of).
-
Select the Table Tools / Design tab on the ribbon. Select one of the following in the Draw Borders group:
-
Use Pen Color to change the color of the border.
If you want more color options, click More Border Colors, and then either click the color that you want on the Standard tab, or mix your own color on the Custom tab. Custom colors and colors on the Standard tab are not updated if you later change the document theme.
-
Use Pen Weight to change the thickness of the border.
-
Use Pen Style to change the line style of the border.
-
-
To apply the color, weight, or line style that you chose in step 2 to the table, do one of the following:
-
While the pointer still looks like a pencil
 , click the borders that you want to change.
-
Go to Table Tools >Design > Table Styles > Borders, and then click the border option that you want to change.
Tip: You can use the Eraser to delete borders between table cells. Under Design > Table Tools, in the Draw Borders group, click Eraser, or press and hold Shift while the pointer is a pencil , and then click the borders that you want to delete.
Add or change the background of a table
You can add or change the background color for the whole table. The background color appears underneath any fill color that is applied to the table cells.
-
Click a cell in the table.
-
Go to Table Tools> Design, and then in the Table Styles group, click the arrow next to Shading, and then point to Table Background.
-
Click the color that you want, or to choose no color, click No Fill.
To change to a color that is not shown in the Theme Colors list, click More Fill Colors, and then either click the color that you want on the Standard tab, or mix your own color on the Custom tab. Custom colors and colors on the Standard tab are not updated if you later change the document theme.
You can apply or change a style, border, or color of a table in your presentation. For example, you can apply or clear a table style (or Quick Style), erase lines from a cell, row, or column, change the border of the table, or change the background color of a table.
Select a heading below to open it and see the detailed instructions.
Apply a new or different table style
A table style (or Quick Style) is a combination of different formatting options, including color combinations that are derived from the theme colors of the presentation. Any table that you add has a table style applied to it automatically. Thumbnails of table styles appear in the Quick Styles gallery in the Table Styles group. When you place your pointer over a Quick Style thumbnail, you can see how the Quick Style affects your table.
-
Click the table that you want to apply a new or different table style to.
-
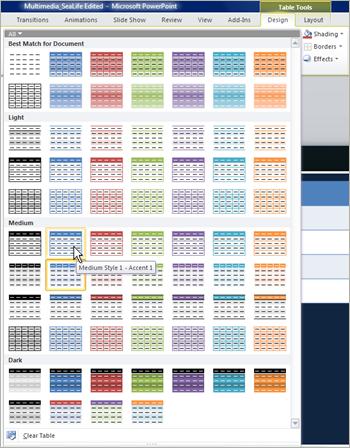
Under Table Tools, on the Design tab, in the Table Styles group, click the table style that you want. To see more table styles, click the More button
.When you place your pointer over a Quick Style thumbnail, you can see how the Quick Style affects your table.
Notes:
-
Text in tables does not appear on the Outline tab (in the leftmost pane in the program window, in Normal view). Only text in text placeholders appears on the Outline tab.
-
To change the look of text in the table cells or the entire table, choose the options on the Home tab, in the Font group, or the options under Table Tools, on the Design tab, in the WordArt Styles group.
-
Clear a style from a table
-
To remove a table style, under Table Tools, on the Design tab, in the Table Styles group, click the More button
, and then click Clear Table.
Erase a line from a cell, row, or column
-
Under Table Tools, on the Design tab, in the Draw Borders group, click Eraser, or press and hold SHIFT while the Draw Tool is active.
The pointer changes to an eraser
. -
Click the line that you want to erase.
-
When you are finished erasing lines, click outside of the table.
Add or change a table border
-
Select the table cells that you want to add or change the table border for.
-
Under Table Tools, on the Design tab, in the Draw Borders group, do one or more of the following:
-
To change the color of the border, click the arrow next to Pen color, and then click the color that you want.
To change to a color that is not in the theme colors, click More Border Colors, and then either click the color that you want on the Standard tab, or mix your own color on the Custom tab. Custom colors and colors on the Standard tab are not updated if you later change the document theme.
-
To change the weight of the border, click the arrow next to Pen Weight, and then click the line thickness that you want.
-
To change the line style of the border, click the arrow next to Pen Style, and then click the line style that you want.
-
-
To apply the color, weight, or line style that you chose in step 2 to the table, do one of the following:
-
While the pointer still looks like a pencil
, click the borders that you want to change. -
Under Table Tools, on the Design tab, in the Table Styles group, click Borders, and then click the the border option that you want to change.
-
Tip: You can use the Eraser to delete borders between table cells. Under Table Tools, on the Design tab, in the Draw Borders group, click Eraser, or press and hold SHIFT while the pointer is a pencil , and then click the borders that you want to delete.
Add or change the background color of a table
You can add or change the background color for an entire table. The background color appears beneath any fill color that is applied to the table cells.
-
Click a cell in the table.
-
Under Table Tools, on the Design tab, in the Table Styles group, click the arrow next to Shading, and then point to Table Background.
-
Click the color that you want, or to choose no color, click No Fill.
To change to a color that is not shown in the Theme Colors list, click More Fill Colors, and then either click the color that you want on the Standard tab, or mix your own color on the Custom tab. Custom colors and colors on the Standard tab are not updated if you later change the document theme.
You can apply or change a style, border, or color of a table in your presentation. For example, you can apply or clear a table style (or Quick Style), erase lines from a cell, row, or column, change the border of the table, or change the background color of a table.
For information about distributing data in table cells, including splitting cells and merging cells, see Add or delete table rows, columns, or cells.
Select a heading below to open it and see the detailed instructions.
Change a table style
A table style (or Quick Style) is a combination of different formatting options, including color combinations that are derived from the theme colors of the presentation. Any table that you add has a table style applied to it automatically. Thumbnails of table styles appear in the Quick Styles gallery in the Table Styles group. When you place your pointer over a Quick Style thumbnail, you can see how the Quick Style affects your table.
-
Click the table that you want to apply a different table style to.
-
Under Table Tools, on the Design tab, in the Table Styles group, click the table style that you want. To see more table styles, click the More button
.To clear the default or any other table style, click the More button
, and then click Clear Table.Tip: To make a table style the default table style for all new tables that you create, right-click the table style, and then click Set as Default on the shortcut menu.
Notes:
-
You cannot save a new Quick Style.
-
To reuse the overall formatting of an existing table, click the table that you want to copy, rest the pointer on the outermost border of the table (but not on the dots), and then when the pointer becomes a
 , press and hold CTRL while you click and drag the border.
 -
To copy the formatting of cell text, use the Format Painter. For more information, see Copy the formatting of a shape, object, worksheet cell, or text by using Format Painter.
-
For more information about Quick Styles, see All about themes, Quick Styles, cell styles, and background styles.
-
Change table style options
You can apply a table style to specific parts of your table by selecting options in the Table Style Options group.
-
Click the table that you want to change the table style options for.
-
Under Table Tools, on the Design tab, in the Table Styles Options group, do one or more of the following:

-
To emphasize the first row of the table, select the Header Row check box.
-
To emphasize the last row of the table, select the Total Row check box.
-
To have alternating striped rows, select the Banded Rows check box.
-
To emphasize the first column of the table, select the First Column check box.
-
To emphasize the last column of the table, select the Last Column check box.
-
To have alternating striped columns, select the Banded Column check box.
-
Add or change a table border
-
Select the table cells that you want to add or change the table border for.
-
Under Table Tools, on the Design tab, in the Draw Borders group, do one or more of the following:
-
To change the color of the border, click the arrow next to Pen color, and then click the color that you want.
To change to a color that is not in the theme colors, click More Border Colors, and then either click the color that you want on the Standard tab, or mix your own color on the Custom tab. Custom colors and colors on the Standard tab are not updated if you later change the document theme.
-
To change the weight of the border, click the arrow next to Pen Weight, and then click the line thickness that you want.
-
To change the line style of the border, click the arrow next to Pen Style, and then click the line style that you want.
-
-
To apply the color, weight, or line style that you chose in step 2 to the table, do one of the following:
-
While the pointer still looks like a pencil
, click the borders that you want to change. -
Under Table Tools, on the Design tab, in the Table Styles group, click Borders, and then click the border option that you want to change.
-
Tip: You can use the Eraser to delete borders between table cells. Under Table Tools, on the Design tab, in the Draw Borders group, click Eraser, or press and hold SHIFT while the pointer is a pencil , and then click the borders that you want to delete.
Add or change a fill for a table cell
A fill is the interior of a cell. When you add or change the fill color of a table cell, you can also add a texture, picture, or gradient to the fill. A gradient is a gradual progression of colors and shades, usually from one color to another color, or from one shade to another shade of the same color.
-
Select the table cells that you want to add a fill to.
-
Under Table Tools, on the Design tab, in the Table Styles group, click the arrow next to Shading, and then do one of the following:
-
To add or change a fill color, click the color that you want, or to choose no color, click No Fill.
To change to a color that is not in the theme colors, click More Fill Colors, and then either click the color that you want on the Standard tab, or mix your own color on the Custom tab. Custom colors and colors on the Standard tab are not updated if you later change the document theme.
-
To add or change a fill picture, click Picture, locate the folder that contains the picture that you want to use, click the picture file, and then click Insert.
When you add a picture as a fill effect, it is resized to fit the cell and may be distorted. To eliminate the distortion, you can resize the cell or table.
-
To add or change a fill gradient, point to Gradient, and then click the variation that you want.
To customize the gradient, click More Gradients, and then choose the options that you want.
-
To add or change a fill texture, point to Texture, and then click the texture that you want.
To customize the texture, click More Textures, and then choose the options that you want.
-
Add or change a table background color
You can add or change the background color for an entire table. The background color appears beneath any fill color that is applied to the table cells.
-
Click a cell in the table.
-
Under Table Tools, on the Design tab, in the Table Styles group, click the arrow next to Shading, and then point to Table Background.
-
Click the color that you want, or to choose no color, click No Fill.
To change to a color that is not in the theme colors, click More Fill Colors, and then either click the color that you want on the Standard tab, or mix your own color on the Custom tab. Custom colors and colors on the Standard tab are not updated if you later change the document theme.
Add or change a table cell effect
Note: Shadow and Reflection effects can be applied only to an entire table, not to individual table cells.
-
Do one of the following:
-
To apply an effect to some of the table cells, select the table cells that you want to add an effect to.
-
To apply an effect to all the table cells, right-click a table cell, and then click Select Table on the shortcut menu.
-
-
Under Table Tools, on the Design tab, in the Table Styles group, click Effects.
-
To add or change an edge, point to Cell Bevel, and then choose the bevel that you want.
Add or change a table effect
-
Click the table that you want to add an effect to.
-
Under Table Tools, on the Design tab, in the Table Styles group, click Effects, and then do one of the following:
-
To add or change a shadow, point to Shadow, and then choose the shadow that you want.
To customize the shadow, click Shadows Options, and then choose the options that you want.
-
To add or change a reflection, point to Reflection, and then choose the variation that you want.
-
Delete a fill from a table or table cell
-
Do one of the following:
-
To select the table, right-click a table cell, and then click Select Table on the shortcut menu.
-
To select part of the table, select the cells that you want to delete the fill from.
-
-
Under Table Tools, on the Design tab, in the Table Styles group, click Shading, and then do one of the following:
-
To delete a fill color, picture, or texture, click No Fill.
-
To delete a fill gradient, point to Gradient, and then click No Gradient.
-
To delete a table background fill, point to Table Background, and then click No Fill.
-
Delete an effect from a table or table cell
-
Do one of the following:
-
To select the table, right-click a table cell, and then click Select Table on the shortcut menu.
-
To select part of the table, select the cells that you want to delete the fill from.
-
-
Under Table Tools, on the Design tab, in the Table Styles group, click Effects, and then do one of the following:
-
To delete an edge from the table cell or table, point to Cell Bevel, and then click No Bevel.
-
To delete a shadow from the table, point to Shadow, and then click No Shadow.
-
To delete a reflection from the table, point to Reflection, and then click No Reflection.
Note: If you added multiple individual effects, repeat step 2 to delete all of the effects.
-
Tip: To change the look of text in the table cells or the entire table, choose the options that you want under Table Tools, on the Design group, in the WordArt Styles group, or on the Home tab, in the Font group.
You can apply or change a style or color to a table in your presentation.
Select a heading below to open it and see the detailed instructions.
Apply a table style
A table style (or Quick Style) is a combination of different formatting options, including color combinations that are derived from the theme colors of the presentation. Any table that you add has a table style applied to it automatically.
-
Select the table that you want to apply a style to.
-
Select the Table Tools / Design tab on the ribbon and then select the table style that you want. To see more table styles, click the More drop-down arrow
 on the right of the Table Styles gallery.
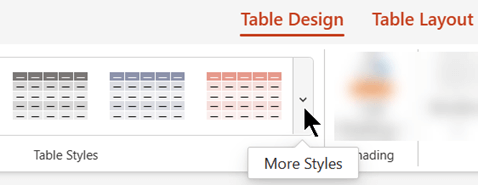
Tip: To change the look of text in a table, go to the Home tab on the toolbar and use the options in the Font group.
Remove a table style
-
Select part of the table.
-
Select the Table Tools / Design tab on the ribbon.
-
Select the More drop-down arrow on the right of the Table Styles gallery:
-
At the very bottom of the gallery that opens, select Clear Table:

Add shading to rows or columns
You can add shading styles by using the Table Style Options group on the Table Tools / Design on the ribbon.
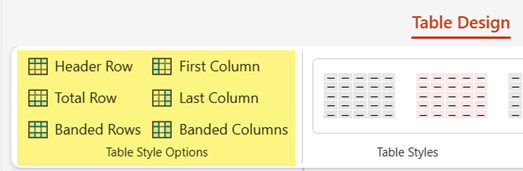
| Option | Description |
| Header Row | Darken the shading of the top row, where the column headings are, as is done in this table |
| Total Row | Darken the shading of the bottom row, where column totals are shown |
| Banded Rows | Use alternating lighter and darker shading of table rows, as is used in this table |
| First Column | Darken the shading of the first table column |
| Last Column | Darken the shading of the last table column |
| Banded Columns | Use alternating lighter and darker shading of table columns |
Add or change the shading of selected cells
You can add or change the shading of an individual cell or selected cells.
-
Select a cell or cells in the table.
-
Go to Table Tools > Design on the toolbar, and open the Cell Shading menu of colors.
-
Select the color that you want, or to choose no color, select No Fill.
No comments:
Post a Comment