A contact list, also known as a distribution group, is a grouping of email addresses collected under one name. A message sent to a contact list goes to all recipients listed in the list. You can include contact lists in messages, meeting requests, and in other contact lists.
Note: If you have a Microsoft Exchange account, contact lists are not saved to the Exchange server. Any lists that you create are saved on your computer and are available only in Outlook for Mac.
Create a contact list and add or remove people
Office 365 subscription plans for consumers who work with Outlook 2016 for Mac include:
-
At the bottom of the left navigation pane, select People.
-
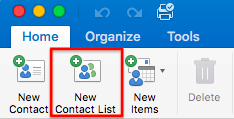
On the Home tab, select New Contact List.

Important: If the New Contact List option is greyed out, set your preferences to Show my "On My Computer" folders, and then return to finish creating your contact list.
-
Enter a name for the contact list.
-
Do any of the following:
To
Do this
Add a person from your contacts, or add a person with whom you've recently exchanged email
Select Add
 , type the first few letters of the person or group's name, and select the name from the pop-up menu.
Add a person who is not in your contacts or with whom you haven't recently exchanged email
Select Add
 , and type the person's email address.
Prevent message recipients from seeing the addresses of other group members
Select the Use Bcc to hide member information check box.
Remove a member
Select the member's name, and choose Remove
 .
. -
Select Save & Close.
The contact list appears in your Outlook contacts in the On My Computer folder. You can send messages to the list exactly as you would to any person.
Notes:
-
To delete a contact list, open the list, and then on the List tab, choose Delete. Deleting a list does not delete contacts that you already have saved in Outlook or contacts from your organization's directory.
-
You can view the contact names in the header of a message or meeting request. In the To box, select the arrow next to the name of the Contact List. After the list is expanded, you can't collapse the list again in that message.
-
Show my "On My Computer" folders
To view your On My Computer folders, do the following:
-
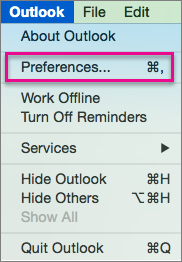
On the Outlook menu, select Preferences.

-
In the Outlook Preferences box, under Personal Settings, select General.
-
In the General box, clear the Hide On My Computer folders checkbox.

-
At the bottom of the navigation pane, click Contacts
 .
. -
On the Home tab, click Contact Group.

If Contact Group is not available
To create a contact group, you must set your preferences to show the On My Computer folders.
-
On the Outlook menu, click Preferences.
-
Under Personal Settings, click General
 .
. -
Under Folder list, clear the Hide On My Computer folders check box.
-
-
Enter a name for the contact group.
-
Do any of the following:
To
Do this
Add a person from your contacts, or add a person with whom you've recently exchanged email
Click Add
 , type the first few letters of the person or group's name, and then click the appropriate entry on the pop-up menu.
Add a person who is not in your contacts or with whom you haven't recently exchanged email
Click Add
 , and then type the person's email address.
Prevent message recipients from seeing the addresses of other group members
Select the Use Bcc to hide member information check box.
Remove a member
Click the member, and then click Remove
 .
. -
Click Save & Close.

The group appears in your Outlook contacts, and you can send messages to the group exactly as you would to one person.
Notes:
-
To delete a contact group, open the group, and then on the Group tab, click Delete. Deleting a group does not delete contacts that you already have saved in Outlook or contacts from your organization's directory.
-
You can view the contact names in the header of a message or meeting request. In the To box, click the arrow next to the name of the Contact Group. After the list is expanded, you can't collapse the list again in that message.
-
Tip: You can import and export contacts from other applications such as Outlook for Windows, Apple Mail, and Entourage. For more information, see how to Import a .pst file into Outlook for Mac from Outlook for Windows
No comments:
Post a Comment