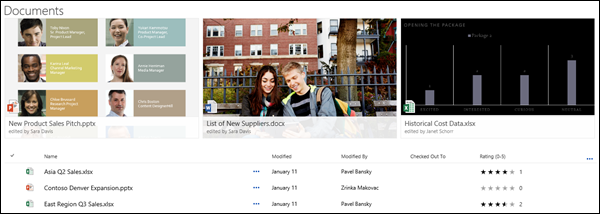
You can highlight important files, folders, or links in a document library in SharePoint in Microsoft 365 or SharePoint Server 2019 by pinning them to the top of the document library. When you pin an item, a thumbnail image will appear at the top of the document library page making it easier for users to find it. You then simply click the image to open the item in the browser window. If you click the top right corner of the thumbnail image, the menu at the top left of the document library will change to a list of additional actions you can take on that item.

Note: The highlight area is specific to a single folder or library view. When using custom views, you need to pin the item in each view where you want it to appear.
Note: This procedure is not available in classic experience.
To highlight an item in document library
-
Go to the document library that contains the file, folder, or link you want to highlight.
-
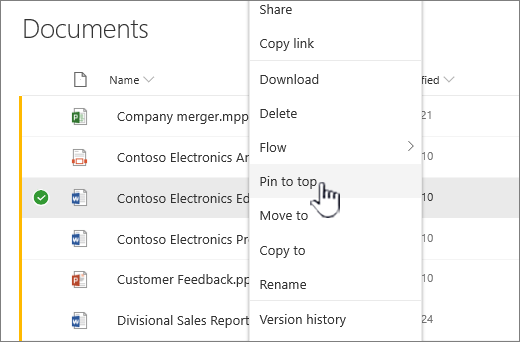
Right-click the file, folder, or link that you want to highlight, and then select Pin to top.
Note: You can highlight a maximum of 3 items per library, folder, or view.

To change the order of highlighted items
-
Go to the document library, folder, or view where the item is highlighted.
-
Right-click the file or folder that you want to reorder, and then select Edit Pin.
-
Select Move Right or Move Left to reorder the item.
To unpin an item
-
Go to the document library, folder, or view where the item is highlighted.
-
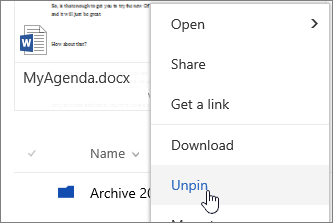
Right-click the file or folder that you want to stop highlighting, and then select Unpin.

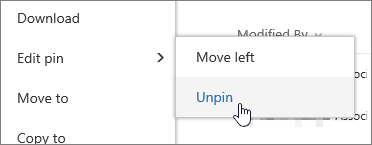
If you pinned more than one item, select Edit pin, and then click Unpin.

No comments:
Post a Comment