The default setting for text in list columns is plain text. But by choosing the enhanced rich text column setting, you can customize the font color, size, or style or markup of the text. You need Edit permission level or higher to create an enhanced rich text column.
Create an enhanced rich text column
Note: Does your screen look different than the examples here? Your administrator may have classic experience set on the list, or you're using an earlier version. If so, see Format the text under column headings in lists. If you're a list owner, site owner, or administrator, see Switch the default experience for lists or document libraries from new or classic for the steps to set the default experience.
-
Open the list you want to create an enhanced rich text column for.
-
In the list, scroll to the far right, and then select + Add column or +.
-
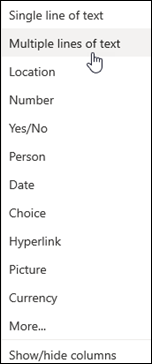
In the menu, select Multiple lines of text.
-
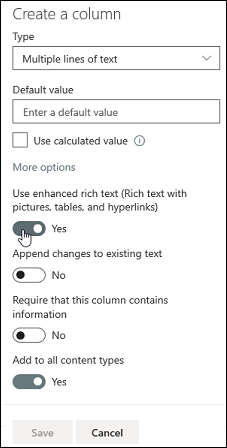
Type the name and description of your column.
-
Click More options, and then select the Use enhanced rich text (Rich text with pictures, tables, and hyperlinks) option.
-
Click Save.
Edit an enhanced rich text column
-
Open the list you want to edit.
-
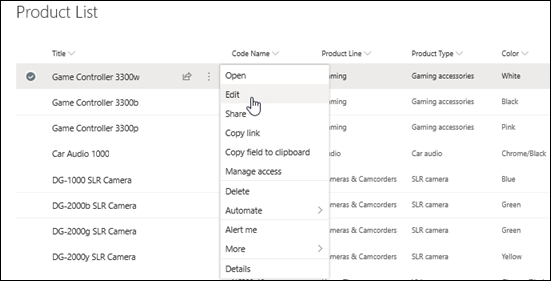
Select the list item, right click, and then select Edit.
-
Next to the Text label, click the Pencil
 to display the Edit window.
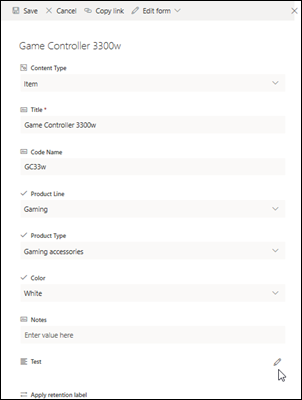
Note that you can't edit an enhanced rich text column in Quick Edit view.
-
Add text and format it any way you want (change the font, font size, font color, highlight, bold, italics, underline, bullet points, numbering, and so on.
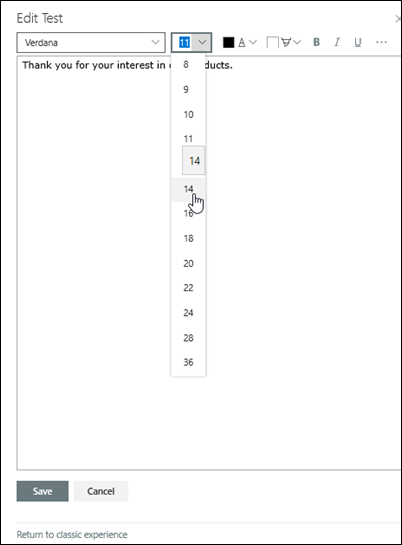
-
For additional formatting options, click the ellipses (…) and select from the list.
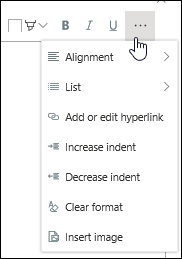
-
If you would like to apply any of the formatting in the table below, select Return to classic experience at the bottom of the Edit window.
Features in the Classic rich text editor that are not supported in the Modern rich text editor:
Strike through text
Subscript, Super script
Left to right paragraph, right to left paragraph
Justify alignment
Styles
Markup > Edit HTML source
Markup > Select elements on the page based on html elements
Markup > Convert HTML to XHMTL
Markup > Select a language
Insert > Table
Insert > Upload image to the site
Insert > Upload file to the site
Insert > Embed code
-
-
If you made any changes, click the Edit tab, and then click Save.
-
Click Save.
Leave us a comment
Was this article helpful? If so, please let us know at the bottom of this page. If it wasn't helpful, let us know what was confusing or missing. We'll use your feedback to double-check the facts, add info, and update this article.
No comments:
Post a Comment