Create DNS records at Nettica for Office 365
Check the Domains FAQ if you don't find what you're looking for.
If Nettica has been your DNS hosting provider, you should be aware that your domain registration has been moved to Dyn, which recently acquired Nettica.
Follow the steps in the two sections of this article to create an account at Dyn, where you can make DNS changes and renew your domain or domains.
You must set up services at Dyn and delegate your domain before you can Create DNS records at Dyn.com for Office 365.
Set up services at Dyn
Your domain account has already been transferred to Dyn. Before you can start using Office 365, however, you need to set up your Dyn services. Follow these steps to complete the service transfer process.
-
To get started, go to your domains page at Nettica by using this link. You'll be prompted to login first.

-
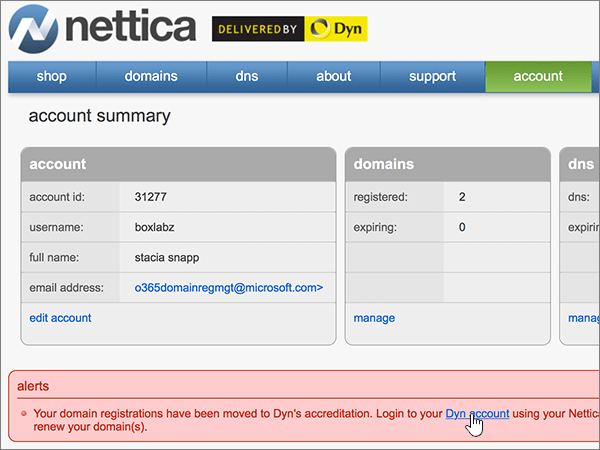
On the Account Summary page, in the alerts area, choose the Dyn account link.
-
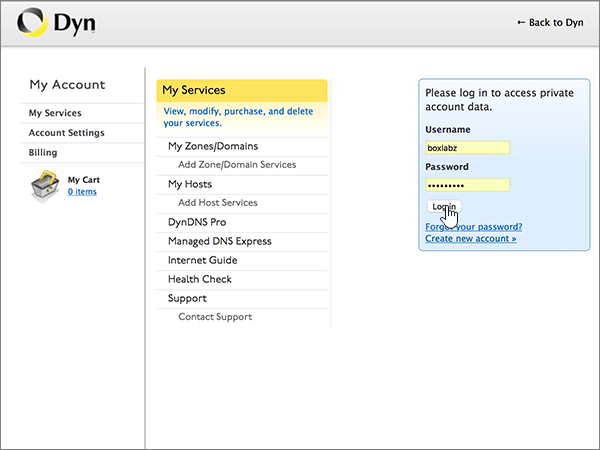
Log in to your Dyn account, using your Nettica username and password.
-
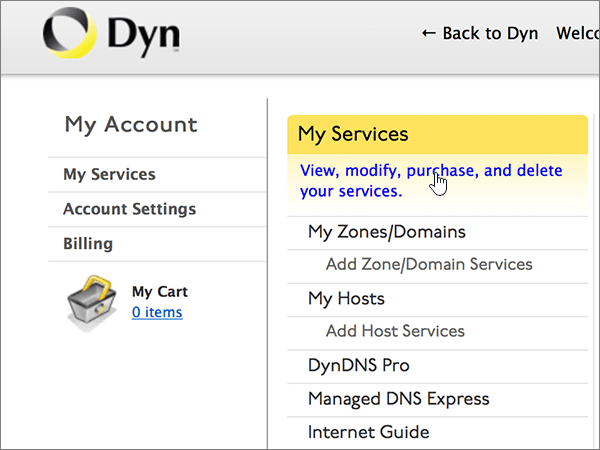
In the My Services section, choose View, modify, purchase, and delete your services.
-
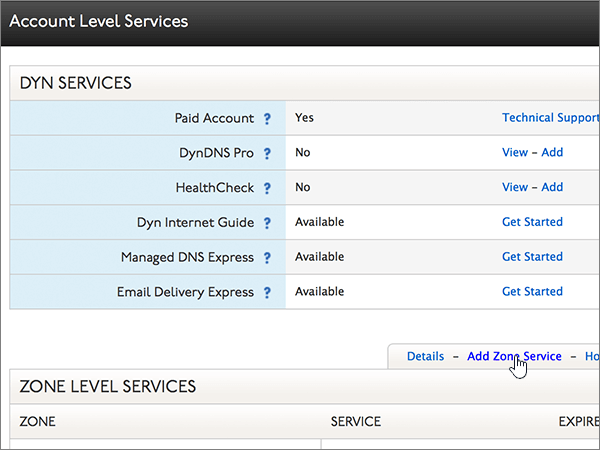
On the Account Level Services page, in the DYN SERVICES section, choose Add Zone Service.
-
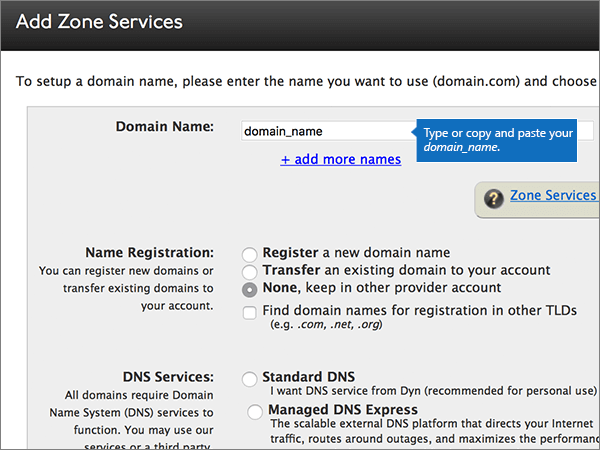
In the Domain Name field, type or copy and paste your domain_name.
(If you have more than one domain to transfer, choose + add more names and add the domain_name for each of the other domains.)
-
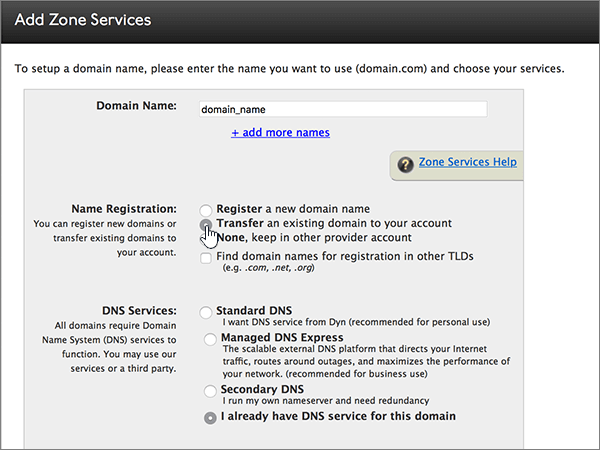
In the Name Registration area, select Transfer an existing domain to your account.
Note: If your Nettica account has expired, you will need to purchase DNS services from Dyn. Nettica accounts in good standing are transferred to Dyn on a pro-rated basis.
-
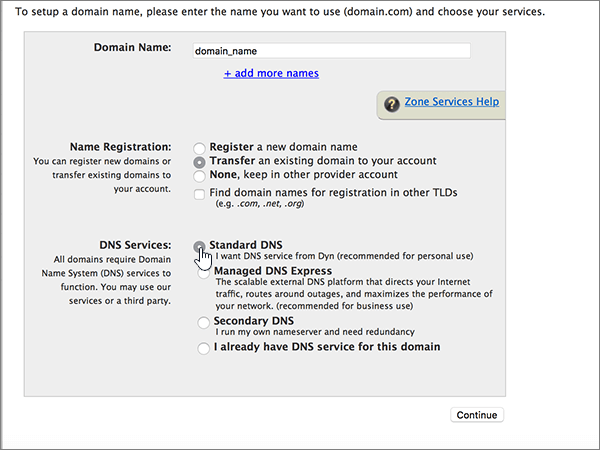
In the DNS Services area, select Standard DNS
-
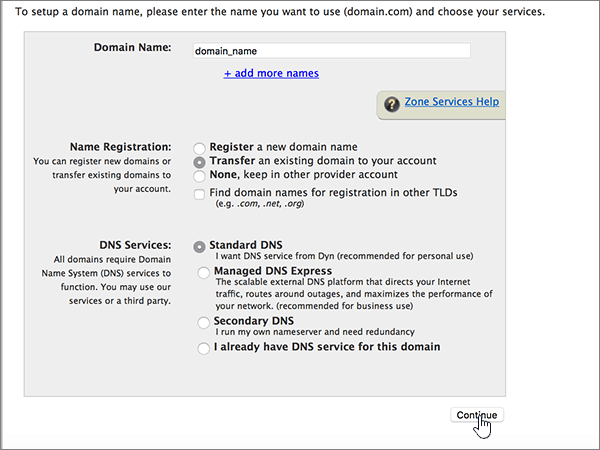
Choose Continue.
-
On the Add Zone Services page, double-check your Requested Domains entry, and then choose Continue to finish the transfer process.
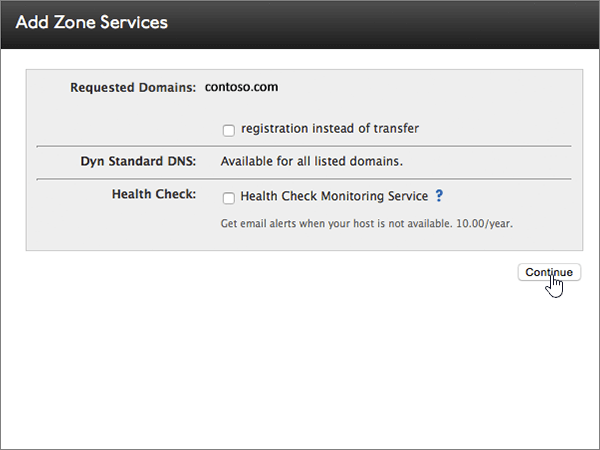
When the transfer process is complete, you will receive an order-confirmation email message. Once you have received that message, you can go to the next section to begin the next step in the transfer process.
Delegate your domain to Dyn
Even though your DNS services are active, the nameservers for your transferred domains are set by default to inactive (parked). To create the DNS records required for Office 365, you must first delegate your domain to the Dyn Standard DNS nameservers.
-
To get started, go to your domains page at Dyn by using this link. You'll be prompted to log in first.

-
In the My Services section, choose View, modify, purchase, and delete your services.

-
On the Account Level Services page, in the ZONE LEVEL SERVICES section, choose the name of the domain that you want to delegate.
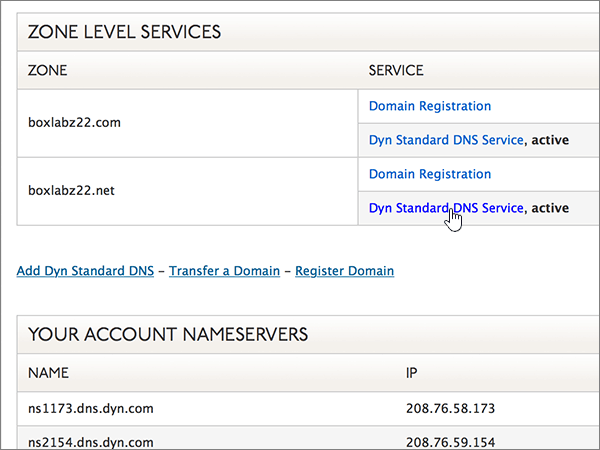
-
On the DNS for domain_name page, choose Update your delegation.
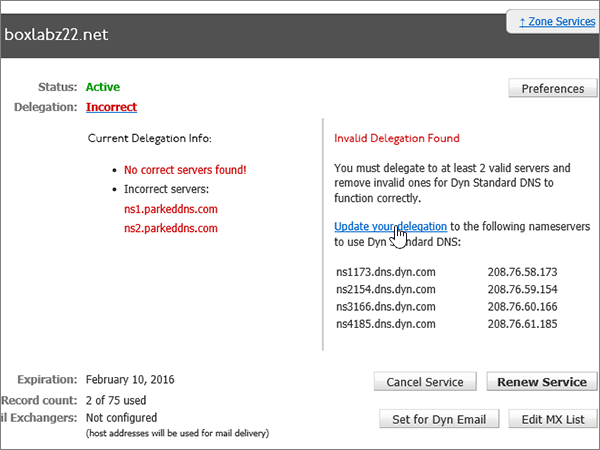
-
Choose OK to accept Dyn delegation.
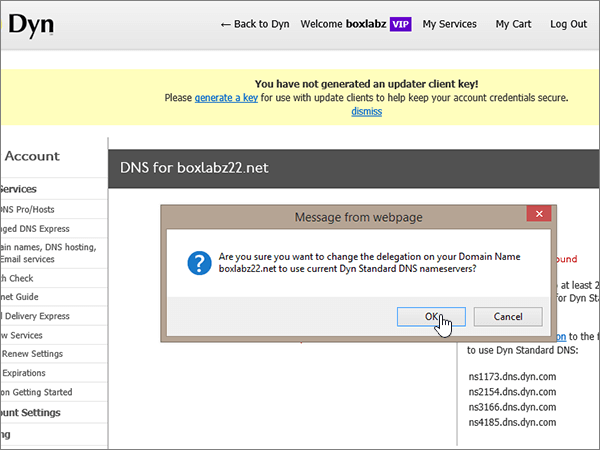
-
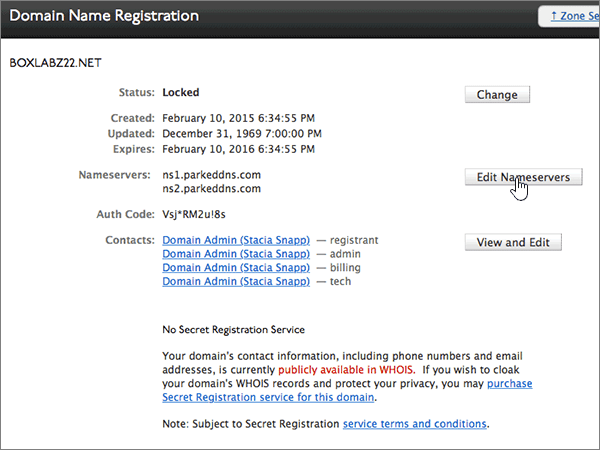
On the Domain Name Registration page, choose Edit Nameservers.
-
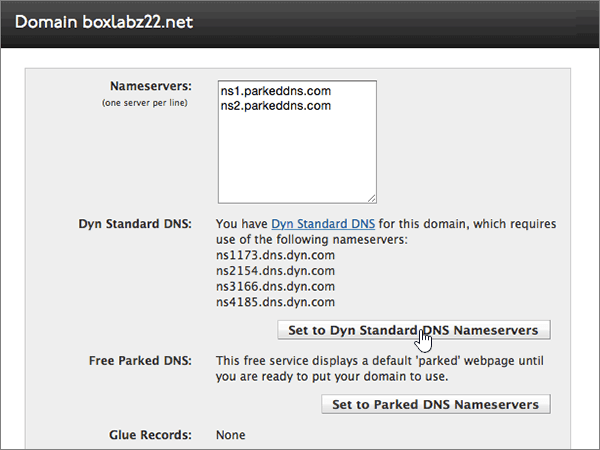
On the Domain page, choose Set to Dyn Standard DNS Nameservers.
-
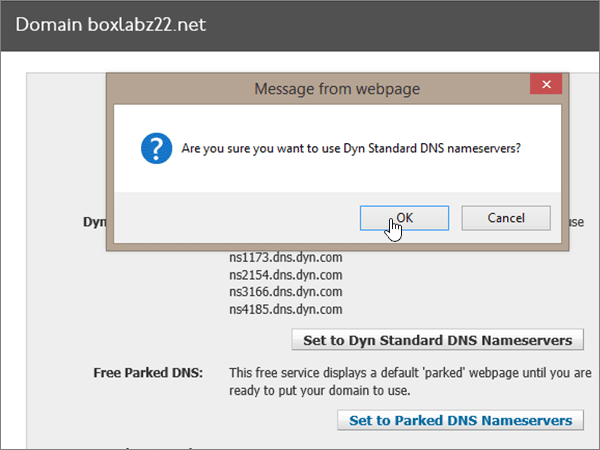
Choose OK to confirm your changes.
Note: Typically it takes about 15 minutes for DNS changes to take effect. However, it can occasionally take longer for a change you've made to update across the Internet's DNS system. If you're having trouble with mail flow or other issues after adding DNS records, see Troubleshoot issues after changing your domain name or DNS records.
Now that you have set up services at Dyn and delegated your domain, you can Create DNS records at Dyn.com for Office 365.
Still need help?


Congratulation for the great post. Those who come to read your Information will find lots of helpful and informative tips. Transfer Your Domains
ReplyDelete