Change line spacing
You might want to improve the look of the text inside a cell by changing the vertical line spacing. Although Excel offers no direct control for line spacing within a cell, you can use several text alignment strategies to adjust white space or make the text more readable. You can also add a text box, which offers more control.
In this article
Tight the spacing for text inside a cell
If your text inside a cell is too widely spaced, it might be vertically justified. You can often improve readability by changing the Text alignment to get the lines closer together.
-
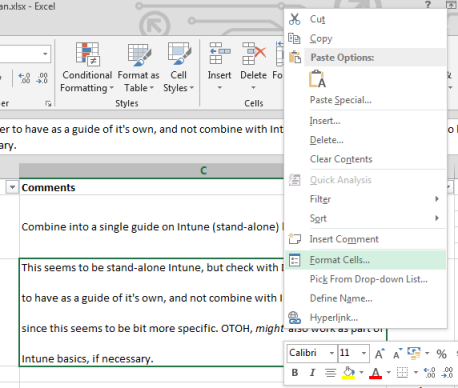
Right-click inside the cell you want to change, and click Format Cells.
-
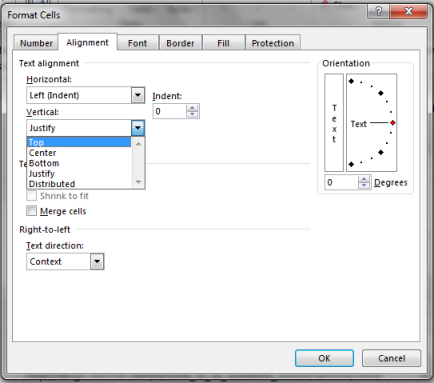
On the Alignment tab, change Vertical to Top, Center, or Bottom, depending on where you want your text to be placed inside the cell.
-
Click OK.
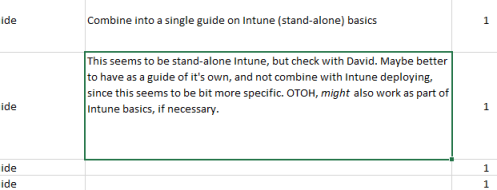
Your text is now aligned and evenly spaced where you wanted it.
Tip: If you have lots of white space in one cell because another cell on the same row has more content, you can change the vertical alignment for the cell with too much space to Center to fill the space more evenly.
Increase the spacing for text in a cell
If your cell has white space, and you want to increase the line space to fill it evenly, change the vertical spacing to Justify.
-
Right-click in the cell you want, and click Format cells.
-
On the Alignment tab, change Vertical to Justify.
-
Click OK.
Your text is now distributed evenly inside the cell. If you change the height of the row, the text re-adjusts evenly to the new width.
Replace the text in a cell with a text box
If you have only few cells with text that need to be modified, you can consider inserting a text box on top of the cell. By using a text box instead of a cell, you have more control over text formatting.
-
Double-click the cell you want to modify, select all of the text in it, and press Ctrl+X.

-
Click another cell to deselect the cell.
-
Adjust the height of the row, if needed.
-
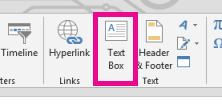
On the Insert tab, click Text Box.
-
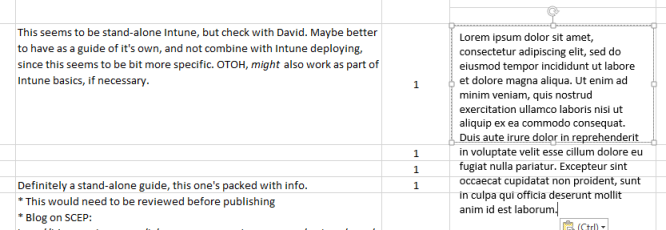
Move the cursor to the upper-left corner of the cell you want, and click and hold to draw a text box that fits the cell. If you need to adjust the size of the text box after creating it, drag the selection squares at the edges.
-
Click in the text box to activate it, and press Ctrl+V to paste your text inside the text box.
-
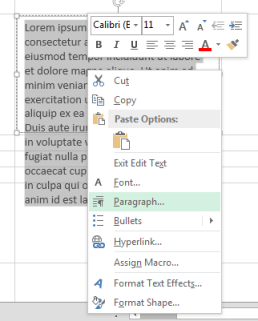
Select all of the text in the text box, right-click it, and click Paragraph.
-
Select the line spacing you want.
Tip: You can also tighten the text by reducing the font size. Select the text, then right-click on it, click Font, and select the font size you want.
Note: The text box is not inside the cell but floats over it. If the row on which it was inserted moves as the content above is changed, the text box does not move along with the cell. To move the text box, move the cursor to the edge of the text box, and click and hold to drag the text box to a new location.
No comments:
Post a Comment