Add a picture as a background watermark in Word 2016 for Mac
Adding a picture watermark is a great way to brand your document with a logo or add an attractive background. To insert a background picture quickly, add it as a watermark. If you want more options for adjusting the background picture, insert it as a header, instead.

Add a background picture as a custom watermark
This method is fast, but it doesn't give you many options for formatting the image.
-
Click Design > Watermark.

-
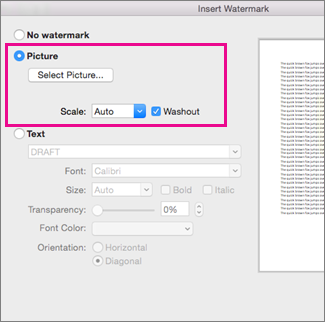
In the Insert Watermark box, select Picture > Select Picture.
-
Browse to (or search for) the picture you want to use as a watermark, and then click Insert.
-
Next to Scale, make sure Auto is selected and Washout is checked, then click OK
 .
.
Add a background picture with more formatting options
Inserting a background picture as a header is a bit more involved, but it gives you more options for adjusting the image.
-
Click Insert > Header > Edit Header.
-
On the Header & Footer tab, click Picture from File.
-
Browse to the picture and click Insert.
-
On the Picture Format tab, do the following:
-
Click Position, and then click the centered option under With Text Wrapping.
-
Click Wrap Text > Behind Text.
-
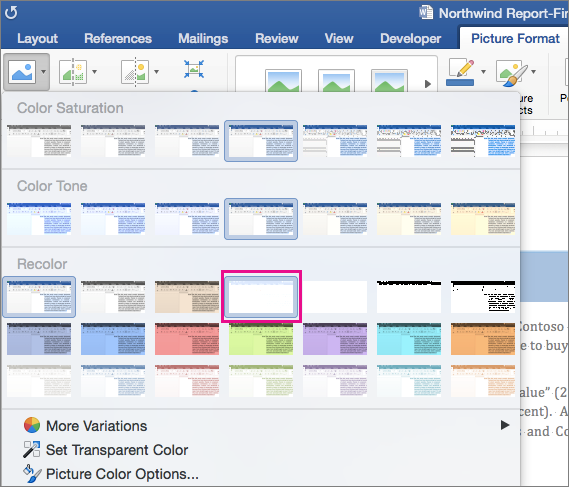
Select any other options you want. For example, to give the picture a washed out look so it doesn't compete with the text, click Color, and under Recolor, click the Washout option:

-
-
On the Header & Footer tab, click Close Header and Footer.

No comments:
Post a Comment