A beginner's guide to Visio
There are many kinds of Visio diagrams, including organization charts, network diagrams, workflows, and home or office plans. But you use the same three basic steps to create nearly all of them:
-
Choose and open a template.
-
Drag and connect shapes.
-
Add text to shapes.
As an example, let's create a flowchart diagram.
Step 1: Choose and open a template
-
Start Visio.
-
Click the Flowcharts category.
-
Click Basic Flowchart, and then click Create.
Each template includes shapes related to the type of drawing, in collections called stencils. Stencils are in the Shapes window beside the drawing page. For example, one of the stencils that opens with the Basic Flowchart template is Basic Flowchart Shapes.
Step 2: Drag and connect shapes
To create your diagram, drag shapes from the stencil onto the blank page and connect them to one another. There are several ways to connect shapes, but for now use AutoConnect. For example, just a few clicks connects a flowchart Start/End shape to a new Process shape.
-
Drag the Start/End shape from the Basic Flowchart Shapes stencil onto the drawing page, and then release the mouse button.
-
Hold the pointer over the shape so that the blue AutoConnect arrows show.

-
Move your pointer on top of the blue arrow that points toward where you want to place the second shape.
A mini toolbar appears that contains shapes from the top of the stencil.

-
Click the square Process shape.
The Process shape is added to the diagram, automatically connected to the Start/End shape.
If the shape you want to add isn't on the mini toolbar, you can drag the shape you want from the Shapes window and drop it on a blue arrow. The new shape is connected to the first shape as if you had clicked it on the mini toolbar.
Use the AutoConnect arrows also to connect two shapes already in your drawing. Drag an AutoConnect arrow from one shape and drop it on another shape. You get an arrow from the first shape to the second.
Step 3: Add text to shapes
-
Click the shape and start typing. You don't need to double-click to add text to a shape; when you type, text is added to whichever shape is selected.

-
When you finish typing, click on a blank area of the drawing page or press ESC.
You can add text to almost any object – even connectors – by selecting it and typing.
What are Visio shapes, stencils, and templates?
Shapes
Visio shapes are ready-made objects that you drag onto your drawing page — they are the building blocks of your diagram.
When you drag a shape from the Shapes window onto your drawing page, the original shape remains on the stencil. That original is called a master shape. The shape that you put on your drawing is a copy — also called an instance — of that master. You can drag as many instances of the same shape onto your drawing as you want.
Rotating and resizing shapes
The most common things that people do with shapes involve features that are built right into the shapes. Visual cues help you find and use those features quickly:
-
Rotation handles
The round handle
 located above a selected shape is called a rotation handle. Drag it right or left to rotate the shape.
 -
Connection arrows for AutoConnect
The connection arrows
 help you easily connect shapes to one another, as you saw in the previous section.
 -
Selection handles for resizing shapes
You can use the square selection handles to change the height and width of your shape. Click and drag a selection handle on the corner of a shape to enlarge the shape without changing its proportions, or click and drag a selection handle on the side of a shape to make the shape taller or wider.
Special features of Visio shapes
Visio shapes are much more than simple images or symbols.
Shapes can hold data
You can add data to each shape by typing it in the Shape Data window – on the View tab, in the Show group, click Task Panes, and then click Shape Data. With Visio Professional Edition, you can also import data from an external data source.
Data is not displayed in the drawing by default. To see the data for an individual shape, open the Shape Data window at Data > Show/Hide > Shape Data Window, then select the shape.
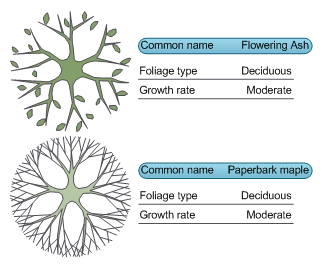
If you want to display the data for lots of shapes at once, you can use a feature called data graphics, also on the Data tab. The following illustration shows the data for two trees at once.
Shapes with special behavior
Many Visio shapes have special behavior that you can find by stretching, right-clicking, or moving the yellow control handle on the shape.
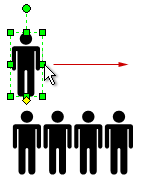
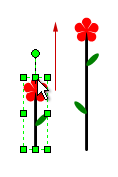
For example, you can stretch a People shape to show more people, or stretch the Growing flower shape to indicate growth.
Tip: A great way to find out what a shape can do is to right-click it to see if there are any special commands on its shortcut menu.
If you're building an organization chart, shapes can automatically build the reporting structure. Drag each person's shape to the chart and drop it on top of their manager's shape. The shapes automatically connect to show the hierarchy.
Stencils
Visio stencils hold collections of shapes. The shapes in each stencil have something in common. The shapes can be a collection of shapes that you need to create a particular kind of diagram, or several different versions of the same shape.
For example, the Basic Flowchart Shapes stencil contains only common flowchart shapes. More specialized flowchart shapes are in other stencils, such as the Work Flow Objects and TQM Diagram Shapes.
Stencils appear in the Shapes window, with the title bars grouped together at the top of the window. To see the shapes on a particular stencil, click its title bar. If there are a lot of stencils in the template, the title bar area will have a scroll bar and some title bars will be hidden; scroll to find them all. You can also expand the title bar area by dragging the bottom divider bar down, so all the title bars are visible.
Open any Visio stencil
Each template opens with the stencils that you need to create a particular kind of drawing, but you can open other stencils any time you want.
-
In the Shapes window, click More Shapes, point to the category that you want, and then click the name of the stencil that you want to use.
Templates
When you want to create a diagram, start with a template for that type of diagram (or the nearest type if there isn't an exact match – you can always change the settings to be what you want). Visio templates help you start with the right settings:
-
Stencils full of the shapes that are needed to create a particular kind of drawing
The Home Plan template, for example, opens with stencils full of shapes such as walls, furniture, appliances, cabinets, and so on.
The Organization Chart template includes distinct shapes for executives, managers, assistants, positions, consultants, vacancies, and more.
-
Appropriate grid size and ruler measurements
Some drawings require a special scale. For example, the Site Plan template opens with an engineering scale, where 1 inch represents 10 feet. Templates come ready with appropriate settings for the drawing type.
-
Special tabs
Some templates have unique features that you can find on special tabs in the ribbon. For example, when you open the Office Layout template, a Plan tab appears. You can use the Plan tab to configure display options that are specific to office layout diagrams.
-
Wizards to help you with special types of drawings
In some cases when you open a Visio template, a wizard helps you get started. For example, the Space Plan template opens with a wizard that helps you set up your space and room information.
View examples of templates
To find out what templates are available:
-
Click the File tab.
-
Click New.
-
Click the various template categories, and then click the template thumbnails to see short descriptions of the templates.
Step 1: Choose and open a template
-
Start Visio 2007.
-
In the Template Categories list, click Flowchart.
-
In the Flowchart window, under Featured Templates, double-click Basic Flowchart.
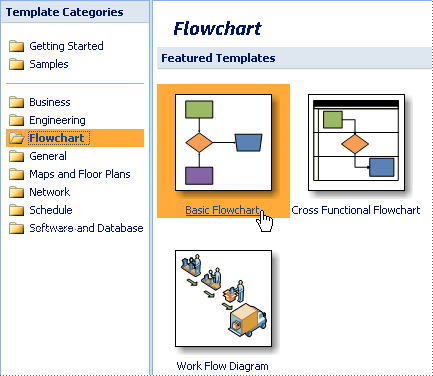
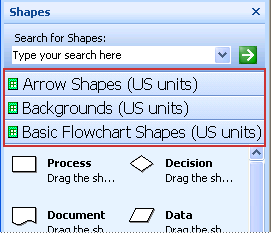
When you open a template, the shapes you need open with it, in collections called stencils. The stencils that open with the Basic Flowchart template are called Arrow Shapes, Backgrounds, and Basic Flowchart Shapes.
Step 2: Drag and connect shapes
To create your drawing, all you need to do is drag shapes from stencils onto the blank drawing page and connect them to one another. There are many ways to connect shapes, but for now let's use the fastest — drag the shapes on top of each other to connect them automatically by using AutoConnect. For more information, see Add connectors between shapes in Visio.
-
Drag your first shape from the Basic Flowchart Shapes stencil onto the drawing page, and then release the mouse button.

-
Drag your second shape on top of the first so that the blue arrows show, but don't release the mouse button yet.

-
While holding the mouse button, move your pointer on top of the blue arrow that points toward where you want to place the second shape.

-
Now release the mouse button. Your shapes are connected, and the first shape points to the second shape.

-
Continue to build your drawing by repeating steps 2-4.
Step 3: Add text to shapes
Although some drawings make a point all by themselves, it's often helpful and sometimes necessary to add text to the shapes. There are many ways to add text to shapes, but for now let's use the simplest way. If you want to learn more ways to add text to shapes, see Add data to shapes and Add imported data to shapes.
Add text directly to a shape
-
Double-click the shape.

-
Start typing.

-
When you finish typing, click on a blank area of the drawing page.

Exactly what are Visio shapes, stencils, and templates?
We already talked about these a little bit, but knowing more about Visio shapes, stencils, and templates can make Visio much easier to use.
Shapes
Visio shapes are ready-made images that you drag onto your drawing page — they are the building blocks of your drawing.
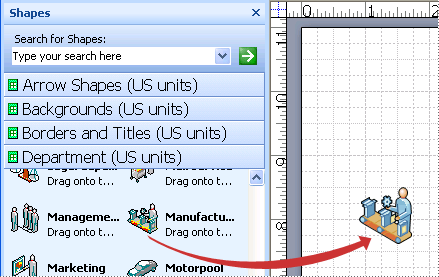
When you drag a shape from a stencil onto your drawing page, the original shape remains on the stencil. That original is called a master shape. The shape that you put on your drawing is a copy — also called an instance — of that master. From most Visio stencils, you can drag as many instances of the same shape onto your drawing as you want.
There are many ways to use and customize Visio shapes, but you can accomplish a lot with only the most popular methods and a few special features.
Customize shapes on the spot
There are thousands of Visio shapes and countless ways to use and customize them. The most common things that people do with shapes involve features that are built right into the shapes. Visual cues help you find and use those features quickly.
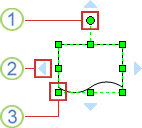
1. Rotation handles
The bright green dots located above shapes are called rotation handles. Drag a rotation handle right or left to rotate the shape.
2. Blue connection arrows for AutoConnect
The light blue connection arrows help you easily connect shapes to one another, as you saw in the previous section. However, there is more than one way to use AutoConnect, so for more information, see Add connectors between shapes in Visio.
3. Selection handles for resizing shapes
You can use the bright green selection handles to change the height and width of your shape. Click and drag a selection handle on the corner of a shape to enlarge the shape without changing its proportions, or click and drag a selection handle on the side of a shape to make the shape taller or wider.
Special features of Visio shapes
Visio shapes are much more than simple images or symbols.
Shapes can hold data
Each shape can be associated with data. There are a number of ways you can add data to shapes. For more information, see Add data to shapes and Add imported data to shapes. For now, let's just see how to view or display the data after it is added.
After data is added to a shape, it isn't displayed in the drawing by default. The easiest way to see the data is to select the shape and then open the Shape Data window, as shown in the illustration below.
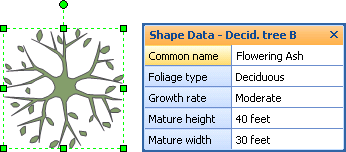
If you want to display the data for lots of shapes at once, you can use a feature called Data Graphics. The following illustration shows the data for two trees at once. For more information about using Data Graphics, see Enhance your data with data graphics.

Note: Data Graphics is only available in Microsoft Office Visio Professional 2007.
Shapes with special behavior
Too many Visio shapes have special behavior to list them all, but here are a couple of examples.
For example, you can stretch a People shape to show more people, or stretch the Growing flower shape to indicate growth.


The next illustration shows how you can measure the size of a shape on your page by using a special dimension shape that is designed for measuring other shapes. (The dimension shapes are only available in Office Visio Professional 2007.)

And below is a Pie chart shape from the Charting Shapes stencil. You can right-click the shape to set the number of slices and what percent each slice represents.
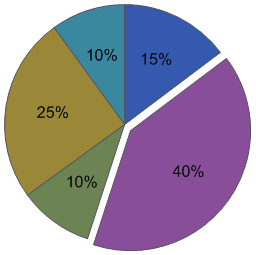
Tip: A great way to find out what a shape can do is to right-click it to see if there are any special commands on its shortcut menu.
Stencils
Visio stencils hold collections of shapes. The shapes in each stencil have something in common. The shapes can be a collection of shapes that you need to create a particular kind of diagram, or several different versions of the same shape.
In the following illustration, the Basic Flowchart Shapes stencil contains common flowchart shapes, and the Backgrounds stencil contains a variety of backgrounds. You can even create your own stencil of favorite shapes. For information about creating your own stencil, see Create a new stencil.

1. Stencils appear in the Shapes window.
2. When stencils open, they automatically dock themselves in the Shapes window, one on top of another.
3. Click the title bar of a stencil to bring it to the top of the stack.
4. The stencil that was previously on top of the stack moves to the bottom of the Shapes window.
Open any Visio stencil
Each template opens with the stencils that you need to create a particular kind of drawing, but it's nice to know that you can open other stencils any time you want.
-
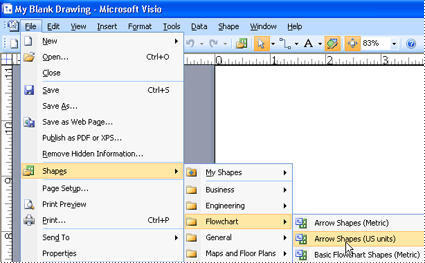
On the File menu, point to Shapes, point to the category that you want, and then click the name of the stencil that you want to use.
-
Repeat step 1 for any other stencils that you want to open.
Templates
Visio templates are a little harder to describe because they aren't a single thing — they are more like a collection of settings. A Visio template combines a blank drawing page with any combination of the following:
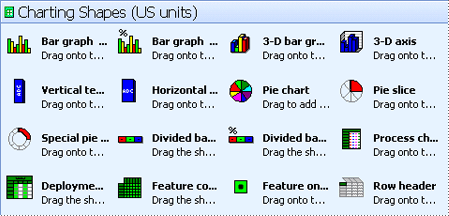
Stencils full of the shapes that are needed to create a particular kind of drawing The Charts and Graphs template, for example, opens with a stencil full of quick, easy shapes for creating charts and graphs.
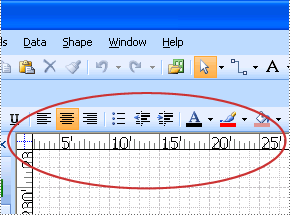
Appropriate grid size and ruler measurements Some drawings require a special scale. For example, the Site Plan template opens with an engineering scale, where 1 inch equals 1 foot.
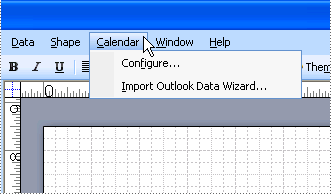
Special menus Some templates have unique features that you can find on special menus. For example, when you open the Calendar template, a Calendar menu appears on the main menu bar. You can use the Calendar menu to configure your calendar or to import data from Microsoft Office Outlook into your calendar.
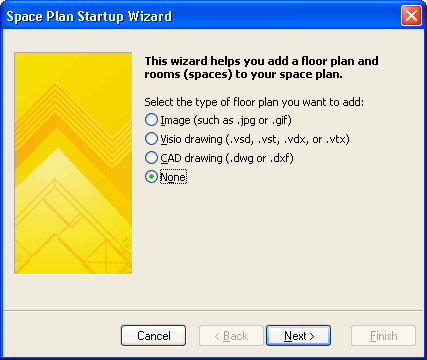
Wizards to help you with special types of drawings In some cases when you open a Visio template, a wizard helps you get the drawing off to a good start. For example, the Space Plan template opens with a wizard that helps you set up your space and room information.
What's next?
Here are some suggestions for how to get more familiar with Visio.
Get help creating a more complex drawing
You can use basic steps described above for many of the Visio templates. For the more complex templates, it's really helpful to read the article written for that specific template.
-
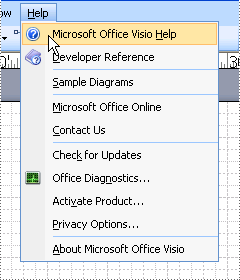
On the Help menu in Visio, click Microsoft Office Visio Help.
-
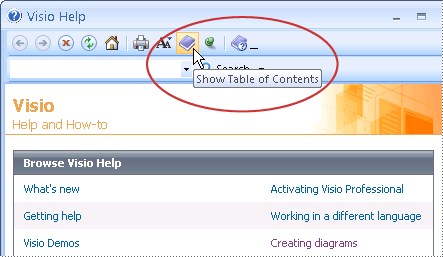
In the Help window, click the Show Table of Contents button.
-
In the Table of Contents window, click the category for the drawing that you want to create.
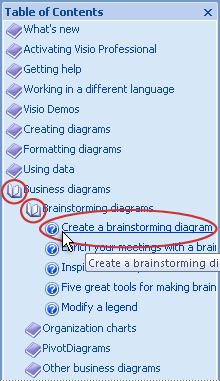
Tip: You can find all kinds of information in Visio Help if you take a few minutes to browse through it.
Discover the variety of Visio templates
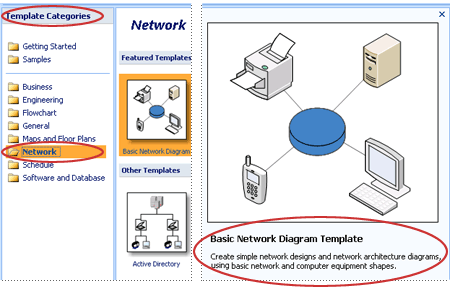
Depending on the edition of Visio you use, you have between 25 (for Microsoft Office Visio Standard 2007) and 64 (for Office Visio Professional 2007) different templates to work with. To find out more about these templates, browse through the Getting Started screen, which opens automatically when you start Visio. Click the various categories, and then click the template thumbnails to see larger versions of the thumbnails and short descriptions of the templates.
Browse through the stencils
Taking a moment to open the list of stencils is a great way to get to know more about the huge variety of shapes available, but exploring a few of the stencils themselves is even better.
You don't even have to open a diagram — just click Shapes on the File menu, and then navigate down to the stencil that you want to open.

Browse through the menus
Opening menus is another quick way to get a sense of what you can do in Visio. The View, Data, and Shape menus are three of the most popular menus.
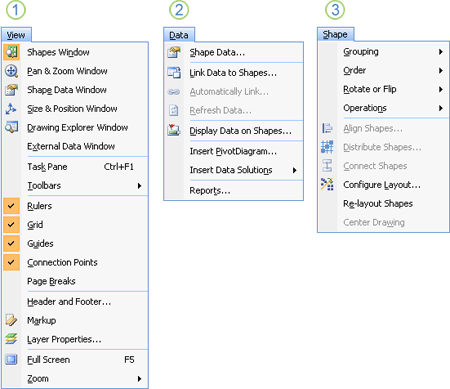
1. The View menu lists all the special windows for Visio drawings as well as the commands for turning on and off the visual guides, like the drawing grid.
2. The Data menu lists the commands for advanced features, like importing and displaying data. These are some of the most powerful features available in Visio.
3. The Shape menu lists the commands that orient your shapes and connectors the way that you want them in your drawing.
Microsoft Office Tutorials: A Beginner'S Guide To Visio >>>>> Download Now
ReplyDelete>>>>> Download Full
Microsoft Office Tutorials: A Beginner'S Guide To Visio >>>>> Download LINK
>>>>> Download Now
Microsoft Office Tutorials: A Beginner'S Guide To Visio >>>>> Download Full
>>>>> Download LINK TL