Basic tasks in Publisher
Publisher is a great app for creating visually rich, professional-looking publications without investing lots of money and time in a complicated desktop publishing application.
You can make simple things like greeting cards and labels, or more complex projects like yearbooks, catalogs, and professional email newsletters.
Create a publication
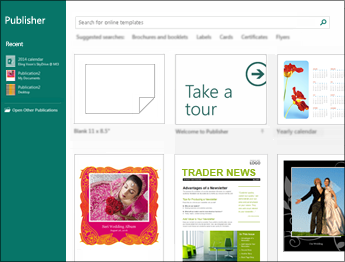
All publications begin with a template, even if it's a blank template. The trick is to find a template that looks like the vision you have for your final publication. Publisher comes with built-in templates.
-
Click File > New, and do one of the following:
-
Choose one of the Featured templates, and click Create.
-
To use one of the templates installed in Publisher, choose Built-in, scroll to click the category you want, choose a template, and click Create.
-
To find a template on Office.com, use the Search for online templates box to find what you need. Enter "newsletter," for example, scroll to a template you like, and click Create.
-
Save your publication
Save your publication the first time by following these steps.
-
Click File > Save As.
-
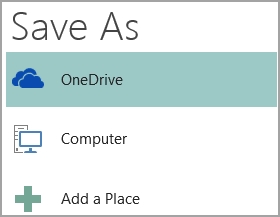
In Save As, choose where you want to save your publication.
-
OneDrive is a free Microsoft service that provides password-protected online file storage.
-
Other Web Locations includes websites you've used recently, and a Browse button to save your publication to any website you have access to.
-
Computer includes any folder on your computer.
-
Add a Place lets you add an online location to save your publication.
-
-
Enter the name for your publication, and click Save.
After you've saved your publication once, you can simply click File > Save each time you want to save.
If you want to change the file name or location of your publication, click File > Save As, and save the publication as if you were saving for the first time.
Add pictures to your publication
-
Click Home > Pictures.
-
Use the options in the Insert Pictures dialog box to find the picture you want to use.
Add text to your publication
Add text to your publication by inserting a text box first. Most templates contain text boxes you can fill in, but you can also add your own text boxes.
First: Add a text box
-
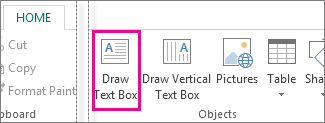
Click Home > Draw Text Box, and drag the cross shaped cursor to draw a box where you want text.
-
Type text in the text box.
If the text you type is too long for the text box, you can make the text box bigger, or link it to another text box.
Second: Link your text boxes
You can link text boxes so that text flows from one box to another.
-
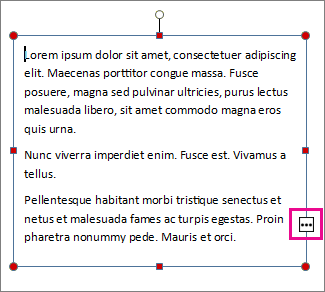
When a text box has too much text, a little box with ellipses appears in the lower right of the text box.
-
Create a new text box.
-
Click the overflow indicator and your cursor becomes a pitcher.

-
Move to the new text box and click.
The overflow text will show up in the new text box.
Now as you add text, words flow from one text box to another. If you run out of room in the second box you can link to another text box, and the text will flow through all three boxes.
Add Building Blocks to your publication
Building blocks are reusable pieces of content such as headings, calendars, borders, and advertisements. Publisher has built-in building blocks, or you can create your own.
-
In the Page Navigation pane, select a page in your publication.
-
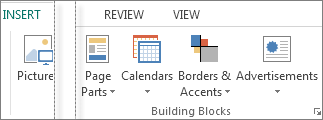
On Insert > Building Blocks, pick a building block gallery.
-
Scroll to find a building block, or click More <gallery name> to open the Building Block Library.
-
Click a building block.
Print your publication
-
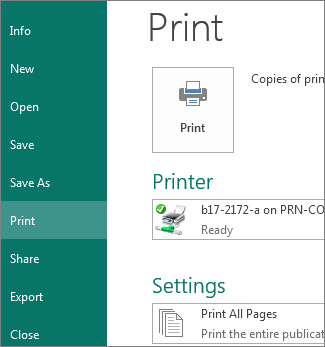
Click File > Print.
-
Under Print, enter the number of copies to print in Copies of print job box.
-
Make sure the correct printer is selected.
Note: The properties for your default printer are automatically entered for you.
-
Under Settings, do the following:
-
Make sure the correct range of pages or sections is selected.
-
Select the layout format for printing.
-
Set the paper size.
-
Set whether to print on one side of the paper or on both sides.
-
If your printer is capable of color printing, choose whether you want to print color or grayscale.
-
Click the Print button when you are ready to print.
-
Microsoft Office Tutorials: Basic Tasks In Publisher >>>>> Download Now
ReplyDelete>>>>> Download Full
Microsoft Office Tutorials: Basic Tasks In Publisher >>>>> Download LINK
>>>>> Download Now
Microsoft Office Tutorials: Basic Tasks In Publisher >>>>> Download Full
>>>>> Download LINK bL