Add shapes
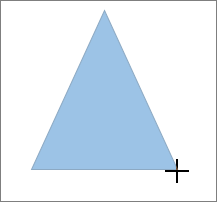
You can add shapes, such as boxes, circles, and arrows, to your documents, email messages, slide shows, and spreadsheets. To add a shape, click Insert, click Shapes, select a shape, and then click and drag to draw the shape.
After you add one or more shapes, you can add text, bullets, and numbering to them, and you can change their fill, outline, and other effects on the Format tab.
Tip: You can add individual shapes to a chart, or add shapes on top of a SmartArt graphic to customize the chart or the graphic. For more information about using charts or SmartArt in your documents, see When should I use a SmartArt graphic and when should I use a chart?
Add a shape in Excel, Outlook, Word, and PowerPoint
-
On the Insert tab, click Shapes.


-
Click the shape you want, click anywhere in the workspace, and then drag to place the shape.

To create a perfect square or circle (or constrain the dimensions of other shapes), press and hold Shift while you drag.
Add a shape in Project
To follow these steps, you need to open or create a report. To do that, on the Report tab, click Recent to open an existing report, or click More Reports to select a report from the list in the Reports dialog box or create a new report.
-
In the open report, on the Design tab, click Shapes.

-
Click the shape you want, click anywhere in the workspace, and then drag to place the shape.

To create a perfect square or circle (or constrain the dimensions of other shapes), press and hold Shift while you drag.
What else do you want to do?
Add text to a shape
Insert a shape, or click an existing shape, and then enter text.
-
Right-click the shape and click Add Text or Edit Text, or just start typing.
Note: The text that you add becomes part of the shape — if you rotate or flip the shape, the text rotates or flips also.
-
To format and align your text, click the Home tab, and then choose options from the Font, Paragraph, or Alignment groups, depending on the program you're using and what kind of formatting you want to apply. (Text formatting options are limited in Project.)
Change from one shape to another shape
Note: These commands aren't available in Project.
-
Click the shape you want to change.
To change multiple shapes, press Ctrl while you click the shapes that you want to change.
-
On the Format tab, in the Insert Shapes group, click Edit Shape
 , point to Change Shape, and then click the new shape that you want.
Add the same shape multiple times
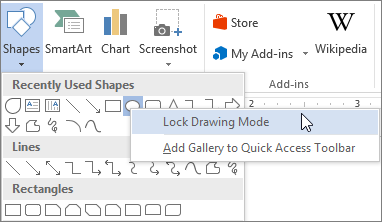
If you need to add the same shape repeatedly, you can do so quickly by using Lock Drawing Mode.
Note: Instead of adding individual shapes to create a drawing, you might want to create a SmartArt graphic. In a SmartArt graphic, the arrangement of the shapes and the font size in those shapes is updated automatically as you add or remove shapes and edit your text.
-
On the Insert tab, click Shapes.


-
Right-click the shape you want to add, and then click Lock Drawing Mode.

-
Click anywhere in the workspace, and then drag to place the shape.
-
Repeat step 3 to add the shape as many times as you like.
Tip: To create a perfect square or circle (or constrain the dimensions of other shapes), press and hold Shift while you drag.
-
After you add all the shapes you want, press Esc.
Add a bulleted or numbered list to a shape
Note: This feature isn't available in Project.
-
Select the text in the shape that you want to add bullets or numbering to.
-
Right-click the selected text, and on the shortcut menu, point to Bullets, and then click Bullets and Numbering.
-
Do one of the following:
-
To add bullets, click the Bulleted tab, and then choose the options that you want.
-
To add numbering, click the Numbered tab, and then choose the options that you want.
-
Add a Quick Style to a shape
Quick Styles let you apply a style to your shape with one click. You'll find the styles in the Quick Style gallery. When you rest your pointer over a Quick Style thumbnail, you can see how the style affects your shape.
-
Click the shape you want to change.
-
On the Format tab, in the Shape Styles group, click the Quick Style you want to use.

To see more Quick Styles, click the More button
 .
.
Change the color of a shape
To learn how to change fill color, border color, or text color, see Change the colors in a text box or shape.
Delete a shape
-
Click the shape that you want to delete, and then press Delete. To delete multiple shapes, press Ctrl while you click the shapes that you want to delete, and then press Delete.
Related information
Draw or delete a line, connector, or freeform shape
Rotate a text box, shape, WordArt, or picture
Change the colors in a text box or shape
Choose a SmartArt graphic layout
No comments:
Post a Comment