When you start a Microsoft Office program, or after you click the File tab, you can see the Microsoft Office Backstage view. If you need to create a new file, open an existing file, print, save, change options or more, Backstage is the place to do it. In short, it is everything that you do to a file that you don't do in the file.
Microsoft 365 features our new Start Pane and Backstage experience.
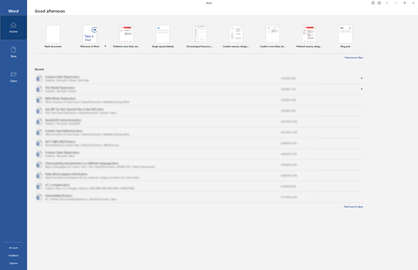
Creating new files
To create a new file choose from one of the templates listed across the top or click the New button to see a larger list of available templates.
Tip: To find, and download, more templates visit https://templates.office.com.
Open an existing file
The Backstage screen shows you quite a few of the most recent files that you've worked on. If the file you want isn't on the Recent files list, click the Open button on the left navigation pane to see file locations you can browse to find the file.
Tip: Use the Search box on the Home, or Open, tabs to search for the file you want.

If you have a file that you want to make sure is always on the recent list you can pin that file to the list. Hover your cursor over the file name and you should see a pin icon appear towards the right side of the file name. Click that to pin the file so that it always appears on the list. Click the pin again to unpin a pinned item.
If you'd like to remove an item from the recent list just right-click that file and choose Remove from list.
Caution: Don't select Delete file unless you actually want to remove the file from the system entirely.
Save a Copy
Save a Copy, as the name suggests, lets you quickly create a copy of the current file. This is handy if you need a second copy in a different location, or if you want to make a copy of this file so you can make changes without affecting the original file. You'll find this command on the navigation pane to the left.
Tip: If you're using an existing file as a starting point for a new file it's always a good idea to Save a Copy BEFORE you make any changes, that way your changes are only affecting the new file and not the original. For more information on this see Use Save a Copy to modify a file without changing the original.
Print or print preview
Whether you actually want to send this file to a printer, or just use Print Preview to see how it would look if you did, you'll find the Print command on the Backstage navigation pane as well. For more information see Printing and print preview.
Share and collaborate
If you want to collaborate on your file the Share command can help. Click Share, enter the email addresses of the people you want to share the file with, and click Send. For more information on collaborating on files see Collaborate on Word documents with real-time co-authoring. It works essentially the same way in Excel and PowerPoint too.
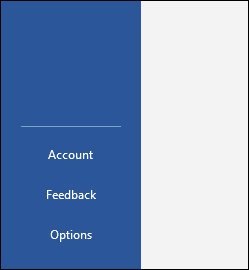
Manage Office
At the bottom left corner of the Backstage screen you'll find three items to help you manage how Office works for you.
-
Account - Lets you add or remove cloud service accounts like OneDrive or SharePoint so that you can easily save files to those services or open files from those services.
-
Feedback - Is the best way to let us know if there's something in your Office app that you really like...or really don't like. The input we get from customers through this tool goes directly to our product teams and helps to drive future changes and improvements in the products. For more information see How do I give feedback on Microsoft Office?.
-
Options - This is where you go to configure your app. Everything from the color theme Office uses, to the spell check options, editing languages, default file locations and a lot more.
Getting back to your document
If you want to exit Backstage, and return to the document you were working on, click the Back arrow that is at the top left of the navigation pane, or just press the Escape key on your keyboard.
When you first start Microsoft Office 2010, 2013 or 2016 you'll be presented with the start page, which is Backstage view.
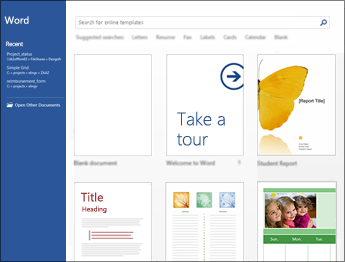
Here you can start a new document using a pre-created template (including the Blank template, if you'd prefer to start clean) or open an existing file.
Tip: To find and download more pre-created templates visit https://templates.office.com
By default you'll see your most recently used files listed on the panel to the left. If you want to open a file that's not listed there choose Open Other Docuents at the bottom left corner of the window and browse for the file you want.
If you're already in a file and want to come back to Backstage view in order to print, save, open another file, or any other task click the File tab. The File tab is a colored tab, for example, a blue tab in Word, located in the upper-left corner of Microsoft Office programs.
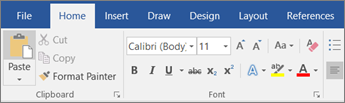
When you click the File tab, you see many of the same basic commands that you saw when you clicked the Microsoft Office Button  or on the File menu in earlier releases of Microsoft Office, such as Open, Save, and Print.

Creating new files
To create a new file click the New button to see a list of available templates, or search for more templates to start with.
Tip: To find, and download, more templates visit https://templates.office.com.
You can click the "Blank" template to start with a clean, blank, file.
Open an existing file
Click the Open button on the left navigation pane to see a list of recently edited files. If the file you want isn't listed there, you'll also see file locations you can browse to find the file.
If you have a file that you want to make sure is always on the recent list you can pin that file to the list. Hover your cursor over the file name and you should see a pin icon appear towards the right side of the file name. Click that to pin the file so that it always appears on the list. Click the pin again to unpin a pinned item.
If you'd like to remove an item from the recent list just right-click that file and choose Remove from list.
Save a new copy
Save as lets you quickly create a copy of the current file. This is handy if you need a second copy in a different location, or if you want to make a copy of this file so you can make changes without affecting the original file. You'll find this command on the navigation pane to the left.
Tip: If you're using an existing file as a starting point for a new file it's always a good idea to Save a Copy BEFORE you make any changes, that way you can ensure that your changes are only affecting the new file and not the original.
Print or print preview
Whether you actually want to send this file to a printer, or just use Print Preview to see how it would look if you did, you'll find the Print command on the Backstage navigation pane as well. For more information see Printing and print preview.
Share with others
If you want to collaborate on your file the Share command can help. Click Share, enter the email addresses of the people you want to share the file with, and click Send.
Manage Office
At the bottom of the navigation pane you'll find two items to help you manage how Office works for you.
-
Account - Lets you add or remove cloud service accounts like OneDrive or SharePoint so that you can easily save files to those services or open files from those services.
-
Options - This is where you go to configure your app. Everything from the color theme Office uses, to the spell check options, editing languages, default file locations and a lot more.
Getting back to your document
If you want to exit Backstage, and return to the document you were working on, click the Back arrow that is at the top left of the navigation pane, or just press the Escape key on your keyboard.
No comments:
Post a Comment