Add custom tiles to the app launcher
In Office 365, you can quickly and easily get to your email, calendars, documents, and apps using the Office 365 app launcher (learn more). These are apps you get with Office 365 as well as custom apps that you add from the SharePoint Store or Azure AD.
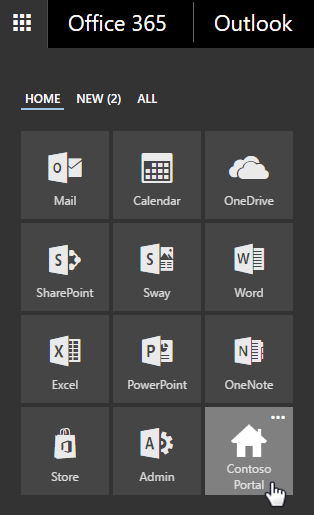
You can add your own custom tiles to the app launcher that point to SharePoint sites, external sites, legacy apps, and more. The custom tile appears under the app launcher's All apps, but you can pin it to the Home apps and instruct your users to do the same. This makes it easy to find the relevant sites, apps, and resources to do your job. In the below example, a custom tile called "Contoso Portal" is used to access an organization's SharePoint intranet site.

Watch the video

Add a custom tile to the app launcher
-
Sign in to Office 365 with your work or school account.
-
Select the app launcher icon
 and choose Admin.
 -
In the Office 365 admin center, search for tiles or use the left navigation pane by choosing Settings > Organization profile > Add custom tiles for your organization.

Note: If you don't see the Custom tiles link, verify you have an Exchange Online mailbox assigned to you and you've successfully signed into your mailbox. Both are required for this feature.
-
Choose
 Add a custom tile.
-
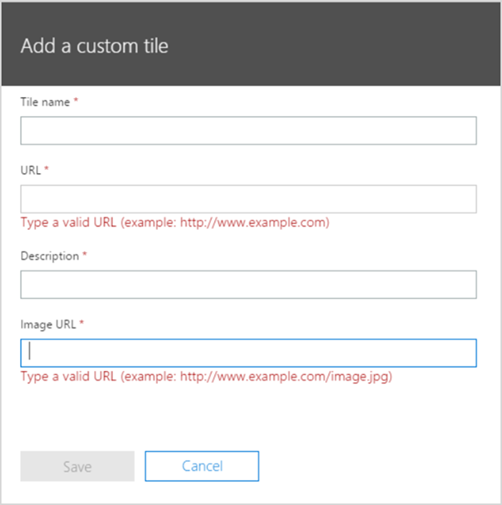
Enter a Tile name for the new tile. The name will appear in the tile.
-
Enter a URL for the tile. This is the location where you want your users to go when they click the tile on the app launcher.
Tip: If you're creating a tile for a SharePoint site, navigate to that site, copy the URL, and paste it here. The URL of your default team site looks like this: https://<company_name>.sharepoint.com
-
Enter a Description for the tile. You see this when you select the tile on the My apps page and choose App details.
-
Enter an Image URL for the tile. The image appears on the My apps page and app launcher.
Tip: The image should be 60x60 pixels and be available to everyone in your organization. You can, for example, put it in a library on a SharePoint site and generate an anonymous guest link to use as the URL. You may need to first enable external sharing.
-
Choose Save to create the custom tile.
Your custom tile now appears in the app launcher on the All tab for you and your users.
Promote the tile to the Home tab
-
Select the app launcher icon
 and select the Home tab.
 -
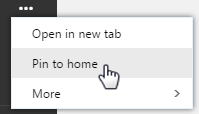
Locate the new tile for your app, select the ellipsis, and choose Pin to home.

Note: If you don't see the custom tile created in the previous steps, make sure you have an Exchange Online mailbox assigned to you and you've signed into your mailbox at least once. These steps are required for custom tiles in Office 365.
Important: Both you and your users need to perform these steps to promote custom tiles from the My apps page to the app launcher.
Edit or delete a custom tile
-
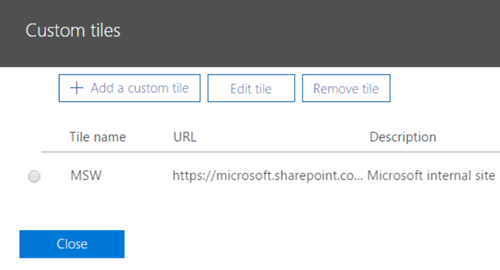
In the Office 365 admin center, search for tiles or use the left navigation pane by choosing Settings > Organization profile > Add custom tiles for your organization and click
 :
:
-
Update the Tile name, URL, Description, or Image URL for the custom tile (see earlier description).
-
Click Update > Close.
To delete a custom tile, from the Custom tiles window, select the tile, click Remove tile and then click Delete.

What's next?
In addition to adding tiles to the app launcher, you can add app launcher tiles to the Office 365 navigation bar (learn more). To customize the look and feel of Office 365 to match your organization's brand, see Customize the Office 365 theme.
No comments:
Post a Comment