
-
Do one of the following:
-
Select Insert > Pictures > This Device for a picture on your PC.
-
Select Insert > Pictures > Stock Images for high quality images or backgrounds.
-
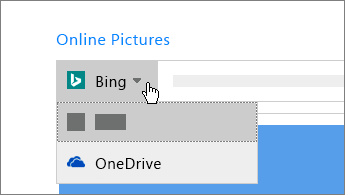
Select Insert > Pictures > Online Pictures for a picture on the web.
Tip: For a picture from your OneDrive, go to the drop-down list at the top left, and switch from Bing to OneDrive.
-
-
Select the picture you want, and then select Insert.
Resize or move pictures
-
To resize a picture, select the picture and drag a corner handle.
-
To wrap text around a picture, select the picture, and then select a wrapping option.
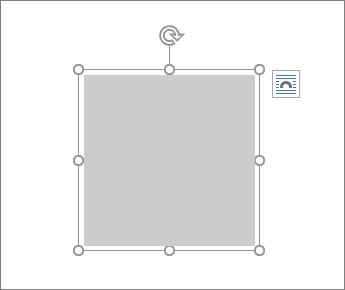
Tip: Pick something other than In Line with Text, and you can move the picture around the page: select the picture and drag it.
What about EPS?
EPS files can no longer be inserted into Office documents. For details, see Support for EPS images has been turned off in Office.
You can easily insert pictures into your document, whether they are on your computer or on the Web.
How?
| | Click where you want to insert the picture in your document. |

| | Insert a picture that is stored on your computer
|

| | Insert clip art
|

Next steps
To resize a picture, select the picture you've inserted in the document. To increase or decrease the size in one or more directions, drag a sizing handle away from or toward the center.
To learn more about adding pictures, drawings, and other graphical elements to your documents, see the following articles:
Tip Office.com is continuously updated with new content, including how-to articles, videos, and training courses. If the bottom of the Help Viewer says Offline and you are connected to the Internet, click Offline, and then click Show content from Office.com.
What do you want to do?
Insert a picture in Word, PowerPoint, or Excel
-
Click the location in your document where you want to insert a picture.
-
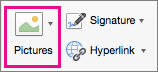
On the Insert tab, click Pictures.
-
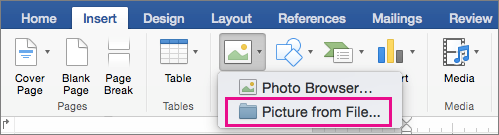
Select the option you want to use for inserting pictures.
The Photo Browser option helps you browse through existing photo sets on your computer, such as photos in iPhoto or Photo Booth. Picture from File lets you browse through your computer's file structure to look for photos.
-
When you find the picture you want, drag it from the Photo Browser into your document, or click Insert in the file browser.
Tip: The picture is embedded in your document. If your picture has a large file size and makes your document too large, you can reduce the size of your document by linking to the picture instead of embedding it. In the Choose a Picture dialog box, select the Link to File box.
Insert a picture in Outlook
You can insert a picture or photo into the body of an email message, instead of attaching the file. Inserting a picture requires that your message uses HTML formatting. To set HTML formatting, select Options > HTML.
-
In the body of your message, click where you want to add a picture.
-
On the Message tab, click Pictures.
-
Select the option you want to use for inserting pictures.
The Photo Browser option helps you browse through existing photo sets on your computer, such as photos in iPhoto or Photo Booth. Picture from File lets you browse through your computer's file structure to look for photos.
-
When you find the picture you want, drag it from the Photo Browser into your document, or click Open in the file browser.
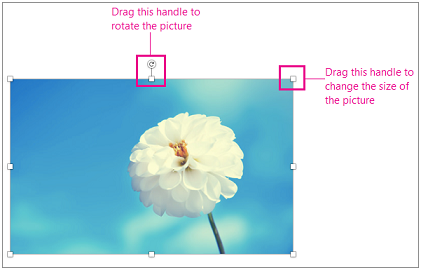
Resize the picture if necessary by clicking one of the handles that surround the picture and dragging it. Click the handle at the top of the picture to rotate it.
Replace a picture in Word, PowerPoint, or Excel
-
Hold down CONTROL and click the picture, and then click Change Picture.
-
Locate a new picture on your computer, and then click Insert.
See also
Move, rotate, or group a picture, text box, or other object in Office for Mac
Change the size of a picture, shape, WordArt, or other object in Word 2016 for Mac
What do you want to do?
Insert a picture in Word or PowerPoint
-
Click the location in your document where you want to insert a picture.
-
On the Home tab, under Insert, click Picture, and then click Photo Browser or Picture from File.
The Photo Browser option helps you browse through existing photo sets on your computer, such as photos in iPhoto or Photo Booth. Picture from File lets you browse through your computer's file structure to look for photos.
-
When you find the picture you want, drag it from the Photo Browser into your document or click Insert in the file browser.
Insert a picture in Excel
From the photo browser:
The Photo Browser helps you browse through existing photo sets on your computer, such as photos that you have in iPhoto or Photo Booth.
-
On the Standard toolbar, click Show or hide the Media Browser
 .
. -
Click the Photos tab
 , and then drag the picture that you want into your document.
From other locations:
-
On the Insert menu, point to Photo, and then click Picture from File.
-
Locate the picture that you want, and then click Insert.
Insert a picture in Outlook
You can insert a picture into a message so that the picture is part of the message, not an attachment.
-
In the body of your message, click where you want to add a picture.
-
On the Message tab, click Picture.
-
Select the option you want to use for inserting pictures.
The Photo Browser option helps you browse through existing photo sets on your computer, such as photos in iPhoto or Photo Booth. Picture from File lets you browse through your computer's file structure to look for photos.
-
When you find the picture you want, drag it from the Photo Browser into your document, or click Open in the file browser.
Insert clip art or online pictures
Note: When you search for clip art and pictures online, you'll be directed to Bing, where you can save the image on your computer, and then insert it in your document. When using pictures or clip art from Bing, you're responsible for respecting copyright, and the license filter in Bing can help you choose which images to use.
In Word and Excel:
-
On the Standard toolbar, click Show or hide the Media Browser
. -
Click the Clip Art tab
 , and then drag the picture that you want into your document.
In PowerPoint:
-
On the Home tab, under Insert, click Picture, and then click Clip Art Browser.
-
Drag the picture that you want into your document.
Replace a picture in Word, PowerPoint, or Excel
-
Hold down CONTROL and click the picture, and then click Change Picture.
-
Locate a new picture, and then click Insert.
See also
Crop pictures in Office for Mac
Pictures make documents more engaging and easier to understand.
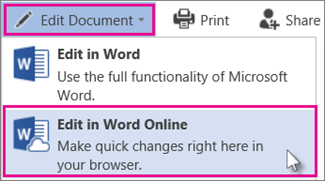
Tip: To add pictures in Word for the web, first switch to Editing View by clicking Edit Document > Edit in Word for the web.
Insert a picture
Do one of the following:
-
Insert a picture from my computer: On the Insert tab, click Picture, browse to, and select the picture you want, and click Open.
-
Insert a picture from the web: On the Insert tab, click Online Pictures, and in the Search Bing box, type a word that describes the picture you're looking for, such as 'cat'.

Tip: You can also insert a picture by copying it (Ctrl + C), and pasting it (Ctrl + V) where you want.
Add style and formatting to a picture
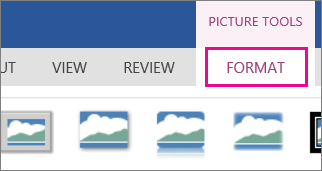
When you insert a picture, Word for the web places the picture in your document and displays the Picture Tools ribbon with the Format tab.
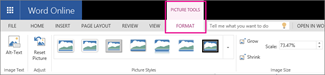
Tip: To open the Picture Tools ribbon anytime you're in Editing View, select the picture.
-
To change the picture's size or style or to add alt text, on the Format tab.
-
Choose the style options that you want to apply to the picture.
Note: If you have Word 2013 or 2016 for Windows, you can do much more to fine-tune a picture: compress it, crop it, remove the background, apply artistic effects, control its position on the page, put it in front of or behind the text, trim it to a specific size, and control how text wraps around it. Click Open in Word to get started.
No comments:
Post a Comment