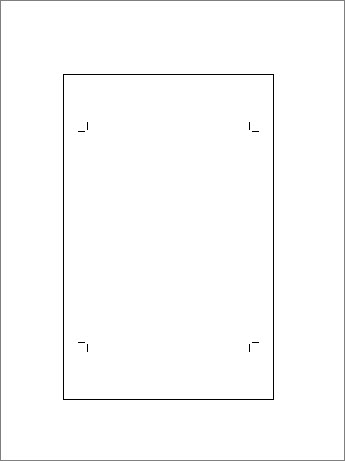
To print crop marks on your publication, you'll need to use the advanced output settings for your printer. Crop marks are not on the ribbon as you might expect. You must print on a paper size that is larger than the page size that you have set for your publication. Commonly, this requires that you print to an imagesetter, which can define a variety of paper sizes. The crop marks will appear in the print preview pane for your publication. You can also print crop marks by using a desktop printer. You just need to print on a sheet of paper that is larger than the final dimensions that you want after the page is trimmed.
-
Click File > Print.
-
Under Settings, click the arrow next to paper size and choose a paper size larger than your final product.
-
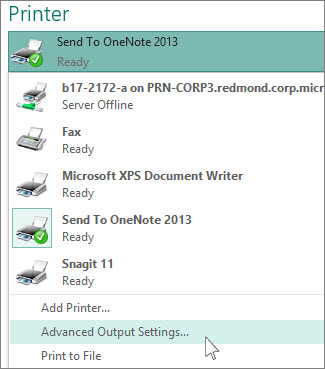
Under Printer, click the arrow next to the printer, and click Advanced Output Settings.
-
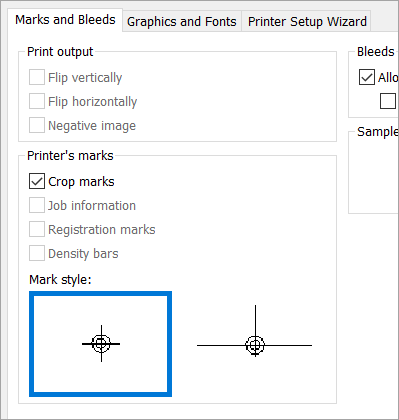
On the Marks and Bleeds tab, under Printer's marks, select the Crop marks box, and click OK.
-
Make sure the crop marks are where you want them, and click Print.

If you want to, you can Remove crop marks.
No comments:
Post a Comment