Change nameservers to set up Office 365 with name.com
Check the Domains FAQ if you don't find what you're looking for.
Follow these instructions if you want Office 365 to manage your Office 365 DNS records for you. (If you prefer, you can manage all your Office 365 DNS records at name.com.)
Here's what you need to do. (Need more help? Get support.)
Add a TXT record for verification
Before you use your domain with Office 365, we have to make sure that you own it. Your ability to log in to your account at your domain registrar and create the DNS record proves to Office 365 that you own the domain.
Note: This record is used only to verify that you own your domain; it doesn't affect anything else. You can delete it later, if you like.
-
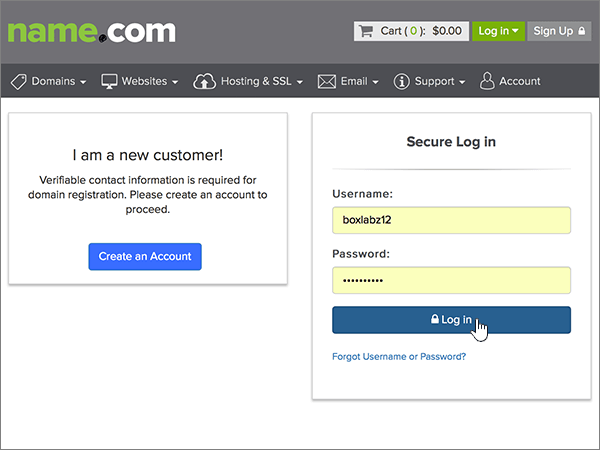
To get started, go to your domains page at name.com by using this link. You'll be prompted to log in first.
-
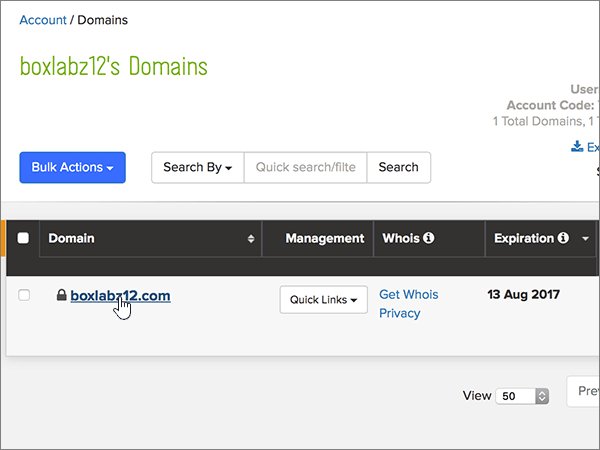
Under My Domains, choose the name of the domain that you want to modify.
-
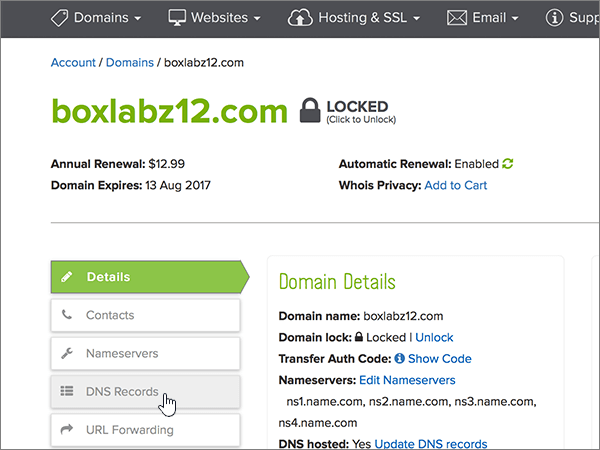
In the Details column, choose DNS Records.
-
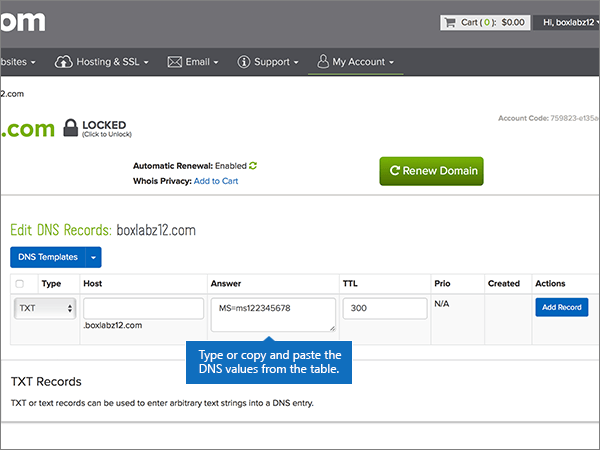
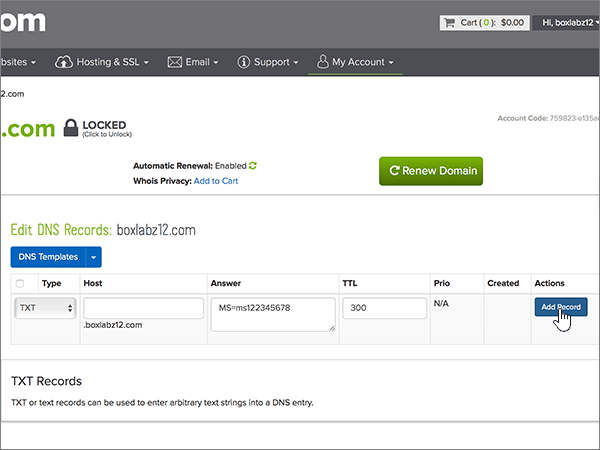
In the boxes for the new record, type or copy and paste the values from the following table.
(Select the Type value from the drop-down list.)
Type
Host
Answer
TTL
TXT
(Leave this field empty.)
MS=msXXXXXXXX
Note: This is an example. Use your specific Destination or Points to Address value here, from the table in Office 365.
How do I find this?Use the default value (300).
-
Choose Add Record.
-
Wait a few minutes before you continue, so that the record you just created can update across the Internet.
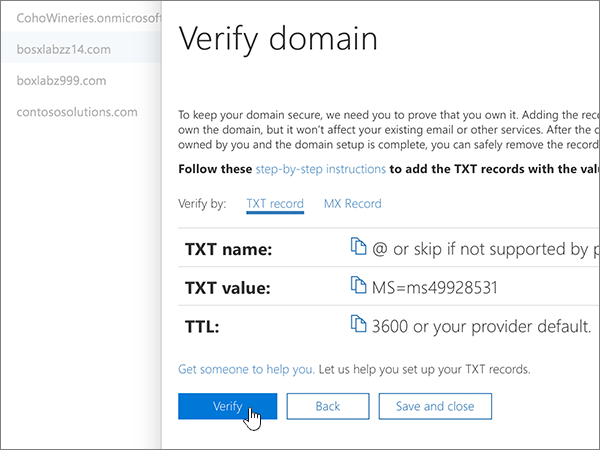
Now that you've added the record at your domain registrar's site, you'll go back to Office 365 and request Office 365 to look for the record.
When Office 365 finds the correct TXT record, your domain is verified.
-
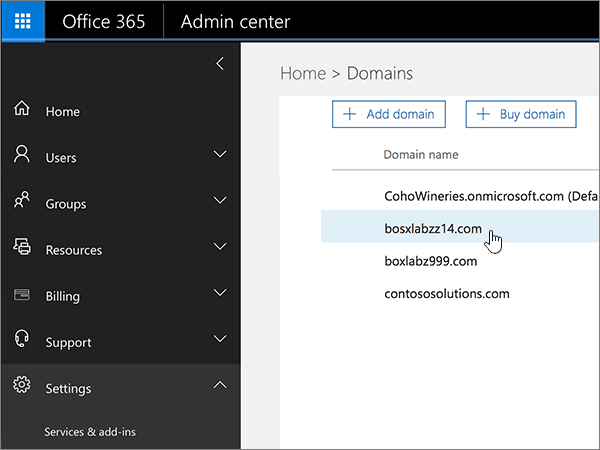
Choose Setup > Domains.
-
On the Domains page, choose the domain that you are verifying.
-
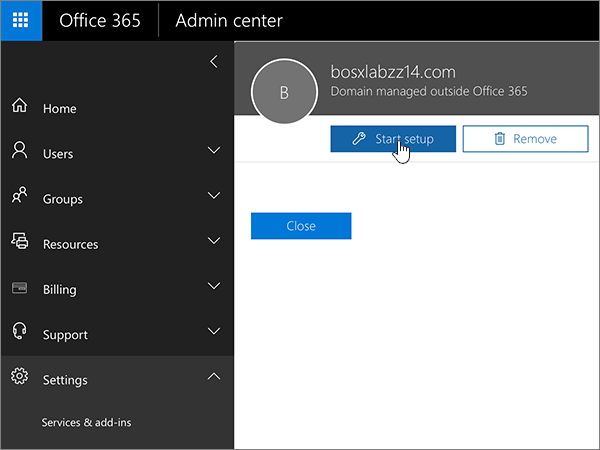
On the Setup page, choose Start setup.
-
On the Verify domain page, choose Verify.
Note: Typically it takes about 15 minutes for DNS changes to take effect. However, it can occasionally take longer for a change you've made to update across the Internet's DNS system. If you're having trouble with mail flow or other issues after adding DNS records, see Troubleshoot issues after changing your domain name or DNS records.
Change your domain's nameserver (NS) records
To complete setting up your domain with Office 365, you change your domain's NS records at your domain registrar to point to the Office 365 primary and secondary name servers. This sets up Office 365 to update the domain's DNS records for you. We'll add all records so that email, Skype for Business Online, and your public website work with your domain, and you'll be all set.
Caution: When you change your domain's NS records to point to the Office 365 name servers, all the services that are currently associated with your domain are affected. For example, all email sent to your domain (like rob@your_domain.com) will start coming to Office 365 after you make this change.
Important:
-
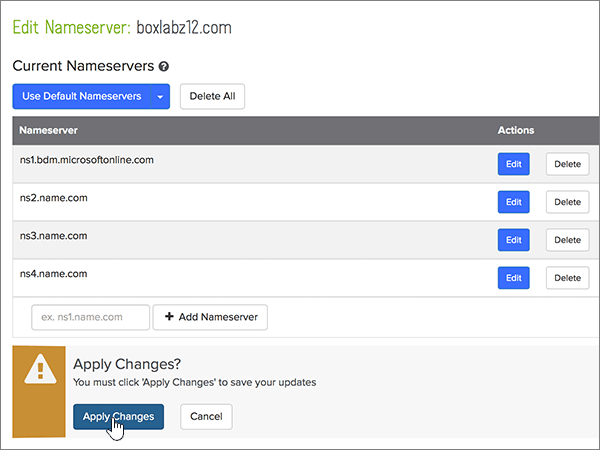
When you have completed the steps in this section, the only nameservers that should be listed are these four:
-
The following procedure will show you how to delete any other, unwanted nameservers from the list, and also how to add the correct nameservers if they are not already in the list.
-
ns1.bdm.microsoftonline.com
-
ns2.bdm.microsoftonline.com
-
ns3.bdm.microsoftonline.com
-
ns4.bdm.microsoftonline.com
-
To get started, go to your domains page at name.com by using this link. You'll be prompted to log in first.
-
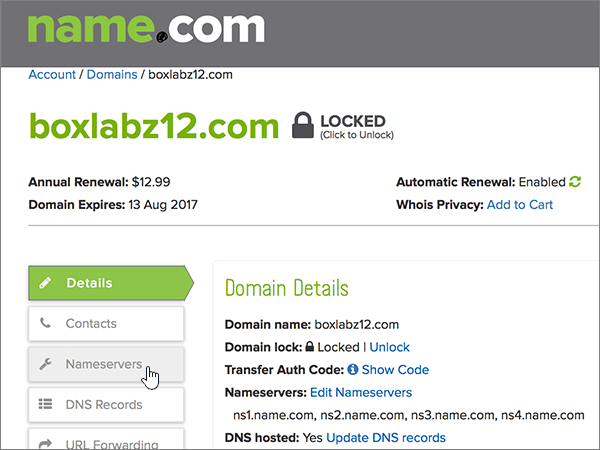
Under My Domains, choose the name of the domain that you want to modify.
-
In the Details column, choose Nameservers.
-
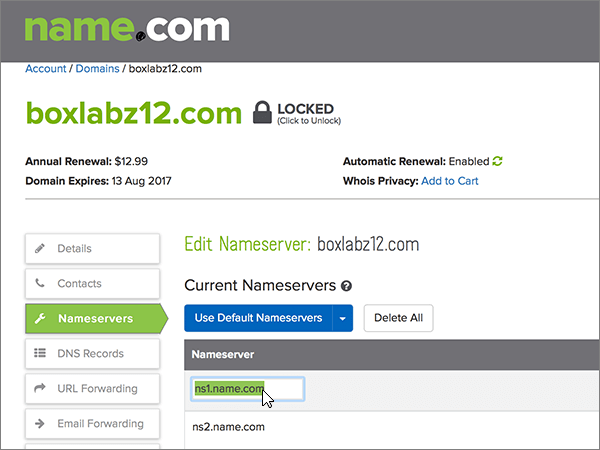
In the Edit Nameserver section, find the first nameserver in the list, and then choose Edit in the Actions column.

-
Delete the current entry by selecting it and then pressing the Delete key on your keyboard.
-
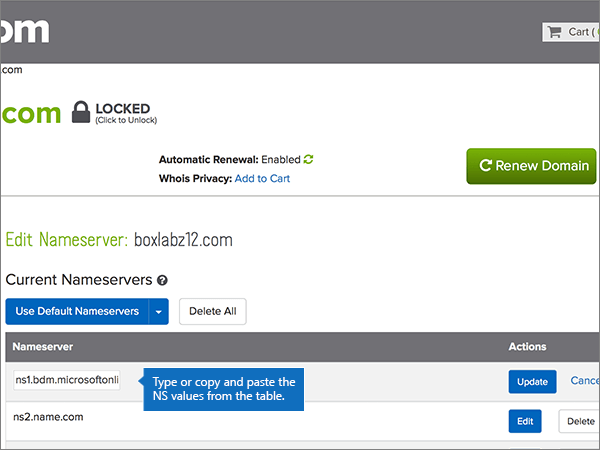
Add the first nameserver.
In the same box, type or copy and paste the first nameserver value from the following table (ns1.bdm.microsoftonline.com).
First Nameserver row
ns1.bdm.microsoftonline.com
Second Nameserver row
ns2.bdm.microsoftonline.com
Third Nameserver row
ns3.bdm.microsoftonline.com
Fourth Nameserver row
ns4.bdm.microsoftonline.com
-
Choose Update.

-
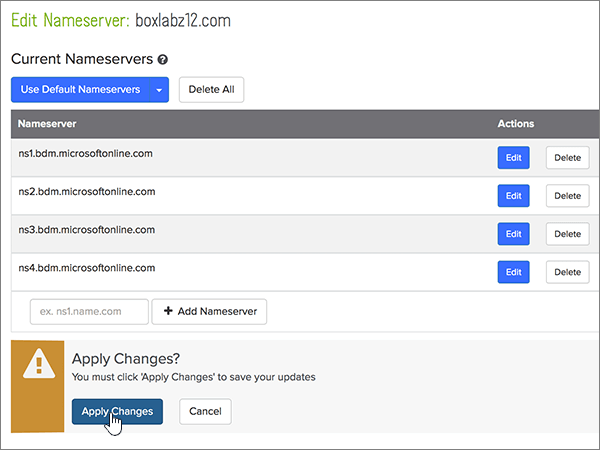
Choose Apply Changes to save your update.
-
Add the other nameservers.
Use the same process, but this time replace the nameservers in the list with the next nameserver from the table above (ns2.bdm.microsoftonline.com, ns3.bdm.microsoftonline.com, and ns4.bdm.microsoftonline.com).
(Make sure that you finish the addition by choosing first Update and then Apply Changes.)
-
If there are now any nameservers in the list other than ns1.bdm.microsoftonline.com and ns2.bdm.microsoftonline.com, ns3.bdm.microsoftonline.com, and ns4.bdm.microsoftonline.com, delete each of those other nameservers by choosing Delete in the Actions column for that record.
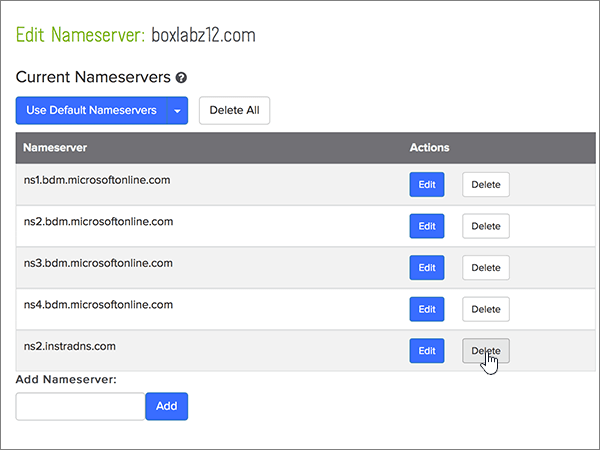
-
Choose Apply Changes to save your updates.
Note: Your nameserver record updates may take up to several hours to update across the Internet's DNS system. Then your Office 365 email and other services will be all set to work with your domain.
Still need help?


Microsoft Office 365 + 1TB storage free for students, teachers and schools FREE
ReplyDeleteMicrosoft Office Tutorials: Change Nameservers To Set Up Office 365 With Name.Com >>>>> Download Now
Delete>>>>> Download Full
Microsoft Office Tutorials: Change Nameservers To Set Up Office 365 With Name.Com >>>>> Download LINK
>>>>> Download Now
Microsoft Office Tutorials: Change Nameservers To Set Up Office 365 With Name.Com >>>>> Download Full
>>>>> Download LINK WV
Microsoft Office Tutorials: Change Nameservers To Set Up Office 365 With Name.Com >>>>> Download Now
ReplyDelete>>>>> Download Full
Microsoft Office Tutorials: Change Nameservers To Set Up Office 365 With Name.Com >>>>> Download LINK
>>>>> Download Now
Microsoft Office Tutorials: Change Nameservers To Set Up Office 365 With Name.Com >>>>> Download Full
>>>>> Download LINK lX