Add a border to a slide
You can add a border to a slide for an added element of design in your presentation. While there is not a specific tool in PowerPoint to add a border, there are a couple of ways to accomplish the task: create a simple border by using the outline of a shape, or use Bing Image Search to find and insert a border.
Create a simple border by using the outline of a shape
-
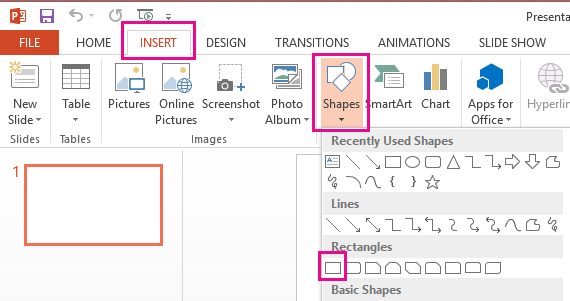
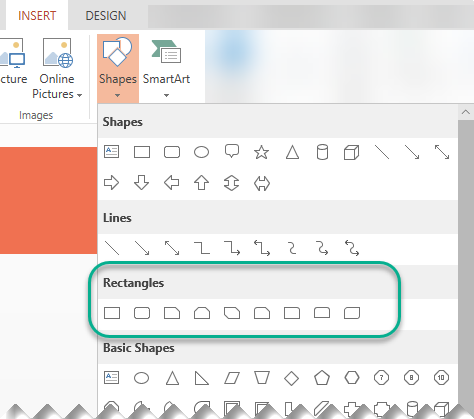
Click Insert, and click the Shapes drop-down menu.
-
Select a shape from the Rectangles category.
-
To draw the shape to the size you want, place the cursor at the top-left corner. Hold the left mouse button, and drag the cursor to the bottom right.
(The Format tab is available on the Ribbon after you select a shape by clicking it.)

-
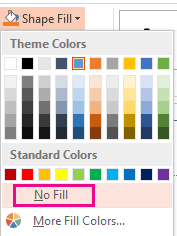
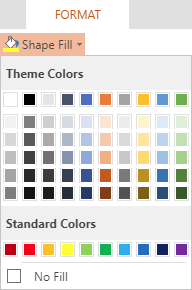
To eliminate the background color, click Format, and click the Shape Fill drop-down menu. Click No Fill.
-
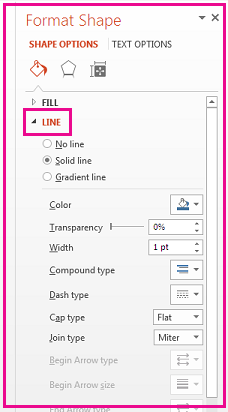
Optional. Right-click the border, and select Format Shape. Use the Format Shape panel on the right to adjust how the border line looks.

Use Bing Image Search to insert a border
You can also search for a new border to use in your presentation. PowerPoint uses a Bing Image Search to locate and download borders. You can search for new border images if you are connected to the Internet.
-
On the slide where you want to add a border, click Insert > Online Pictures.
-
Type a search phrase, like line borders or flower borders in the Bing Image Search box, and press Enter.

-
Select a border image, and click Insert to add it to your slide.
Note: The Bing Image Search results bring up images that are licensed under Creative Commons. For more information, see Add clip art to your file.
See also
Create a simple border by using the outline of a shape
-
On the Insert tab, in the Illustrations group, click the arrow under Shapes.
-
Under Recently Used Shapes, click a rectangle shape.
-
On your slide, drag to a draw a rectangle that is almost as large as the slide.
-
Right-click the rectangle, click Format Shape, and then do the following:
-
To remove the background color of the rectangle, in the Format Shape box, click Fill in the left pane. and then click No fill.
-
To change the outline color of the rectangle, in the Format Shape box, click Line Color in the left pane. Click the arrow next to Fill Color
 , and then click the color you want.
 -
To make the outline wider or narrower, dashed, or another style, in the Format Shape box, click Line Style in the left pane. To change the width of the line, next to Width, click the up or down arrows to change the point size of the line. To change the style of the line, click the arrow next to Compound type or Dash type to select the style you want.
-
Use clip art to create a more elaborate border
There are dozens of styles of clip art that you can use to create a border on a slide. Some border styles are in the shape of a hollow rectangle, and all you need to do is resize them to look like a border along the edge of your slide. Other clip art border styles are solid shapes, and you may need to copy and paste or rotate or flip the shape to make it repeat around the edge of your slide.
-
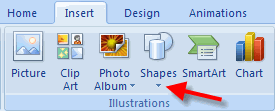
If you are using PowerPoint 2010, on the Insert tab, in the Images group, click Clip Art.
If you are using PowerPoint 2007, on the Insert tab, in the Illustrations group, click Clip Art.
-
In the Clip Art task pane, click in the Search for box, type borders, and then click Go.
-
In the results list, double-click the border that you want to use, and then resize, copy, paste, rotate, or flip the shape it to make it look the way you want.
See also
Create a simple border by using the outline of a shape
-
Select the slide you want and click Insert > Shapes > Rectangle.
Tip: To add a border to all your slides, edit the Slide Master.
-
Click and drag to draw the rectangle so it almost fills the slide.
-
In the Shape Format tab, click Format Pane.

-
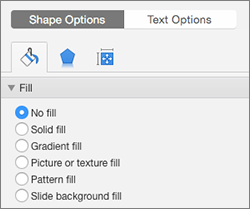
In the Shape Options pane at the right, under Fill, click No Fill.
-
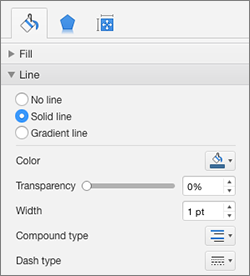
In the Format Shape pane, under Line, set the color and line style you want.
Use Bing Images to create a more elaborate border
-
Search for slide borders on Bing.
Important: Bing gives you access to thousands of Creative Commons licensed images on the Web . Remember, you're responsible for respecting the rights of others' property, including copyright.
-
Ctrl+click the image you want and click Save Image As to download it.
-
In PowerPoint, click Design > Format Background.

-
In the Format background pane at the right, click Fill > Picture or texture fill.

-
Under Insert picture from, click File, browse for the border you downloaded, and click Insert.
-
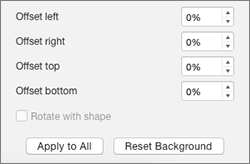
If the picture you loaded doesn't fit your slide, make sure all of the offset values in the Format background pane are set to zero percent (0%).
-
If you want to use this border for all your slides, click Apply to All.
See Also
Create a simple border by using the outline of a shape
-
Click Insert, and click the Shapes drop-down menu.
-
Select a shape from the Rectangles category.
-
A small default rectangle is drawn on the slide.
-
To eliminate the coloring inside the shape, select the Format tab, and select the Shape Fill drop-down menu. Click No Fill.
(The Format tab is available on the Ribbon after you select a shape by clicking it.)
-
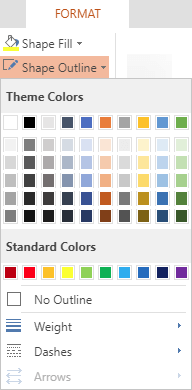
On the Format tab, select Shape Outline, and choose the color you want for the border.
-
Select Shape Outline again. Use the Weight and Dashes options near the bottom of the menu to select the line thickness and style you want for your border.
-
Drag the handles on the shape to size and position the border on the slide.
Use Bing Image Search to insert a border
You can also search for a new border to use in your presentation. PowerPoint uses a Bing Image Search to locate and download borders. You can search for new border images if you are connected to the Internet.
-
On the slide where you want to add a border, click Insert > Online Pictures.
-
Type a search phrase, like line borders or flower borders in the Bing Image Search box, and press Enter.
-
Select a border image, and click Insert to add it to your slide.
Note: The Bing Image Search results bring up images that are licensed under Creative Commons. For more information, see Add clip art to your file.
No comments:
Post a Comment