Print a document in landscape or portrait orientation in Word for Mac
You can print your document (or parts of it) in landscape or portrait orientation. Portrait is commonly used for letters, reports, and other documents. Landscape is often used in documents with tables.
Change the page orientation for a document
-
On the Layout tab, click Orientation, and then click Portrait or Landscape.

-
On the File menu, click Print.
Change the orientation for specific pages
-
Select all the text on the pages you want to change.
Tip: To change the orientation for all pages after the cursor, instead of selecting text, click where you want to start the new page orientation. On the Format menu, click Document, click Page Setup, select the orientation you want, and then click OK. Next to Apply to, click This point forward.
-
On the Format menu, click Document.
-
Click Page Setup at the bottom of the dialog box.
-
Next to Orientation, click the orientation you want, and then click OK.
-
Next to Apply to, click Selected text, and then click OK.
-
On the File menu, click Print.
Change the orientation for a specific section
Important: To change the orientation for a specific section, your document must be divided by section breaks. Learn how to add section breaks.
-
To display nonprinting characters, such as paragraph markers (¶), click Show all nonprinting characters
 on the Home tab.
-
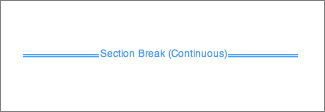
Double-click the section break that follows the section you want to change.
Section breaks look like this:

-
Click Page Setup.
-
Next to Orientation, click the orientation you want, and then click OK.
-
Next to Apply to, click This section, and then click OK.
-
On the File menu, click Print.
See also
Change the page orientation for a document
-
On the View menu, click Print Layout.
-
On the Layout tab, under Page Setup, click Orientation, and then click Portrait or Landscape.

-
On the File menu, click Print.
Change the orientation for specific pages
-
On the View menu, click Print Layout.
-
Select all the text on the pages that you want to change.
-
On the Format menu, click Document.
-
Click Page Setup.
-
Under Orientation, click the orientation that you want, and then click OK.
-
On the Apply to pop-up menu, click Selected text, and then click OK.
As necessary, Word inserts section break before and after the text that you selected and changes the orientation for those sections.
-
On the File menu, click Print.
Note: To change the orientation for all pages after the cursor, instead of selecting text, click in the document to set the cursor position. On the Format menu, click Document, click Page Setup, select the orientation that you want, and then on the Apply to pop-up menu, click This point forward.
Change the orientation for a specific section
Important: To change the orientation for a specific section, the document must have section breaks.
-
On the View menu, click Print Layout.
-
To display nonprinting characters, such as paragraph markers (¶), click Show all nonprinting characters
 on the Standard toolbar.
 -
Double-click the section break that follows the section that you want to change.
-
Click Page Setup.
-
Under Orientation, click the orientation that you want, and then click OK.
-
On the Apply to pop-up menu, click This section, and then click OK.
As necessary, Word inserts section breaks before and after the sections that you selected and changes the orientation for those sections.
-
On the File menu, click Print.
Note: To change the orientation for all pages after the cursor, instead of selecting text, click in the document to set the cursor position. On the Format menu, click Document, click Page Setup, select the orientation that you want, and then on the Apply to pop-up menu, click This point forward.
Microsoft Office Tutorials: Print A Document In Landscape Or Portrait Orientation In Word For Mac >>>>> Download Now
ReplyDelete>>>>> Download Full
Microsoft Office Tutorials: Print A Document In Landscape Or Portrait Orientation In Word For Mac >>>>> Download LINK
>>>>> Download Now
Microsoft Office Tutorials: Print A Document In Landscape Or Portrait Orientation In Word For Mac >>>>> Download Full
>>>>> Download LINK h5