Use VoiceOver in Outlook 2016 for Mac
You can use VoiceOver in Outlook 2016 for Mac. Just set your accessibility preferences for vision, hearing, and interaction, and start working with your email, calendars, tasks, people, and notes view.
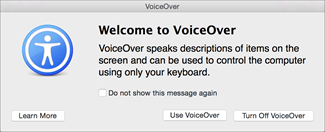
Turn on/off VoiceOver
Outlook 2016 for Mac is compatible with VoiceOver in OS X Yosemite.
Do one of the following:
-
Press
 + F5
+ F5
-
Press
 + OPTION + F5, and under VoiceOver check or uncheck Enable VoiceOver.
Set additional OS X accessibility preferences
-
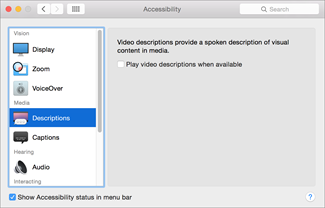
To access all the OS X accessibility options, in the Accessibility Options box, click Preferences.
Tip: To access the accessability preferences from the menu bar, click Accessibility box, check Show Accessibility status in menu bar. The Accessibility Preferences
 icon appears in the menu bar.
 -
In the left pane, under Vision, Hearing, or Interacting, set your preferences.

Working with email
Creating and sending email-
To go to Mail, press
 + 1.
+ 1. -
To create a new message,
 + N.
+ N. -
In the To field, enter the recipients email address.
To check if you have the recipients email addresses right, press CONTROL +
 + C.
+ C. -
To type the subject of your email, press Tab until you get to the Subject field.
-
To get to the body of the email and type, press Tab.
-
To send your message, press
 + RETURN.
Replying to email
-
To reply to the sender of the message or, if the message is from a mailing list, to reply to the mailing list, press
 + R.
+ R. -
To reply to all the recipients of an email, including the sender, press SHIFT +
 + R.
+ R.
Forwarding an email
-
To forward a message to another recipient, press
 + J.
+ J.
Reading email
-
To navigate to the previous or next message in the message list, press SHIFT + CONTROL + ].
Navigating the ribbon
-
To navigate to the previous or next message in the message list, press SHIFT + CONTROL + ].
Navigating the ribbon
When you are on a menu button within a tab group, like font or highlight color picker, and want to access that menu, press CONTROL+OPTION+SHIFT+M. Here's the list of controls on the ribbon that use this keyboard shortcut:
-
Follow up
-
Filter email
-
Filter tasks
-
Font color picker
-
Highlight color picker
-
Hyperlink
-
Background picker
Note: You'll get instructions from the VoiceOver to press CONTROL + OPTION + SPACE. That instruction is incorrect and won't work.
Working with calendar
Navigating the calendar and creating appointments-
To switch to Calendar, press
 + 2.
+ 2. -
To create a new appointment, press
 + N.
+ N. -
To invite attendees to your meeting, press
 + SHIFT + I.
 -
Press Tab to search for contacts in the address book. In the Search People box, type the attendee name. Press Tab to go to the results table. If it's an empty table, change the directory pop up to All Folders. Press Tab to go to the results table and select the attendee.
-
Press Tab to go to the Subject field and type the purpose of your meeting.
-
Press Tab to go to the Location field and type where you'll be holding the meeting.
-
Press Tab to go to the Starts and End fields and specify the Start Date and End Date for the meeting. Tab again to specify the Start and End times.
-
To go to the body of the message window, press CONTROL + OPTION + SHIFT + DOWN ARROW and type the context for your meeting.
-
To send your message, press
 + RETURN.
Working with people, tasks, and Notes view
Navigating People view
-
To go to People that has a list of all your contacts, press
 + 3.
+ 3. -
To create a new contact, press
 + N.
+ N.
Navigating Tasks view
-
To go Tasks view, press
 + 4.
+ 4. -
To create a new task, press
 + N.
+ N.
Navigating Notes view
-
To go Notes view, press
 + 5.
+ 5.
No comments:
Post a Comment