Insert or delete cells, rows, and columns
Sometimes when you're entering data in a worksheet, you might need new cells, rows, or columns. You can add blank cells above or to the left of an existing cell. When you insert a cell, Excel shifts cells in the same column down or cells in the same row to the right to accommodate the new cell.
For example, to insert a cell between "Summer" and "Winter":
-
Click the cell "Winter."
-
On the Home tab, click the arrow under Insert, and then click Insert Cells & Shift Down.
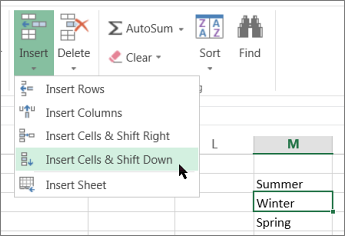
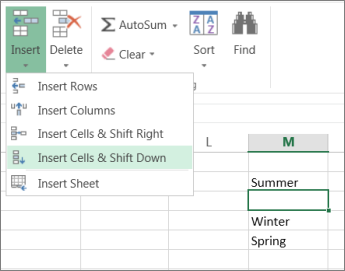
A new cell is added above the cell "Winter" and looks like this:
Insert rows
To insert a single row : Right-click the whole row above which you want to insert the new row, and then click Insert Rows.
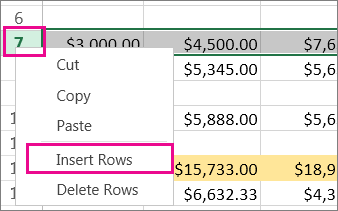
To insert multiple rows: Select the same number of rows above which you want to add the new ones. Right-click the selection and click Insert Rows.
Insert columns
To insert a single new column: Right-click the whole column to the right of where you want to add the new column. For example, to insert a column between columns B and C, right-click column C, and click Insert Columns.
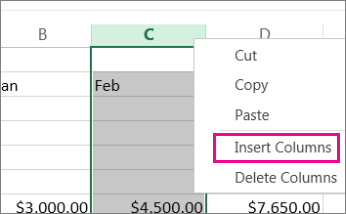
To insert multiple columns: Select the same number of columns to the right of which you want to add new ones. Right-click the selection and click Insert Columns.
Delete cells, rows, or columns
If you don't need any of the existing cells, rows or columns, here's how to delete them:
-
Select the cells, rows, or columns that you want to delete.
-
On the Home tab, click the arrow under Delete, and then click the appropriate delete option.
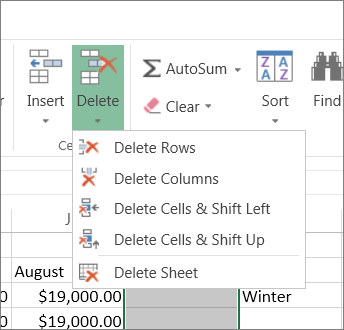
When you delete rows or columns, other rows or columns automatically shift up or to the left.
Tip: If you change your mind right after you deleted a cell, row or column, no problem, just press Ctrl+Z to restore it.
No comments:
Post a Comment