Create a group in Outlook
Groups is a feature of Office 365 that provides a shared workspace for collaboration and sharing. The workspace comes with a shared inbox, calendar, document library, OneNote notebook, and planning tool.
An Office 365 group is different from a contact group (formerly called a distribution list). A contact group is a set of email addresses. You can use the contact group to send an email message or meeting invitation to all the addresses at once. To create a contact group, see Create a contact group.
Office 365 Groups must be enabled before you can use any of the collaboration tools. If you don't see the ribbon or buttons described below, the feature might not be enabled for you. Talk to your IT department for assistance.
Tips: You can also create a group from:
-
OneDrive for Business. The steps are exactly the same.
-
Yammer. See Create a group in Yammer for instructions.
Create a group in Outlook on the web (formerly Outlook Web App)
-
Open Outlook on the web.
-
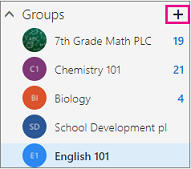
In the navigation pane, next to Groups, select the + button. (If you don't see the + button, hover your mouse over the navigation pane.)

-
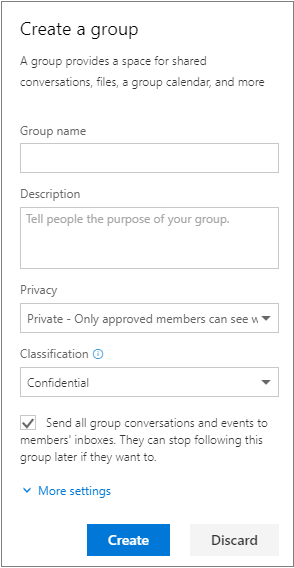
In Choose a name, enter a group name that briefly captures the spirit of the group.
-
A suggested group ID is provided. To assign a different name to your group which will be part of the group URL, click Edit
 next to the Group ID box.
If you see "not available," the group ID is already in use. Try something different. Note that once you choose a group ID, it cannot be changed.
-
In Add a description, enter a detailed description of the group to help others understand its purpose. This description will be included in the welcome email when others join the group.
-
In Privacy, do one of the following:
-
To create a group in which anyone within your organization can view its content and become a member, select Public.
-
To create a group in which membership requires approval by a group owner and only members can view group content, select Private.
-
-
To enable subscribed members to receive email and calendar event notifications in both their group inbox and personal inbox, select Subscribe members so they receive group conversations and calendar events in their inbox. This is recommended when members belong to multiple groups because it means they can see all group notifications in one place without having to visit each group mailbox in order to stay current with group activity.
-
Select Create.

-
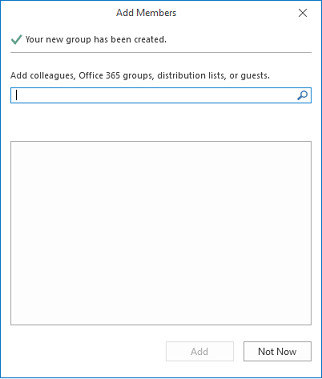
If you're ready to add members to your newly created group (you aren't able to add external users at this time), continue with the create group wizard. Otherwise, select Not now. You can always come back and add group members later.
Create a group in Outlook 2016
-
Open Outlook 2016.
-
On the Home tab, choose New Group.

-
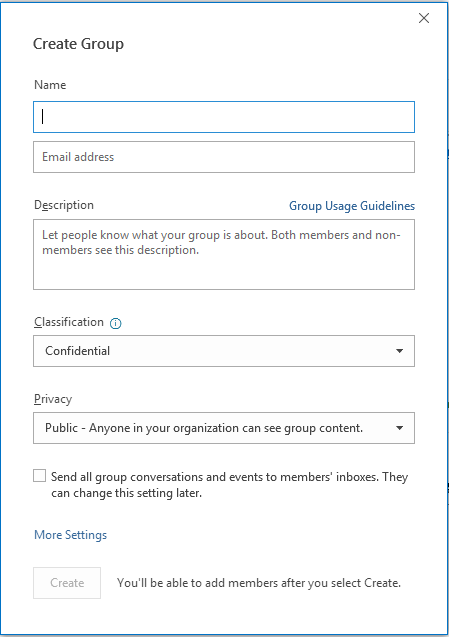
In the Create Group window, enter the required information, including Name, Group ID, and Privacy level, (Public or Private). You won't be able to change the group ID after you create the group.
-
Check the subscription box to let members receive the group's emails in their regular inbox or keep it un-checked if you prefer that they access the group's mail only from the group's inbox, and then click OK.

-
Add the members (you aren't able to add external users at this time), description, and a photo for the group, and then click OK. You can add members after the group is created as well.

-
Click OK. You'll see your newly created group in the left nav and a Welcome email in your group's inbox.
No comments:
Post a Comment