Create and apply a border cell style
If you frequently use a specific border style in your workbook, you can create a custom border style button and use it to apply the custom border style quickly.
-
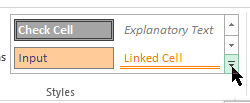
Click Home > Cell Styles.
Notes: If you don't see Cell Style, click the Morearrow in the cell style gallery.
-
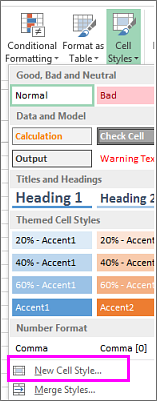
Pick New Cell Style.
-
In the Style name box, type a name for the new border style.
-
Click Format.
-
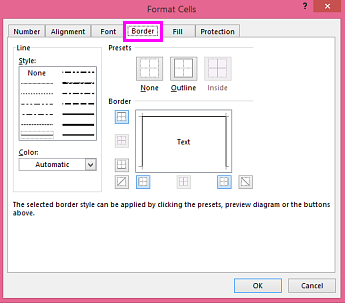
Click Border and pick a line style.
-
To change the line color, click color box, and pick a color.
-
Click one of the Presets or to customize borders for specific cell sides, under Border click the individual border buttons.
Note: To undo a border, click the border button again.
-
You can preview the border style in the Border diagram. If the border style meets your needs, click OK.
-
Click OK to close the Style box.
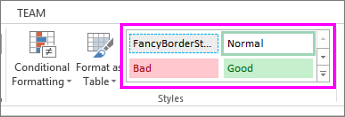
Your custom cell style button appears in the gallery. Like the FancyBorderStyle button in this picture.
Apply or remove a custom border style
After you create a border cell style, here's how you can use it:
-
To apply the custom border style, select the cells that you want to add borders to, and then click your custom cell style button.
-
To remove a custom border style, select the cells with the border and click Normal.
Change formatting for a custom border cell style
Here's how you can modify the custom border cell style in a workbook:
Note: Changing a cell style affects all cells that have that style in the workbook.
-
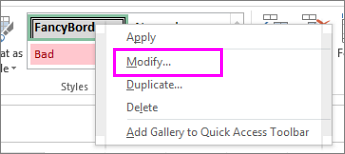
Right-click the cell style button and pick Modify.
-
Click Format and make any format changes.
More on cell borders
-
To quickly add a default style border around cells, press Ctrl+Shift+7.
-
To apply the current border style, select the cells and click Home > the border button
 .
.
No comments:
Post a Comment