Add a border to a page in Word 2016 for Mac
You can put a border around just one page if that page is at the beginning of a document or a section. If the page is in the middle of your document, you must first add section breaks.
Add a border to a page
-
Click Design > Page Borders.

-
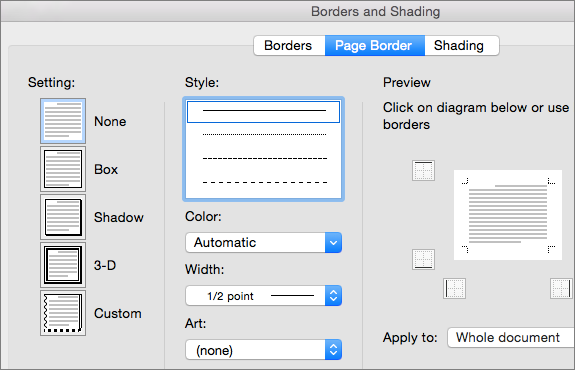
In the Borders and Shading box, design your border:
-
Under Setting on the left, choose the border style you want.
-
Under Style, click the line style you want.
-
Click the arrow under Color and choose a border color.
-
Click the arrow under Width and choose the width you want.
Tips: If you want a clip-art border instead, click the arrow under Art and choose a border graphic.

-
-
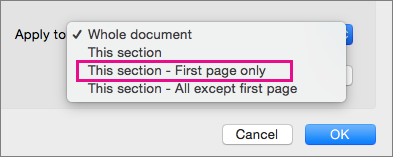
Next, click the arrow to the right of Apply to and choose This section - First page only.

This setting also works if you're adding the border to the first page in your document.
-
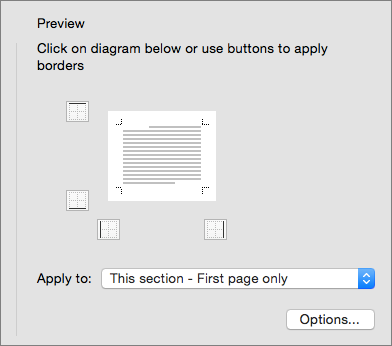
The Preview box confirms your border styles. To remove the border from one side, click that line in the Preview box.

Tip: To change where the border appears on the page, click Options and adjust the margin settings.
When finished, click OK .
No comments:
Post a Comment