PowerPoint doesn't have a gallery of ready-made watermarks like Word has, but you can still manually put a text background in your slides to get that watermark effect.

To indicate that your presentation is a draft copy, add the watermark text "Draft" to the background of your slides. Or add other text stamps, such as "Company Confidential," your company name, or anything else that you want.
Add a watermark
-
Select View > Slide Master.
-
Scroll to the top of the thumbnail pane and select the Slide Master at the top.
-
Select Insert > Text Box, then drag to draw a text box on the slide.
-
Type the text you want in the text box.
Change the look of the watermark text
-
Click and hold the rotation handle at the top of the text box by moving the mouse left or right.
-
Select the text in the text box.
-
Choose a light font fill color, and make any other changes to the font and style.
-
Close Slide Master. All slides in your presentation will have the watermark text.
Add a watermark to your slides using Word Art or a text box
You can add the watermark to all slides at once (by editing the slide master), or to individual slides. The procedure is the same, except for the starting point, as explained in step 1.
-
To add a watermark to an individual slide, open that slide in Normal view.
To add a watermark to all the slides in a blank presentation, first go to View > Slide Master.

Note: If your completed presentation contains one or more master slides, you might not want to apply the background to the master slides and risk unwanted changes to your presentation. The safe alternative is to add the background to one slide at a time.
-
Select the Insert tab and do one of the following:
-
To use a text box, select Text Box, and then drag to draw the text box the size that you want.
-
To use WordArt, select WordArt.
-
-
Enter text in the text box or WordArt that you want to appear in the watermark.
-
If you want to reposition the watermark, click the text box or WordArt, and then when the pointer becomes a
 , drag the text box or WordArt to a new location.
 -
To send the watermark to the back of the slide, go to Format > Picture Tools, click the arrow next to Send Backward, and then click Send to Back.
Tip: If you don't see the Picture Tools or Format tabs, make sure you've selected a text box or WordArt.
You can add the watermark to all slides at once (by editing the slide master), or to individual slides. The procedure is the same, except for the starting point, as explained in step 1.
Use a text box or WordArt as a watermark
-
To add a watermark to an individual slide, open that slide in Normal view.
To add a watermark to all the slides in a blank presentation, on the View tab, in the Presentations Views group, click Slide Master.
Note: If your completed presentation contains one or more master slides, you might not want to apply the background to the master slides and risk unwanted changes to your presentation. The safe alternative is to add the background to one slide at a time.
-
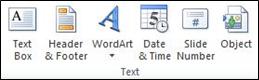
On the Insert tab, in the Illustrations group, in the Text group, do one of the following:
-
To use a text box, click Text Box, and then drag to draw the text box the size that you want.
-
To use WordArt, click WordArt.
-
-
Enter text in the text box or WordArt that you want to appear in the watermark.
-
If you want to reposition the watermark, click the text box or WordArt, and then when the pointer becomes a
, drag the text box or WordArt to a new location. -
When you finish editing and positioning the watermark and are satisfied with its appearance, to send the text box or WordArt to the back of the slide, under Drawing Tools, on the Format tab, in the Arrange group, click Send to Back.

If you do not see the Drawing Tools or Format tabs, make sure that you've selected a text box or WordArt.
No comments:
Post a Comment