After you create your SharePoint in Microsoft 365 site using an accessible template, use correct formatting, styles, and alternative descriptions to keep your site accessible.
Note: When you use SharePoint in Microsoft 365, we recommend that you use Internet Explorer as your browser.
In this topic
Add and format text
Your SharePoint in Microsoft 365 site already contains some basic elements, such as a Search bar and a Documents area. It's very easy to add your own content to a SharePoint in Microsoft 365 site.
-
To open the Editing ribbon and to enter Edit mode, on the page you want to edit, select the Edit link.

-
To add text to an existing web part, place the focus in it and then, from the Edit ribbon, cut, copy, insert, or format text, as you would in Word for the web.
-
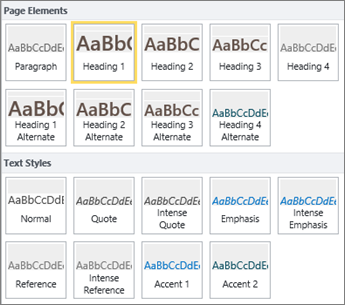
To select a format for your text, open the Styles group.

Select the style that you want to use, place the focus in the edit area, and start typing.
-
When you finish, select Save.

Some accessibility notes
-
Use simple fonts, and use no more than two or three font faces.
-
Do not set a fixed font size. Setting a fixed size can interfere with other elements on the screen, especially if someone makes the screen larger or smaller. For example, it can be a problem with screen layout, because text lines can overlap columns, or text can disappear.
-
Avoid using bold, italic, and underline font variations, if possible. Instead, choose an option from the Styles group. Options from Styles include information about both how the font looks and what it means. Emphasis, for example, appears in italics, and screen readers read the word "emphasis" aloud for people who can't see the italics.
-
Use conventional capitalization. Long segments of capital letters are harder to read. In addition, screen readers do not read capital letters differently from lower-case letters, so the listener won't know what you meant.
Add headings to make your content easy to scan
Headings are important for accessibility in a document. Users tend to scan through web content and may only read deeply when the content is especially interesting. In addition, screen readers use headings to help people scan. Without headings, blind users have to listen to an entire webpage, word by word.
-
To open the Editing ribbon and to enter Edit mode, on the page you want to edit, select the Edit link.
-
Select the text you want to use as a heading.
-
Open the Styles group, and select the heading level that you want.
Tip: Headings are hierarchical. The Heading 1 style is the most important in the document and is generally the top heading. Heading 2 is the secondary level. Heading 3 can be used for subheadings and is always preceded in the document by at least one heading with the Heading 2 style applied.
-
When you finish, select Save.
Note: Use headings to create a table of contents so that screen reader users can easily scan the page.
Add tables and make them accessible
Tables are a great way to organize information on a page. It's easy to make sure that your tables are set up to provide helpful context for screen readers, such as column headings or table captions.
-
To open the Editing ribbon and to enter Edit mode, select the Edit link.
-
Place the focus where you want the table to appear.
-
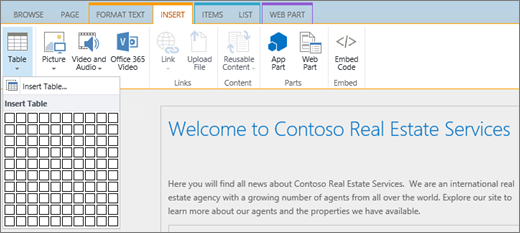
From the Insert tab, open the Table group and select the number of rows and columns you want in your new table. After you click the final box, a table of the specified size appears on your page.
-
Place the focus in the upper-left row of your new table, and select the Design tab.
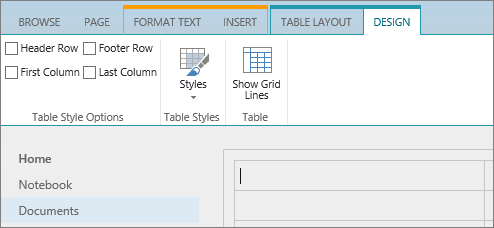
Note: The Design tab is only visible when your cursor is in a designable element, such as a table.
-
Select the Header Row check box.
Note: To make your table easier to read, use a colored-line style or show grid lines. These options are both available on the Design tab.
-
When you finish, select Save.
Accessibility notes for tables
-
Always designate a header row, and put labels in each column. If appropriate, you can also designate a First Column.
-
Table headers should not be empty.
-
Add a brief table description as a caption.
-
Just like fonts, use proportional sizing (percentages) instead of absolute sizing for column widths and row heights. Don't use pixel or point values. . If users view your site via a mobile device or if they zoom in on your site to better see details, pixel or point values keep an element frozen at the defined size.
Add accessible hyperlinks
-
To open the Editing ribbon and to enter Edit mode, select the Edit link.
-
Place the focus where you want the hyperlink to appear.
-
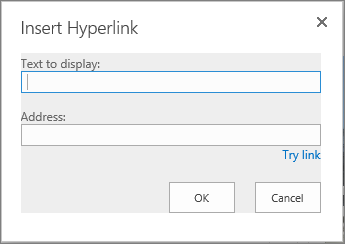
To open the Insert Hyperlink dialog box, from the Insert tab, select Link and From Address, or press Ctrl+K.
-
In the Text to display field, type the destination of the link.
Tip: The link text is often the website name or page title. Link display text should be meaningful in any context and should never be something like Click here.
-
In the Address field, type or paste the URL.
Tip: To make sure the link works like you want it to, select Try link.
-
When you finish, select OK.
Related information
Resources for creating accessible sites in SharePoint Online
After you create your SharePoint site using accessibility features, use correct formatting, styles, and alternative descriptions to keep your site accessible.
Note: When you use SharePoint, we recommend that you use Microsoft Edge as your browser.
In this topic
Add and format text
Your SharePoint site already contains some basic elements, such as a Search bar and a Documents area. It's very easy to add your own content to a SharePoint site.
-
To enter the Edit mode, on the page you want to edit, select the Edit link.

-
To add text to an existing web part, place the focus in it and then select the Edit Web Part button.

-
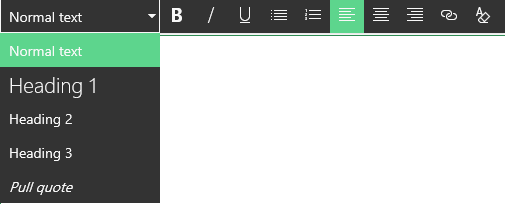
To select a format for your text, open the Rich Text Editor.

-
Select the style that you want to use, place the focus in the edit area, and start typing.
Some accessibility notes
-
Use simple fonts, and use no more than two or three font faces.
-
Do not set a fixed font size. Setting a fixed size can interfere with other elements on the screen, especially if someone makes the screen larger or smaller. For example, it can be a problem with screen layout, because text lines can overlap columns, or text can disappear.
-
Avoid using bold, italic, and underline font variations, if possible. Instead, choose an option from the Styles group. Options from Styles include information about both how the font looks and what it means.
-
Use conventional capitalization. Long segments of capital letters are harder to read. In addition, screen readers do not read capital letters differently from lower-case letters, so the listener doesn't know what you meant.
Add headings to make your content easy to scan
Headings are important for accessibility in a document. Users tend to scan through web content and may only read carefully when the content is especially interesting. In addition, screen readers use headings to help people scan. Without headings, people using screen readers have to listen to an entire webpage, word by word.
-
Select the Edit link on the page you wish to edit.
-
Select the text you want to use as a heading.
-
Open the Styles menu, and select the heading level that you want.

Tip: Headings are hierarchical. The Heading 1 style is the most important in the document and is generally the top heading. Heading 2 is the secondary level. Heading 3 can be used for subheadings and is always preceded in the document by at least one heading using the Heading 2 style.
Note: Use headings to create a table of contents so that screen reader users can easily scan the page.
Add layout sections and make them accessible
Layout sections are a great way to organize information on a page. The sections are easily accessible by assigning headings to text sections and captions to images and other media.
-
To add a layout section, select the Edit link.
-
Place the focus where you want to add the table.
-
Select the Add a new section or web part link.

-
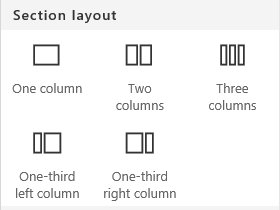
Select the section layout you want to use.
-
Add content to each section by selecting the Add a new web part link.

Add accessible hyperlinks
-
Select the Edit link of the section where you want to add the hyperlink.
-
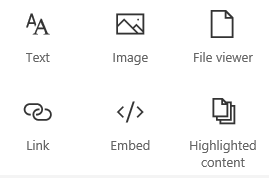
Select the Add a new web part link.

-
Select Link in the Web Part menu.
-
Insert the address of the destination link.

-
In the Address field, type or paste the URL.
Tip: Check the link preview to make sure that it is clear for people who use screen readers to use your site.
ReplyDeleteI never thought it was possible to recover stolen cryptocurrency due to my past experience trying to recover $228k that was stolen from my usdt w.a.l.l.e.t; until I read an article on this webpage www.thedailychargeback.com , I summited all documents needed to carryout the recovery operation, they successfully recover $205k from what I lost, I advice anyone having problems with lost or stolen cryptocurrency issues to reach to them.