Add different page numbers or number formats to different sections
Let's say you want to use different page numbers or number formats and styles in different parts of your document. You could use page numbers such as i, ii, iii… for the introduction and table of contents and 1, 2, 3… for everything after. The trick is to divide the document into sections and to make sure those sections aren't linked. Then, set the page numbering for each of those sections by following these steps.
Notes:
-
If you're using Word Online, you can add page breaks but not section breaks. If you have the Word desktop application, use the Open in Word command to open the document. When you're done and you save the document, it will continue to be stored where you opened it in Word Online. If you don't have Word, you can try or buy it in the latest version of Office now.
-
Click at the very beginning of the first page where you want to start, stop, or change page numbering.
-
Choose Layout (or Page Layout) > Breaks > Next Page.

Tip: You might find it helpful to see section breaks and other formatting marks as you type. On the Home tab, in the Paragraph group, choose Show/Hide (¶) to turn on the display of formatting marks. Choose the button again to turn off the display.
-
On the page after the section break, double-click in the header (top of page) or footer (bottom of page) area where you want to display page numbers. This will open the Design tab under Header & Footer Tools.
-
Click Link to Previous to deselect the button and disconnect your header or footer from the header or footer in the previous section.
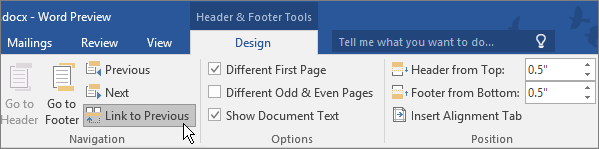
Note: If Link to Previous is dimmed, it means there is no section break between the page you're on and the previous page. Make sure you've successfully added a section break (see step 2) and that you've opened the header for the appropriate section.
-
In the Header & Footer group, click Page Number, pick a location, and then choose a style in the gallery.

Note: If your change only affects the first page of your section, make sure Different First Page is not selected. Double-click the header or footer area of the first page of the section, and look in the Options group on the Design tab.
-
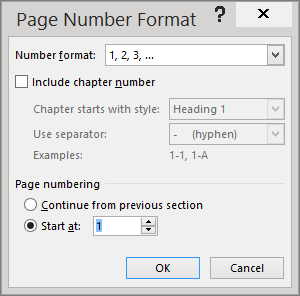
To choose a format or to control the starting number, in the Header & Footer group, choose Page Number > Format Page Numbers to open the Page Number Format dialog box.
-
Do either or both of the following:
-
Click Number format to select the format for the numbering, such as a, b, c or i, ii, iii.
-
Under Page numbering, choose Start at and type a number that you want to start the section with.
Tips:
-
If you just want to change or delete the first page number of a section, double-click to open the header or footer on that page, and in the Options group on the Design tab, click Different First Page. Then delete or format the first page number as you like.
-
You also can change the appearance of the page numbers. On the Home tab, choose Font, and change, for example, the font style and family, and font size and color.
-
-
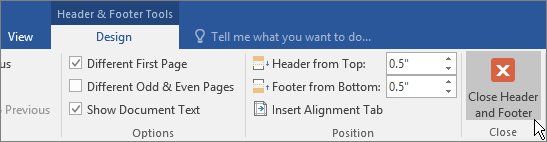
When you're done, choose the Close Header and Footer, or double-click anywhere outside the header or footer area to close it.
 .
.
No comments:
Post a Comment