Insert new cells, rows, or columns
Insert cells
When you insert blank cells, you can choose whether to shift other cells down or to the right to accommodate the new cells. Cell references automatically adjust to match the location of the shifted cells.
-
Select the cell, or the range of cells, to the right or above where you want to insert additional cells.
Note: Select the same number of cells as you want to insert. For example, to insert five blank cells, select five cells.
-
Hold down CTRL, click the selected cells, then on the pop-up menu, click Insert.
-
On the Insert menu, select whether to shift the selected cells down or to the right of the newly inserted cells.
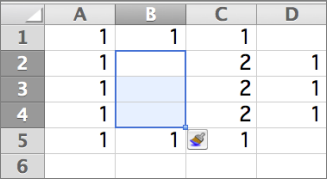
 Action that occurs when you shift cells right.
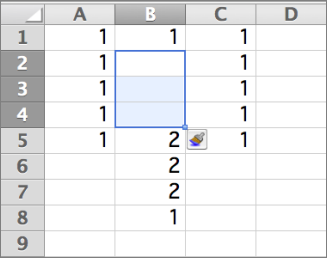
 Action that occurs when you shift cells down.
Tip: To insert cells that contain data, see Move or copy cells, rows, or columns.
Insert rows or columns
When you insert additional rows or columns, they appear above or to the left of the selected cell on your sheet. Cell references automatically adjust to match the location of the shifted cells.
-
Select the heading of the row above where you want to insert additional rows; likewise, select the heading of the column to the right of which you want to insert additional columns.
Note: Select the same number of rows or columns as you want to insert. For example, to insert five blank rows, select five rows. It's okay if the rows contain data, because it will insert the rows above these rows. If you're inserting columns, it will insert them to the left.
-
Hold down CTRL, click the selected rows or columns, then on the pop-up menu, click Insert.
Tip: To insert rows or columns that contain data, see Move or copy cells, rows, or columns.
No comments:
Post a Comment