Add a picture to a SmartArt graphic
Pictures or images can be an integral part of creating a compelling document, worksheet, or presentation, and it is easy to insert a picture into your SmartArt graphic. For help with creating a SmartArt graphic in the Picture Organization Chart layout, see Create an organization chart with pictures.
In this article
Overview of adding pictures
A fill is the interior of a shape. You can add a picture fill to any shape, and some shapes in SmartArt graphics are designed to be placeholders for pictures. By using a layout with a picture placeholder shape, you can obtain a more professional-looking SmartArt graphic, because picture placeholders are designed to work well with an entire SmartArt graphic.
You can add a picture to an individual shape, or you can add a picture to the entire background of your SmartArt graphic. Most shapes contain a placeholder for text that reads [Text]. When you add a picture to a shape that contains a placeholder for text, the placeholder for text remains in the shape. The placeholder for text will not print or display in a presentation. To remove the placeholder for text from a shape so that it does not appear when you are editing your SmartArt graphic, click the shape, type some text, click outside the shape, and then click the shape again and delete the text that you added.
Picture placeholders cannot be deleted, but you can apply a fill to make them invisible. If you add a picture and then later delete it, the picture placeholder returns. Picture placeholders cannot be copied, are not printed, and are not displayed in a presentation.
Not all SmartArt graphics have picture placeholders. If you choose a layout that does not have a picture placeholder, you can add a picture fill to the shape or switch to another layout.

Insert a picture into a picture placeholder
-
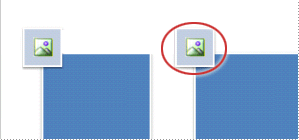
Click the picture placeholder inside the shape in the SmartArt graphic.
 Picture placeholder shape
 -
Locate the folder that contains the picture that you want to use, click the picture file, and then click Insert.
-
To edit the properties of the picture after you've inserted it, right-click the picture, click Format Shape, and do any of the following:
-
In the Picture window, adjust the color, brightness, or contrast.
-
Click Fill, and in the Fill window, adjust the stretch or transparency options.
-
Note: To add more than one picture to a single SmartArt graphic shape, group the pictures into a single picture that you save or copy before adding.
Add a picture fill to a shape
-
Click the shape in the SmartArt graphic that you want to add a picture fill to.
To add the same fill to multiple shapes, select the first shape, and then press and hold CTRL while you select the other shapes.
-
Under SmartArt Tools, on the Format tab, in the Shape Styles group, click the arrow next to Shape Fill.

If you don't see the SmartArt Tools or Format tabs, make sure that you've selected a SmartArt graphic.
-
Click Picture, locate the folder that contains the picture that you want to use, click the picture file, and then click Insert.
Note: When you select multiple shapes and apply a picture fill, each shape will be filled with the whole picture. The picture will not span the selected shapes.
-
To center, stretch, or shrink the picture, adjust the Stretch options.
-
To specify how much you can see through the picture, move the Transparency slider, or enter a number in the box next to the slider.
Note: To add more than one picture to a single SmartArt graphic shape, group the pictures into a single picture that you save or copy before adding.
Add a picture that you copied to a shape
-
Copy the image or picture that you want to use.
-
Click the shape in the SmartArt graphic that you want to paste the picture into.
To add the same picture to multiple shapes, select the first shape, and then press and hold CTRL while you select the other shapes.
-
On the Home tab, in the Clipboard group, click Paste.
-
To center, stretch, or shrink the picture, adjust the Stretch options.
-
To specify how much you can see through the picture, move the Transparency slider, or enter a number in the box next to the slider.
Note: To add more than one picture to a single SmartArt graphic shape, group the pictures into a single picture that you save or copy before adding.
Add a background picture to your SmartArt graphic
-
Right-click the border of the SmartArt graphic that you want to add a background picture to, and then click Format Object.
-
Click Fill, and then click Picture or texture fill.
-
Under Insert from, click one of the following:
-
To insert a picture from a file, click File, locate the folder that contains the picture that you want to use, click the picture file, and then click Insert.
-
To insert a picture that you copied to the Clipboard, click Clipboard.
-
-
To center, stretch, or shrink the picture, adjust the Stretch options.
-
To specify how much you can see through the picture, move the Transparency slider, or enter a number in the box next to the slider.
-
In the Format Shape dialog box, click Close.
Note: To add more than one picture to a single SmartArt graphic shape, group the pictures into a single picture that you save or copy before adding.
No comments:
Post a Comment