Add a gradient fill to a shape
You can apply a gradient fill to shapes, text boxes, and SmartArt graphics in Excel, PowerPoint, and Word. A gradient fill is a shape fill that gradually changes from one color to another across the surface of the shape.
For more information about how to add a shape, see Add, change, or delete shapes.
In this article
Overview of gradient fills
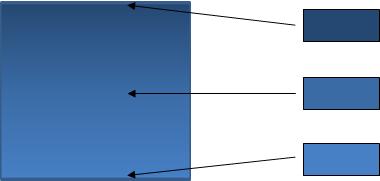
A gradient fill is a gradual blending together of two or more fill colors.

A shape fill that gradually changes between three colors
A gradient can be a simple light or dark variation of the shape's current fill color, just like the example above. As well, you can choose from one of the many built-in gradient fills or even create your own, customized gradient fill.

An example of the built-in Horizon gradient fill

An example of a custom gradient fill
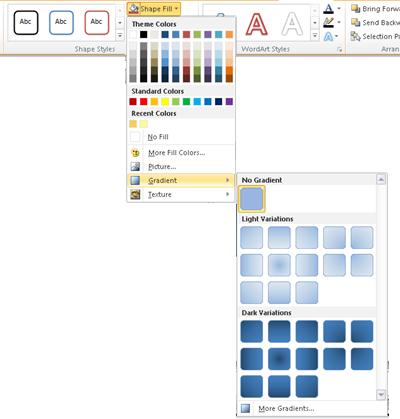
Apply a simple gradient to your shape
-
Select the shape that you want to apply a gradient fill to.
Note: The following steps work best if the shape already has a solid fill color that you like.
-
Under Drawing Tools, on the Format tab, in the Shape Styles group, click Shape Fill, point to Gradient, and then select the gradient that you want.

If you do not see the Drawing Tools or Format tabs, make sure that you have selected the shape. You might have to double-click the shape to open the Format tab.

Apply a built-in gradient to your shape
-
Select the shape that you want to apply a gradient fill to.
-
Under Drawing Tools, on the Format tab, in the Shape Styles group, click Shape Fill, point to Gradient, and then select More Gradients.

If you do not see the Drawing Tools or Format tabs, make sure that you have selected the shape. You might have to double-click the shape to open the Format tab.

-
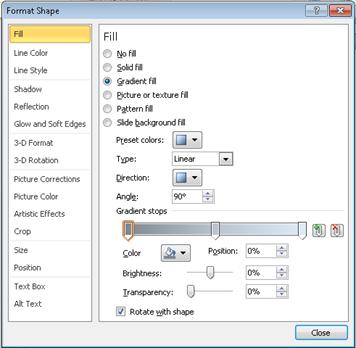
In the Format Shape dialog box, on the Fill tab, select the Gradient fill check box.

-
In the Preset colors list, select the gradient that you want.
Create a custom gradient fill for your shape
-
Select the shape that you want to apply a gradient fill to.
-
Under Drawing Tools, on the Format tab, in the Shape Styles group, click Shape Fill, point to Gradient, and then select More Gradients.

If you do not see the Drawing Tools or Format tabs, make sure that you have selected the shape. You might have to double-click the shape to open the Format tab.

-
In the Format Shape dialog box, on the Fill tab, select the Gradient fill check box.

-
In the Type list, select the type of gradient that you want.
-
In the Direction list, select the direction that you want for the gradient.
-
Under Gradient stops, click Add gradient stops
 or Remove gradient stops
  until you have a stop for each color that you want in your gradient fill.
Notes:
-
A "stop" is the specific point where the blending of two adjacent colors in a gradient ends.
-
The maximum number of stops that can be set is 10. The minimum number of stops that can be set is 2.
-
-
Do the following for each of the fill colors that you want in your gradient:
-
Click one of the stops.
-
In the Color list, select the color that you want.
-
In the Position box, type the position that you want.
-
If you want, you can adjust the Brightness or Transparency of the color.
-
-
When you have finished customizing the gradient fill, click Close.
Tip: If you want to rotate the shape and you also want the direction of the gradient fill to remain relative to the orientation of the shape, select the Rotate with shape check box.
No comments:
Post a Comment