Why is some text highlighted in a shared notebook in OneNote 2016 for Windows?
When you work in a shared notebook, and someone else adds content, the titles of the workbooks, sections, and pages that changed become bold and the new content on each page is highlighted. This formatting lets you know there are updates to review and makes it easier to find the changes.

Note: This highlighting is different from the text highlighter you can apply to text from the Home tab, even though it looks similar.
When you click a page, the bolding and automatic highlighting disappears, to show that you've reviewed it. However, you don't have to click through each section or page one at a time to remove the highlights. You can mark sections and notebooks as read to remove the bolding and highlights at the same time.
To mark a section as read:
-
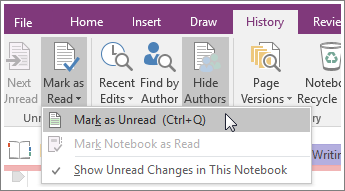
Click the section tab with unread content, and click History > Mark as Read.
-
Select Mark as Read.

To mark the entire notebook as read, click History > Mark as Read > Mark Notebook as Read.
Tip: If you want to reapply the bold and highlighting on a page, as a reminder to look at it later, click Mark as Read > Mark as Unread.
When reviewing other peoples' changes, you can also see a list of changes in a shared notebook and see other authors' initials listed next their changes.
No comments:
Post a Comment