Shape basics
In a Microsoft Office Visio drawing, shapes represent both objects and concepts. A Visio shape can be as simple as a line or as complex as a calendar. A Visio shape can be one-dimensional (1-D) or two-dimensional (2-D). A 1-D shape behaves like a line, while a 2-D shape behaves like a rectangle.
Note: Some shapes have custom behavior appropriate to their drawing types and do not behave exactly as described here.
Select a shape
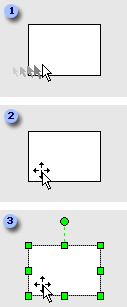
To select one shape:  Position the pointer over the shape.
  When the pointer changes to a four-headed arrow, click the shape.
  The selected shape displays selection handles.
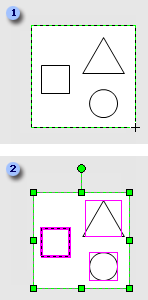
To select multiple shapes:  Click the Pointer tool
  , and then drag a selection net around all the shapes that you want to select, or hold down the SHIFT key and click each shape.
  The selected shapes are outlined in purple and the group displays selection handles.
Notes:
-
To quickly select all shapes on the page, on the Edit menu, click Select All.
-
To cancel the selection of one of several selected shapes, hold down SHIFT and click the specific shape.
Move a shape
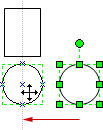
To move a shape: Position the pointer over the shape. When the pointer changes to a four-headed arrow, hold down the mouse button and drag the shape.

To align a shape with another shape, use dynamic grid lines.
Notes:
-
To turn on the dynamic grid, on the Tools menu, click Snap & Glue. Click the General tab, select the Dynamic grid check box, and then click OK.
-
To nudge a shape, click to select it, and then press an arrow key. To nudge a shape exactly one pixel, hold down SHIFT and press an arrow key.
Add text to a shape
To add text to a shape:  Select the shape.
  Type the text.
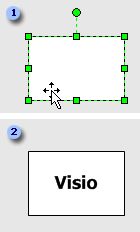
Note: If you haven't already zoomed in on the shape, Visio zooms in when you type. To zoom out again, click outside the shape.
Edit text on a shape
To edit text on a shape:  Click to select the shape.
  Click the Text tool.
  Type the new text.
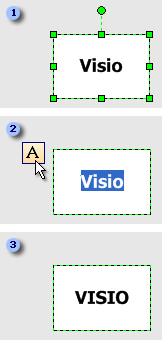
Note: To change the way shape text looks, click to select the shape, point to the Format menu, click Text, and then select the formatting options you want.
Resize a shape
To change the width or length of a shape:  Position the pointer over a side selection handle.
  When the pointer changes to a two-headed arrow, drag the selection handle.

The width and height of the selected shape appear in the status bar at the bottom of the Visio window.
Note: You can also resize a shape in the Size & Position window. On the View menu, click Size & Position Window. Select the shape you want to resize, and then type the width and height values you want.
To resize a shape while maintaining its proportions:  Position the pointer over a corner selection handle.
  Drag the selection handle.
  Drag any selection handle on a perfect circle or square to resize the shape proportionally.

Format a shape
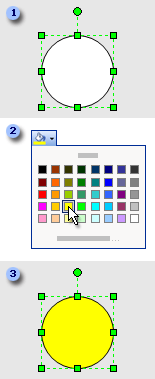
To format a shape:  Click to select the shape.
  Click Fill Color, Line Color, Line Weight, or other buttons on the Format toolbar.
  Your shape reflects the changes you made.
Rotate a shape
To rotate a shape:  Click to select the shape and then move the pointer over the rotation handle
  until your pointer becomes a circle
  .
.  Drag the handle to the rotation you want.
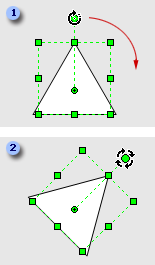
To rotate a shape by a fixed amount:  Click to select the shape.
  On the View menu, click Size & Position Window.
  In the Angle box, type the angle you want, and then press Enter.

Copy a shape
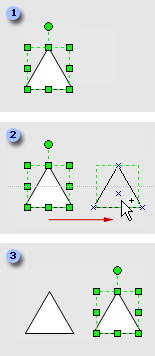
To copy a shape:  Click to select the shape.
  Hold down the CTRL key and drag to place the copy where you want it.
  Release the mouse button.
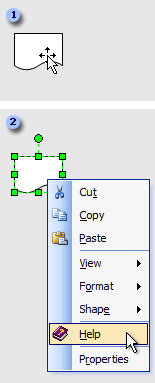
See more shape commands
To see more shape commands:  Place your pointer over a shape.
  Right-click the shape.
Some shapes have control handles that you can use to modify the shape. Each control handle has a function unique to the shape on which it appears.  Click to select the shape and place the pointer over the control handle
  .
.  Drag the control handle.
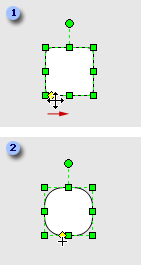
Note: To display a control handle tip, pause the pointer over the control handle.
Zoom in or out
To zoom in on a drawing, click the arrow next to the Zoom box and click a setting. You can also zoom in on an area by holding down CTRL+SHIFT and dragging a selection net around the area you want to magnify.

No comments:
Post a Comment