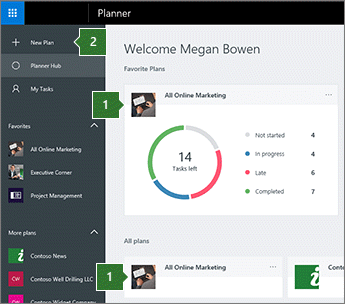
Sign in to Planner, and you'll see a plan for each of your Microsoft 365 Groups.
To get started
-
Select a plan under Favorite plans or All plans.
OR
-
Start a new plan by choosing New plan.
New plan, new group
When you create a plan, a Microsoft 365 group is created to support your plan. Microsoft 365 groups make it easy for you and the people you're working with to collaborate not only in Planner, but also in OneNote, Outlook, OneDrive, and more.
To create a new plan and group
-
Name your plan.
-
Choose whether to create a new group or add your plan to an existing group (see the next set of steps).
-
Choose who can see your plan.
-
Select Options to add a description.
-
Select Create plan.

Note: What's the difference between "public" and "private"? Public plans are visible by everyone in your organization. Private plans are only visible by people you've added to the plan. When people in your organization search for plans, only public plans come up in search results. Remember that when you make a plan public or private, you also make the Office 365 Group public or private. Learn more.
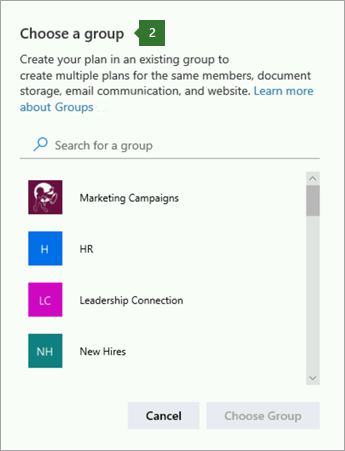
Add a plan to an existing group
You can also add a plan to the same members, document library, and other group features you're already using.

-
Name your plan, and then select Add to an existing Office 365 Group.
-
On the Choose a group page, either search for or select a group from the list.
-
Select Choose Group.
-
Select Create plan.
What should I do next?
After you've created a plan, you can add tasks to list the work that needs to get done.
No comments:
Post a Comment