Manage Office 365 Groups with PowerShell
Last updated 18 April, 2018
This article provides the steps for doing common management tasks for Groups in Microsoft PowerShell. It also lists the PowerShell cmdlets for Groups. For info about managing SharePoint sites, see Manage SharePoint Online sites using PowerShell.
Common tasks for managing Office 365 Groups
-
Add hundreds or thousands of users to Office 365 groups, use the Add-UnifiedGroupLinks cmdlet.
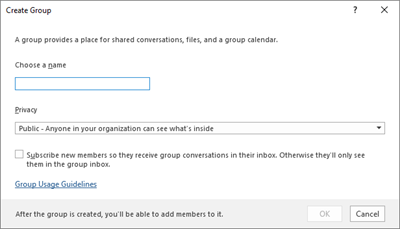
Link to your Office 365 Groups usage guidelines
When users create or edit a group in Outlook, you can show them a link to your organization's usage guidelines. For example, if you require a specific prefix or suffix to be added to a group name.
Use the Azure Active Directory PowerShell to point your users to your organization's usage guidelines for Office 365 groups. Check out Azure Active Directory cmdlets for configuring group settings and follow the steps in the Create settings at the directory level to define the usage guideline hyperlink. Once you run the AAD cmdlet, user's will see the link to your guidelines when they create or edit a group in Outlook.
Allow users to Send as the Office 365 Group
You can also do this in the Exchange Admin Center. See Allow members to "Send as" or "Send on behalf of" an Office 365 Group.
If you want to enable your Office 365 groups to "Send As", use the Add-RecipientPermission and the Get-RecipientPermission cmdlets to configure this. Once you enable this setting, Office 365 group users can use Outlook or Outlook on the web to send and reply to email as the Office 365 group. Users can go to the group, create a new email, and change the "Send As" field to the group's email address.
Note: You'll need to add the group email address to the Cc field when you compose the "send as" email, so that the message is sent to the Group and appears in group conversations.
At this time, the only way to update the mailbox policy is through PowerShell.
-
Use this command to set the group alias.
$groupAlias = "TestSendAs"
-
Use this command to set the user alias.
$userAlias = "User"
-
Use this command to pass the groupalias to the Get-Recipient cmdlet to get the recipient details.
$groupsRecipientDetails = Get-Recipient -RecipientTypeDetails groupmailbox -Identity $groupAlias
-
Then the target recipient name (Group name) needs to be passed to the Add-RecipientPermission cmdlet. The useralias for whom the sendas permission will be given will be assigned to the -Trustee parameter.
Add-RecipientPermission -Identity $groupsRecipientDetails.Name -Trustee $userAlias -AccessRights SendAs
-
Once the cmdlet is executed, users can go to Outlook or Outlook on the web to send as the group, by adding the group email address to the From field.
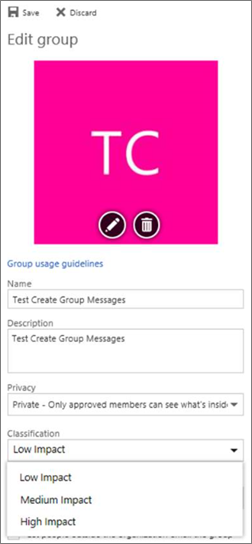
Create classifications for Office groups in your organization
You can create classifications that the users in your organization can set when they create an Office 365 group. For example, you can allow users to set "Standard", "Secret", and "Top Secret" on groups they create. Group classifications aren't set by default and you need to create it in order for your users to set it. Use Azure Active Directory PowerShell to point your users to your organization's usage guidelines for Office 365 groups.
Check out Azure Active Directory cmdlets for configuring group settings and follow the steps in the Create settings at the directory level to define the classification for Office 365 groups.
$setting["ClassificationList"] = "Low Impact, Medium Impact, High Impact"
In order to associate a description to each classification you can use the settings attribute ClassificationDescriptions to define.
$setting["ClassificationDescriptions"] ="Classification:Description,Classification:Description", where Classification matches the strings in the ClassificationList.
For example:
$setting["ClassificationDescriptions"] = "Low Impact: General communication, Medium Impact: Company internal data , High Impact: Data that has regulatory requirements"
After you run the above Azure Active Directory cmdlet to set your classification, run the Set-UnifiedGroup cmdlet if you want to set the classification for a specific group.
Set-UnifiedGroup <LowImpactGroup@constoso.com> -Classification <LowImpact>
Or create a new group with a classification.
New-UnifiedGroup <HighImpactGroup@constoso.com> -Classification <HighImpact> -AccessType <Public>
Check out Using PowerShell with Exchange Online and Connect to Exchange Online PowerShell for more details on using Exchange Online PowerShell.
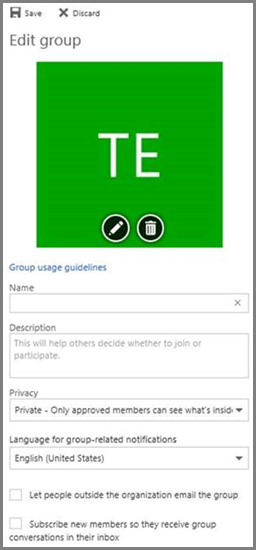
Once these settings are enabled, the group owner will be able to choose a classification from the drop down menu in Outlook on the Web and Outlook, and save it from the Edit group page.
Hide Office 365 Groups from GAL
You can specify whether a Office 365 group appears in the global address list (GAL) and other lists in your organization. For example, if you have a legal department group that you don't want to show up in the address list, you can stop that group from appearing in GAL. Run the Set-Unified Group commandlet to hide the group from address list like this:
Set-UnifiedGroup -Identity "Legal Department" -HiddenFromAddressListsEnabled $true
Allow only internal users to send message to Office 365 group
If you don't want users from other organization to send email to a Office 365 group, you can change the settings for that group. It will allow only internal users to send an email to your group. If external user try to send message to that group they will be rejected.
Run the Set-UnifiedGroup commandlet to update this setting, like this:
Set-UnifiedGroup -Identity "Internal senders only" - RequireSenderAuthenticationEnabled $true
Add MailTips to the Office 365 Groups
Whenever a sender tries to send an email to an Office 365 group, a MailTip can be shown to him.
Run the Set-Unified Group commandlet to add a mailTip to the group:
Set-UnifiedGroup -Identity "MailTip Group" -MailTip "This group has a MailTip"
Along with MailTip, you can also set MailTipTranslations, which specifies additional languages fro the MailTip. Suppose you want to have the Spanish translation, then run the following command:
Set-UnifiedGroup -Identity "MailaTip Group" -MailTip "This group has a MailTip" -MailTipTranslations "@{Add="ES:Esta caja no se supervisa." Change Display name of the Office 365 group
Display name specifies the name of the Office 365 group. You can see this name in your exchange admin center or o365 admin portal. You can edit the display name of the group or assign a display name to an exisiting Office 365 group by running Set-UnifiedGroup command:
Set-UnifiedGroup -Identity "mygroup@contoso.com" -DisplayName "My new group"
Manage user photos in Office 365 Groups
| Cmdlet name | Description |
|---|---|
| Used to view information about the user photo associated with an account. User photos are stored in Active Directory | |
| Used to associate a user photo with an account. User photos are stored in Active Directory | |
| Remove the photo for an Office 365 group |
Change the default setting of Office 365 Groups for Outlook to Public or Private
Office 365 Groups in Outlook are created as Private by default. If your organization wants Office 365 Groups for Outlook to be created as Public by default (or back to Private), use this PowerShell cmdlet syntax:
Set-OrganizationConfig -DefaultGroupAccessType Public
To set to Private:
Set-OrganizationConfig -DefaultGroupAccessType Private
To verify the setting:
Get-OrganizationConfig | ft DefaultGroupAccessType
To learn more, see Set-OrganizationConfig and Get-OrganizationConfig.
Office 365 Groups cmdlets
The following cmdlets were recently made available to Office 365 Groups. If you aren't able to use these, your Office 365 subscription has not been updated with this functionality yet. Check your Message Center and the Office 365 Roadmap.
| Cmdlet name | Description |
|---|---|
| Use this cmdlet to look up existing Office 365 Groups, and to view properties of the group object | |
| Update the properties of a specific Office 365 Group | |
| Create a new Office 365 group. This cmdlet provides a minimal set of parameters, for setting values for extended properties use Set-UnifiedGroup after creating the new group | |
| Delete an existing Office 365 Group | |
| Retrieve membership and owner information for an Office 365 Group | |
| Add hundred or thousands of users, or new owners, to an existing Office 365 Group | |
| Remove owners and members from an existing Office 365 Group |
| |
 New to Office 365?
No comments:
Post a Comment