Mail merge: Insert Merge Field
In this article
About mail merge fields
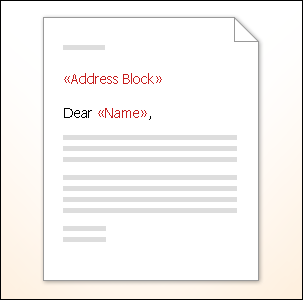
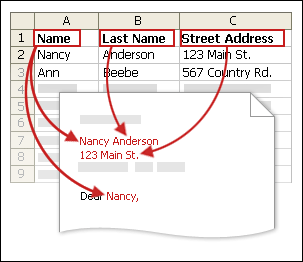
The placeholders, such as address and greeting, are called mail merge fields. Fields in Word correspond to the column headings in the data file that you select.

1. Columns in a data file represent categories of information. Fields that you add to the main document are placeholders for these categories.
2. Rows in a data file represent records of information. Word generates a copy of the main document for each record when you perform a mail merge.
By putting a field in your main document, you indicate that you want a certain category of information, such as name or address, to appear in that location.

Note: When you insert a mail merge field into the main document, the field name is always surrounded by chevrons (« »). These chevrons do not show up in the merged documents. They just help you distinguish the fields in the main document from the regular text.
When you merge, information from the first row in the data file replaces the fields in your main document to create the first merged document. Information from the second row in the data file replaces the fields to create the second merged document, and so on.

Add the fields, or placeholders
-
In the main document, type any content that you want to appear on every copy of the document.
To add a picture, such as a logo, click Picture in the Illustrations group on the Insert tab.
-
Click where you want to insert the field.
-
Use the Write & Insert Fields group on the Mailings tab.

-
Add any of the following:
Address block with name, address, and other information
-
Click Address block.
-
In the Insert Address Block dialog box, select the address elements that you want to include and the formats that you want, and then click OK.
-
If the Match Fields dialog box appears, Word may have been unable to find some of the information that it needs for the address block. Click the arrow next to (not matched), and then select the field from your data source that corresponds to the field that is required for the mail merge.
Greeting line
-
Click Greeting line.
-
Select the greeting line format, which includes the salutation, name format, and following punctuation.
-
Select the text that you want to appear in cases where Microsoft Word can't interpret the recipient's name, for example, when the data source contains no first or last name for a recipient, but only a company name.
-
Click OK.
-
If the Match Fields dialog box appears, Word may have been unable to find some of the information that it needs for the greeting line. Click the arrow next to (not matched), and then select the field from your data source that corresponds to the field that is required for the mail merge.
Individual fields
You can insert information from individual fields, such as first name, telephone number, or the amount of a contribution from a list of donors. To quickly add a field from your data file to the main document, click the arrow next to Insert Merge Field, and then click the field name.
For more options with inserting individual fields in the document, do the following:
-
On the Mailings tab, in the Write & Insert Fields group, click Insert Merge Field.
-
In the Insert Merge Field dialog box, do one of the following:
-
To select address fields that will automatically correspond to fields in your data source, even if the data source's fields don't have the same name as your fields, click Address Fields.
-
To select fields that always take data directly from a column in your data file, click Database Fields.
-
-
In the Fields box, click the field you want.
-
Click Insert, and then click Close.
-
If the Match Fields dialog box appears, Microsoft Word may have been unable to find some of the information it needs to insert the field. Click the arrow next to (not matched), and then select the field from your data source that corresponds to the field that is required for the mail merge.
Note: If you insert a field from the Database Fields list and then later switch to a data source that doesn't have a column with the same name, Word won't be able to insert that field information into the merged document.
-
No comments:
Post a Comment