Attach files in Outlook.com
You can attach files from your computer, OneDrive, or other storage account to email messages and calendar events and share them with others. You can also embed pictures in your email messages and calendar events.
Choose your version for instructions
The instructions are slightly different depending on whether or not you're using the Outlook.com beta. Choose which version of Outlook.com you're using to see the instructions that apply to you.
| IF YOUR MAILBOX LOOKS LIKE... | IF YOUR MAILBOX LOOKS LIKE... |
|---|---|
| | |
Instructions for the Outlook.com beta
Attach files from your computer
When you attach a file from your computer, you're attaching a copy of the file. Each recipient will get their own copy of the file.
Note: The attachment size limit for local files is 34 MB.
-
At the bottom of a message or calendar event, select
 > Computer.
-
Choose the local file you want to attach, and select Open.
Share files from OneDrive
You can also share a file from OneDrive. This way, your recipients can collaborate on it in real time.
Note: The attachment size limit for OneDrive files is 2GB.
-
At the bottom of a message or calendar event, select
 > Cloud locations.
-
Choose the file or folder you want to share and select Next. Double-click folders to open them.
-
Select Share as a OneDrive link.
-
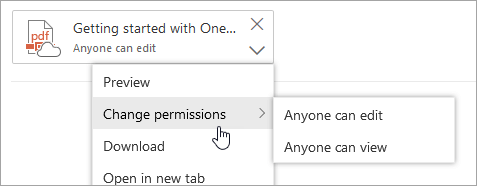
Choose if people can edit the file or only view it. Select
 > Change permissions.
Share files from another cloud storage account
You can also share files from other storage accounts. Anyone you share the file with can see the latest changes. See Use a storage account with Outlook.com for more information.
-
In a message or calendar event, select
 > Cloud locations.
-
Select the storage account from which you want to share the file. You can add storage accounts by selecting Add an account.
-
Choose the file or folder you want to attach and select Next. Double-click folders to open them.
-
Select Share as a link.
Attach an email to another email
You can attach a message to another message in Outlook.com.
-
Open the message in a new window by selecting
 at the top right corner.
 -
Arrange the windows so you can see both the message list and your new message.
-
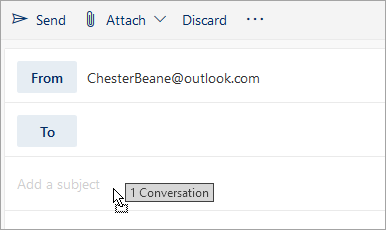
Select and drag the message you want to attach from the message list to your new message.
Attach a folder
You can't attach a copy of a folder in Outlook.com. However, you can share a folder in OneDrive.
-
Go to OneDrive.com, and sign in using the same email address and password you use for your Outlook.com account.
-
On your computer, open File Explorer
 and go to the folder you want to attach.
 -
Drag the folder into OneDrive.com.

-
Go to Outlook.com and create a new message or open a message from the message list.
-
Select
 > Cloud locations, choose the folder in OneDrive you want to attach, and select Next.
 -
Select Share as a OneDrive link.
IMPORTANT: By default, recipients will be able to edit the files in the folder. To change permissions so that recipients can only view the files:
-
Select
 > Change permissions > Anyone can view.
Download an attachment
-
Select the message that contains the attachment you want to download.
-
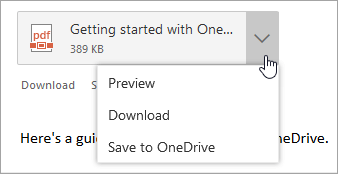
Next to the attachment, select
 .
.
-
Select Download.
Print an attachment
-
Open the message containing the attachment you want to print.
-
Select the attachment, and then select Download.
Caution: Don't open an attachment sent in an email message unless you trust the content and the person who sent it to you. Attachments are a common method for spreading computer viruses. In the email message, select Preview from the drop-down menu next to the attachment to view the contents of the attachment without opening it.
-
Open the attachment using its corresponding app or program, and then print. For example, open a .docx file in Word and then print.
Remove an attachment
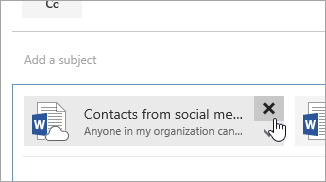
In the email message you're writing, select  at the top right corner of the attached file to delete it.
Insert pictures in an email message or calendar event
You can insert photos, gifs, or clipart from your computer or OneDrive as inline pictures in email messages, calendar events, or your email signature. Inline pictures are displayed in the body of the message or calendar event.
-
Open the message or calendar event.
-
Select the picture icon to insert a picture from your computer or OneDrive.

-
Choose the picture you want to insert and select Open.
-
Drag the corner handles to resize the image.
Note: Resizing an image doesn't reduce its file size. To learn how to reduce the file size of a picture, see Reduce the file size of a picture.
-
Right-click the image to see formatting options.
Instructions for classic Outlook.com
Attach files from your computer
When you attach a file from your computer, you're attaching a copy of the file. Each recipient will get their own copy of the file.
Note: The attachment size limit for local files is 34 MB.
-
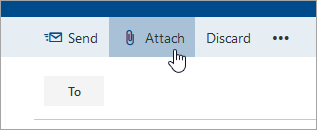
In a message or calendar event, select Attach at the top of the page.
-
Select Computer to choose the local file that you want to attach, and select Open.
Tip: Double-click folders to open them.
-
Select Attach as a copy.
Share files from OneDrive
You can also share a file from OneDrive. This way, your recipients can collaborate on it in real time.
Note: The attachment size limit for OneDrive files is 2GB.
-
In a message or calendar event, select Attach at the top of the page.

-
Under OneDrive - personal, select Files.
-
Choose the file or folder you want to share and select Next. Double-click folders to open them.
-
Select Share as a OneDrive link.
-
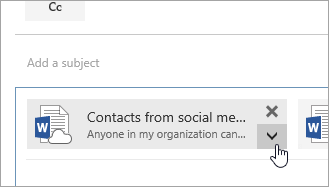
Choose if people can edit the file or only view it. Select
 > Change permissions.
Share files from another cloud storage account
You can also share files from other storage accounts. Anyone you share the file with can see the latest changes. See Use a storage account with Outlook.com for more information.
-
In a message or calendar event, select Attach at the top of the page.

-
Select the storage account from which you want to share the file. You can add storage accounts by choosing them on the left.
-
Choose the file or folder you want to attach and select Next. Double-click folders to open them.
-
Select Share as a link.
Attach an email to another email
You can attach a message to another message in Outlook.com.
-
Open the message in a new window by selecting
 at the top right corner.
Note: If you don't see
 , first try expanding the message by selecting
  at the top right corner.
 -
Arrange the windows so you can see both the message list and your new message.
-
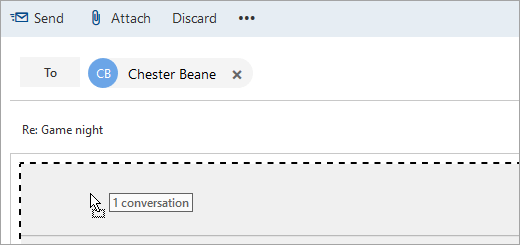
Select and drag the message you want to attach from the message list to your new message.
Attach a folder
You can't attach a copy of a folder in Outlook.com. However, you can share a folder in OneDrive.
-
Go to OneDrive.com, and sign in using the same email address and password you use for your Outlook.com account.
-
On your computer, open File Explorer
 and go to the folder you want to attach.
 -
Drag the folder into OneDrive.com.

-
Go to Outlook.com and create a new message or open a message from the message list.
-
Select Attach, choose the folder in OneDrive you want to attach, and then select Next.
-
Select Share as a OneDrive link.
IMPORTANT: By default, recipients will be able to edit the files in the folder. To change permissions so that recipients can only view the files:
-
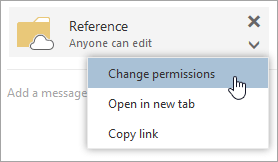
Select More actions > Change permissions.
-
Select Anyone can view, and then select OK.
Download an attachment
-
Select the message that contains the attachment you want to download.
-
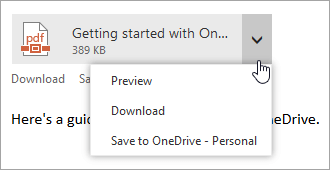
Next to the attachment, select
 .
.
-
Select Download.
Print an attachment
-
Open the message containing the attachment you want to print.
-
Select the attachment, and then select Download.
Caution: Don't open an attachment sent in an email message unless you trust the content and the person who sent it to you. Attachments are a common method for spreading computer viruses. In the email message, select Preview from the drop-down menu next to the attachment to view the contents of the attachment without opening it.
-
Open the attachment using its corresponding app or program, and then print. For example, open a .docx file in Word and then print.
Remove an attachment
In the email message you're writing, select  at the top right corner of the attached file to delete it.

Insert pictures in an email message or calendar event
You can insert photos, gifs, or clipart from your computer or OneDrive as inline pictures in email messages, calendar events, or your email signature. Inline pictures are displayed in the body of the message or calendar event.
-
Open the message or calendar event.
-
Select the picture icon to insert a picture from your computer or OneDrive.

-
Choose the picture you want to insert and select Open (if you chose a picture from your computer) or Insert (if you chose a picture from OneDrive).
-
Drag the corner handles to resize the image.
Note: Resizing an image doesn't reduce its file size. To learn how to reduce the file size of a picture, see Reduce the file size of a picture.
-
Right-click the image to see formatting options.
Tips for sending and receiving file attachments
-
If you reply to a message that has an attachment, the attachment won't be included in the reply.
-
Don't open an attachment sent in an email message unless you trust the content and the person who sent it to you. Attachments are a common method for spreading computer viruses. In the email message, select Preview from the drop-down menu next to the attachment to view the contents of the attachment without opening it.
-
Long file names of attachments might be shortened in Outlook.com. This won't affect the contents of the file.
-
You can only attach files to calendar events that you or a delegate created.
Error when you open a picture or other attachment
You might receive an error that says "We couldn't open the image file" or "access denied" when you try to open a picture or other attachment. This error could occur if you have a non-Microsoft email address as the primary email address on your account.
To resolve this issue, be sure to set your Microsoft email address as the primary email address.
-
Next to the alias you want to make your primary alias, select Make primary.
The alias has to be a Microsoft email address, such as one that ends with @outlook.com, @hotmail.com, or @live.com.
To learn more about managing your aliases, go to Manage aliases on your Microsoft account.


No comments:
Post a Comment