Add or remove protection in your document, workbook, or presentation
In Office, you can use a password to help prevent other people from opening or modifying your documents, workbooks, and presentations. Then you can easily remove passwords to unprotect a document or workbook if read only is no longer required. Also, you can use document protection to restrict the types of changes that reviewers can make.
Your IT administrators set password policy for the apps for Office that include basic rules.
Warning: It's important to know that if you don't remember your password Microsoft can't retrieve your forgotten passwords.
Add or remove a password to control access
To set a password on your Word, Excel or PowerPoint file click File > Info > Protect Document > Encrypt with Password. You'll be prompted to create a password, then to confirm it. After you've added a password to your file you'll want to be sure to save the file to make sure the password takes effect.
Important:
-
End Users: Keep your password in a safe place. If you lose or forget the password, it cannot be recovered or removed.
-
Enterprises: If you're concerned about losing access to password protected Office files in your enterprise, the DocRecrypt tool might be for you. Note that you have to deploy the DocRecrypt tool BEFORE the file in question is password protected. DocRecrypt can't retroactively recover files that were password protected before you deployed DocRecrypt. For more information see: Remove or reset file passwords using DocRecrypt.
After you've added a password to your file, that password will need to be entered before anybody can open the file.
To remove the password open the file, which will require the current password, go to File > Protect Document > Encrypt with Password. Delete the password and click OK. Be sure to save your file to make that change permanent.
Allow users to read your file, but control changes
In an open document, click File > Info > Protect Document. You'll see the following options.
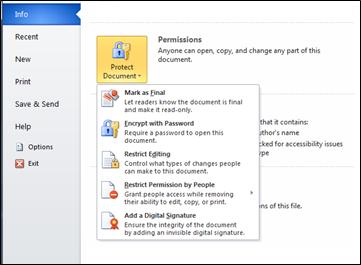
Mark as Final
Communicate that you're sharing a completed version of a file so that reviewers or readers are less likely to make inadvertent changes.
When a file is marked as final, typing, editing, commands, and proofing marks are disabled or turned off and the file becomes read-only.
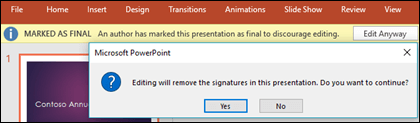
When you mark a document as final, Word asks you to save the file. The next time you open it, you will see a yellow MARKED AS FINAL message at the top of the document. If you click Edit Anyway, the document will no longer be marked as final.
Important: Mark as Final is not a security feature. Any user who opens the file will be able to click Edit Anyway if they wish to bypass this setting. Mark as Final simply notifies people who open the file that it should be considered final. If you want to enforce protection from editing you should use the Restrict Editing function described below.
Restrict Editing (Word Only)
Control what types of changes can be made to the document.
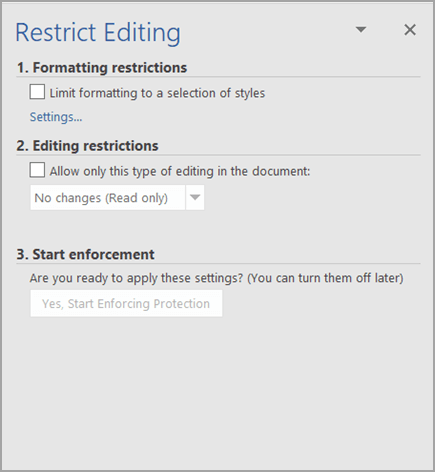
When you select Restrict Editing, you see these options:
-
Formatting restrictions This reduces formatting options, preserving the look and feel you've selected. Click Settings to select which styles are allowed.
-
Editing restrictions You control how the file can be edited or you can disable editing. Click Exceptions or More users to control those who can edit.
-
Towards the bottom of the pane you'll find Restrict Permission...: Use Windows Live ID to restrict permissions.
Use a Windows Live ID or a Microsoft Windows account to restrict permissions. You can apply permissions via a template that is used by your organization, or you can add permissions by clicking Restrict Access. To learn more about Information Rights Management see Information Rights Management in Office.
When you're ready to turn on the editing restrictions you've selected click Yes, Start Enforcing Protection to add a password or select user authentication.
Restrict Access
Lets you apply permissions via a template that is created by your organization. For more information on using Information Rights Management (IRM) to restrict access to your document see: Information Rights Management in Office.
Add a Digital Signature
Add an invisible digital signature that verifies the authenticity of the file.
Digital signatures authenticate digital information such as documents, email messages, and macros by using computer cryptology.
To learn about digital signatures, see Digital signatures and certificates.
Protect Individual Worksheets or Workbook Structure in your Excel spreadsheet
Microsoft Excel has a couple of additional items that you can lock down. You will also see these settings on File > Info > Protect Workbook.
-
Protect Current Sheet: To control what changes can be made to the currently selected worksheet choose Protect Current Sheet. You'll be prompted to enter, then confirm, a password for the sheet. You will also have the option to select what things users of the sheet should be allowed to do, such as selecting, formatting, inserting, deleting or making other changes to the sheet. Be sure to save the file after you set the password to ensure the new password is in place.
To remove this protection just go thru the same steps as above and enter the current password in the Password to unprotect sheet field. Be sure to save the file after removing the protection to ensure the sheet is now open for all users.
-
Protect Workbook Structure: By using the Protect Workbook Structure feature, you can select password protection and select options to prevent users from changing, moving, or deleting important data. When you select Protect Workbook Structure you'll be prompted to enter an optional password.
To remove this protection click Protect Workbook Structure again. If you didn't choose a password when you added the protection then the protection will just be removed without any further steps. If you did choose a password, Excel will prompt you for that password in the Unprotect Workbook dialog box.
Remove protection from your file
Remove Mark as Final
Open the file and you will see a yellow MARKED AS FINAL message at the top of the file. If you click Edit Anyway, the document will no longer be marked as final.
Remove editing restrictions
In the file, click File > Info > Protect Document > Restrict Editing and click Stop Protection at the bottom of the Restrict Editing pane.
Remove or change restricted access
To remove or change restricted access, open the file, and then click Change Permission in the yellow bar at the top of the document.
Remove digital signature
To remove a digital signature, open the file, and you'll see a notice in the yellow bar at the top indicating that the file has been marked as final. Click Edit Anyway and confirm the dialog box that says that editing will remove the signatures from the document.
Click the headings below for more information
Let reviewers insert comments and tracked changes
-
On the Review tab, in the Protect group, click Protect Document, and then click Restrict Formatting and Editing.

-
In the Protect Document task pane, under Formatting restrictions, select the Limit formatting to a selection of styles check box, and then click Settings to specify which styles a reviewer can apply or change.
-
Under Editing restrictions, select the Allow only this type of editing in the document check box.
-
In the list of editing restrictions, click Tracked changes. (This includes comments as well as insertions, deletions, and moved text.)
Note: For a different set of protection features use Active Directory directory service, click Restrict Permission to use Information Rights Management.
-
Under Start enforcement, click Yes, Start Enforcing Protection.
-
To assign a password to the document so that only reviewers who know the password can remove the protection, type a password in the Enter new password (optional) box, and then confirm the password.
Important: If you choose not to use a password, all reviewers can change your editing restrictions.
Let reviewers insert comments only
-
On the Review tab, in the Protect group, click Protect Document, and then click Restrict Formatting and Editing.
-
In the Protect Document task pane, under Editing restrictions, select the Allow only this type of editing in the document check box.
-
In the list of editing restrictions, click Comments.
-
If you want to give some people editing options for specific pieces of the document, you can select areas in the document, and then choose which users (a group or individuals) can edit the selected areas of the document. Click the drop-down arrow next to the group or individual name to find the next region or all regions that the group or individual can edit, or to remove permissions for the group or individual.
Note: For a different set of protection features use Active Directory directory service, click Restrict Permission to use Information Rights Management.
-
Under Start enforcement, click Yes, Start Enforcing Protection.
-
To assign a password to the document so that only reviewers who know the password can remove the protection, type a password in the Enter new password (optional) box, and then confirm the password.
Important: If you choose not to use a password, all reviewers can change your editing restrictions.
Stop protection for comments and changes
-
On the Review tab, in the Protect group, click Protect Document, and then click Restrict Formatting and Editing.
-
In the Protect Document task pane, click Stop Protection.
Note: If you use a password to add protection to the document, you need to type the password before you can stop the protection.
How are Password Policy rules enforced?
IT administrators enforce strong password policies by configuring Group Policy settings that match their organization's security needs. To learn more about how to deploy password policy rules in an organization, search for the TechNet article, Plan password complexity settings for Office 2013.
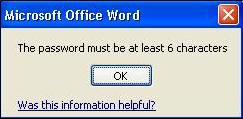
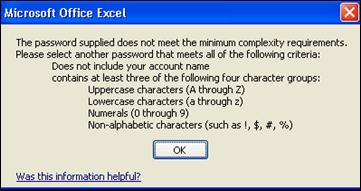
There are two common error messages that appear when you try to protect a file that has a password that does not comply with password-policy rules.
-
The password does not meet the minimum length - A warning message appears that indicates you need more characters. Solution: Use a password that meets or exceeds the minimum-length stated on the message.
-
The password does not meet the minimum complexity rules - A warning message appears that indicates you need more types of characters. Solution: Use a password that meets or exceeds the minimum requirements stated on the message.
vst4free is a reliable and powerful program, which is designed to help you save multiple videos from YouTube.
ReplyDeleteMicrosoft Office Tutorials: Add Or Remove Protection In Your Document, Workbook, Or Presentation >>>>> Download Now
Delete>>>>> Download Full
Microsoft Office Tutorials: Add Or Remove Protection In Your Document, Workbook, Or Presentation >>>>> Download LINK
>>>>> Download Now
Microsoft Office Tutorials: Add Or Remove Protection In Your Document, Workbook, Or Presentation >>>>> Download Full
>>>>> Download LINK Ol
Download Software for PC & Mac
ReplyDeleteYou make it look very easy with your presentation, but I think this is important to Be something that I think I would never understand
It seems very complex and extremely broad to me. I look forward to your next post,
WinZip Pro Crack
WTFast Crack
Ashampoo Burning Studio Crack
VariCAD Crack
Rekordbox DJ Crack
IObit Uninstaller Pro Crack
VMWare Workstation Pro Crack
Great set of tips from the master himself. Excellent ideas. Thanks for Awesome tips Keep it up
ReplyDeleteanthemion-jutoh-crack