Draw a table
Note: This article has done its job, and will be retiring soon. To prevent "Page not found" woes, we're removing links we know about. If you've created links to this page, please remove them, and together we'll keep the web connected.
Why?
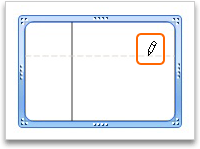
Instead of inserting a table and resizing it later to fit the slide, you can draw the table outline to fit the space available, and then draw in the lines between the rows and columns.
How?
-
On the Tables tab, under Draw Borders, click Draw.

-
On the slide, click the location where you want to add the table, and then drag the sizing handle until the table is the size that you want.

-
To divide the table into rows and columns, under Draw Borders, click Draw a second time. Click inside the table border, and then drag the pointer to draw the lines between the rows and columns.

Note: To draw lines for rows and columns, you must select the table. If the table is not selected, then a second table outline is drawn instead.
Hints
-
In addition to drawing vertical and horizontal lines to define the rows and columns, you can draw lines diagonally across cells.
-
To remove rows, columns, or merge cells with the drawing tools, on the Tables tab, under Draw Borders, click Erase. Move the pointer to position the eraser over the row or column lines that you want to erase, and then click.
No comments:
Post a Comment