Change the default font in Excel 2016 for Windows
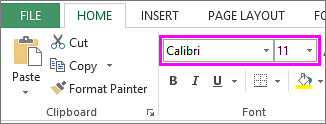
When you type data in a worksheet, Excel automatically uses the Calibri font, size 11. If you prefer using another font style or font size, you can change the default font settings for new workbooks.
-
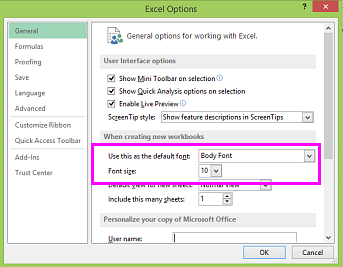
On the File tab, click Options.
-
In the General category, under When creating new workbooks, do the following:
-
In the Use this as the default font box, click the arrow, and then pick the font you want.
-
In the Font Size box, click the arrow, and then pick a font size.

-
-
Click OK.
Note: This won't change the font for an existing workbook.
-
Close and restart Excel.
The new default font is applied when you create a new blank worksheet or workbook.
Change the font style or size for an existing worksheet
-
Press Ctrl+A to select the entire worksheet.
-
On the Home tab, click the arrow in the Font box, and then pick another font.

Note: Small caps and All caps font options are not available in Excel. Try choosing a font that includes only uppercase letters instead.
-
To change the font size, click the arrow in the Font Size box, and then pick the font size you want.
Tip: Another way to apply your new default font to an existing workbook is to move the worksheets to a new workbook.
No comments:
Post a Comment