Add an existing content type to a list or library
Content types enable organizations to organize, manage, and handle content more effectively across a site collection. By defining content types for specific kinds of documents or information products, an organization can ensure that each of these groups of content is managed more effectively. You can set up a list or library to contain items of multiple item types or document types by adding content types to the list or library, such as New Support Issue or New Vendor.
In this article
How content types work in lists and libraries
If you have a list or library that is set up to allow multiple content types, you can add content types to this list or library from the group of site content types that are available for your site.
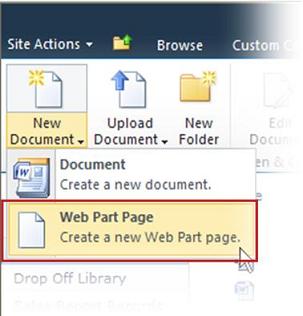
When you add a content type to a list or library, you make it possible for that list or library to contain items of that type. The New command in that list or library lets users create new items of that type. One of the key advantages of content types for lists and libraries is that they make it possible for a single list or library to contain multiple item or document types, each of which may have unique metadata, policies, or behaviors.
How inheritance works for list content types
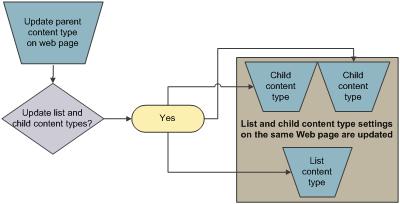
When an instance of a site content type is added to a list or library, it is a child of the site content type from which it was created. This list content type inherits all of the attributes of its parent site content type, such as its document template, read-only setting, workflows, and columns. A list content type can be customized for the specific list or library to which it has been added. These customizations are not applied to the parent site content type. If the parent site content type for a list content type is updated, the child list content type can inherit these changes (if the person who maintains the site content type chooses to apply the updates to all child content types).

If any of the attributes that the child list content type shares with the parent site content type were customized for the list content type, these customizations can be overwritten when the list content type inherits the changes from the parent site content type. If the list content type has been customized with additional attributes that the parent content type does not have (for example, extra columns), these customizations are not overwritten when the child list content type inherits changes from the parent site content type.
Add a content type to a list or library
Before content types can be added to a list or library, first the list or library must be set up to allow multiple content types. For more information about enabling support for multiple content types in a list or library, see topics in the See Also section. To add content types to a list or library, you must have at least the Design permission level for that list or library.
-
If the list or library is not already open, click its name on the Quick Launch. If the name of your list or library does not appear, click View All Site Content, and then click the name of your list or library.
-
For lists, click the List tab on the Ribbon. For libraries, click the Library tab.
-
For lists, click List Settings on the Ribbon. For libraries, click Library Settings.
-
Under Content Types, click Add from existing site content types.
Note: If the list or library is not set up to allow multiple content types, the Content Types section does not appear on the Customize page for the list or library.
-
In the Select Content Types section, in the Select Site content types from list, click the arrow to choose the group of site content types from which you want to select.
-
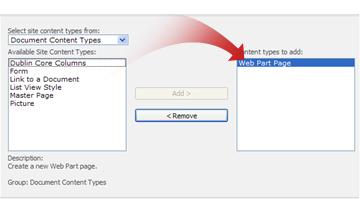
In the Available Site Content Types list, click the content type that you want, and then click Add to move the selected content type to the Content types to add list.

-
To add additional content types, repeat steps 5 and 6.
-
When you finish selecting all of the content types that you want to add, click OK.
Change the New button order or default content type
You can specify the order in which content types are displayed on the New button for a list or library. By default, the first content type that is displayed on the New button becomes the default content type for the list or library. To change the default content type for the list or library, change the content type that is displayed first on the New button. You can also specify whether you want content types that have been added to a list or library to be visible on the New button.

-
If the list or library for which you want to change a content type is not already open, click its name under Lists or Documents on the Quick Launch.
-
On the ribbon, do one of the following:
-
If you are working in a list, click List Settings.
-
If you are working in a document library, click Library Settings.
-
Under Content Types, click Change new button order and default content type.
Note: If the list or library is not set up to allow multiple content types, the Content Types section does not appear on the Customize page for the list or library.
-
In the Content Type Order section, do either of the following:
-
To remove a content type from the New button for the list or library, clear the Visible check box (this check box is selected by default).
-
To change the order in which a content type appears on the New button, click the arrow next to that content type in the Position from Top column, and then select the order number that you want.
I'm no expert, but I believe you just made an excellent point. You certainly fully understand what you're speaking about, and I can truly get behind that.
ReplyDeleteBest Microsoft Office Deals