Use shared and private notes in a Skype for Business Meeting
Important: Note sharing is not available with Lync Basic 2013. If you use Lync Basic (you'll see "Lync Basic" at the top of your Skype for Business main window), the info in this topic doesn't apply.
You usually need to take notes for a meeting, whether it's about tracking attendees, remembering what was discussed, or listing action items. If you use OneNote, Skype for Business lets you take private notes or add shared notes that you can co-edit with participants. You can also add notes to the meeting request, if you use Outlook, or while you're in the meeting room.
Add notes to a Skype for Business Meeting request
Adding notes to the meeting request lets you have all the information you need before the meeting starts and gives your invitees the opportunity to view and edit them, which saves time during the meeting.
When setting up your Skype for Business Meeting in Outlook:
-
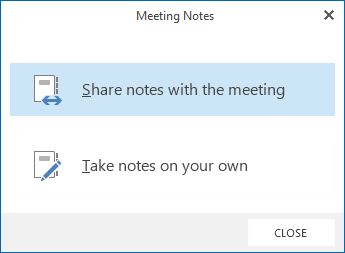
Click Meeting Notes on the meeting request ribbon.

-
Select one of the following:
-
Share notes with the meeting to add shared notes to the meeting request. Your invitees can then click View Meeting Notes in the meeting request to open them in OneNoteto view or edit.
-
Take notes on your own to add your private, personal notes to the meeting that aren't visible to others.

For information about setting up Skype for Business Meetings, click Set up a Lync Meeting.
Add notes during a Skype for Business Meeting
-
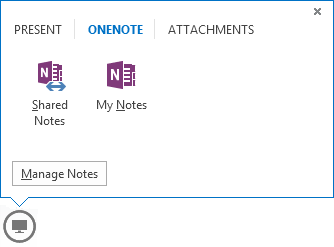
In the conversation window, pause on the presentation (monitor) icon, and click the OneNote tab.
-
Click My notes to take private notes on your computer.
-
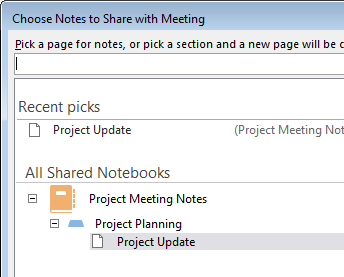
Click Shared Notes, and select a section in the note picker.
The page you select docks on your desktop and participants receive a notification in the meeting about the notebook.

How do shared notes work?
Shared notes have to be in a location that other people can get to, like OneDrive or SharePoint, and people need to have permission to open and edit them.
A few things to consider:
-
You don't have to share the entire notebook, only the page you want.
-
When you open the note picker, you can see only the shared notebooks that were previously opened on your computer.
-
If you don't have a notebook, click New Notebook, to create one.

-
Selecting a section instead of a page lets you create a blank page in that section.
-
You can also search for a page in the search box.
No comments:
Post a Comment