Set text direction and position in a text box or shape in Word for Mac
Text boxes and most shapes (except for lines and connectors) can include text, and you can position or wrap that text. You can also resize shapes for a better text fit, or change the direction of the text.
Position text horizontally in a text box or shape
Change the horizontal alignment of a single paragraph or line
-
In the shape or text box, click in the paragraph or line of text that you want to modify.
-
Click Home, and in the Paragraph group, click the horizontal alignment option that you want.

Change the horizontal alignment of all text in a shape or text box
-
Click the border of the shape or text box to select it.
-
Click Home, and in the Paragraph group, click the horizontal alignment option that you want.

Automatically resize a shape to fit text
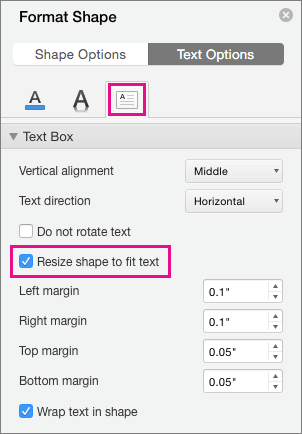
You can automatically increase the size of a text box or shape vertically so that the text fits inside it.
-
Control + Click the border of the shape or text box that you want to resize, and then click Format Shape.
-
In the Format Shape pane on the right, click Text Options.
-
Click Layout & Properties, and then select the check box next to Resize shape to fit text.

Specify text direction in a shape or text box
-
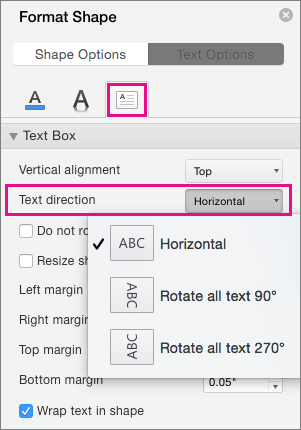
Control + Click the border of the shape or text box that contains the text, and then click Format Shape.
-
In the Format Shape pane on the right, click Text Options.
-
Click Layout & Properties, and then select the option that you want in the Text direction list.

Change the default setting for wrapping text
By default, the text wraps automatically as you type in a text box or shape. If you don't want the text to wrap, do the following:
-
Control + Click the shape that contains the text, and then click Format Shape.
-
In the Format Shape pane on the right, click Text Options.
-
Click Layout & Properties, and then clear the check box next to Wrap text in shape.
See also
Add, copy, or remove a text box
Change the margins between text and the edge of a text box or shape
Add text to a shape
-
Click a shape to select it.
-
Type or paste your text into the shape.
Add text to a shape [compatibility mode]
Compatibility mode indicates that the document was created using an earlier version of Word or saved in an earlier file format.
-
Click a shape to select it.
-
Hold down CONTROL , click the shape, and then click Add Text.
-
Type or paste your text into the shape.
No comments:
Post a Comment