Delete items from the site collection recycle bin
Items that have been deleted from a site Recycle Bin are kept in the site collection Recycle Bin (or second-stage Recycle Bin). If you're a site collection administrator, you can permanently remove these items by deleting them from the site collection Recycle Bin.
Notes:
-
The SharePoint Recycle Bin is different from the Recycle Bin in Windows. To recover files deleted in Windows from your desktop or apps, try the Windows Recycle Bin first. To put your Windows recycle bin on your desktop, see Show or hide the Recycle Bin.
-
If you're looking for the recycle bin for OneDrive, go to your OneDrive site and select Recycle bin in the left pane.
Updated January, 2018 thanks to customer feedback.
Delete items or empty the Second-Stage Recycle Bin in SharePoint Online
Caution: When you delete an item from the Second-Stage or Site Collection Recycle Bin, it is permanently removed.
-
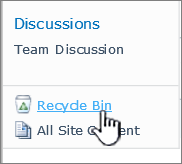
On the left Quick Launch pane of the Site page, choose Recycle Bin.

If you don't see the Recycle Bin, and you do have permissions, try the following steps.
-
Click Settings
 and then click Site settings. If you don't see Site settings, click Site information and then click View all site settings. Some pages might require you to select Site contents, and then Site settings.
 -
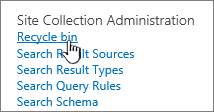
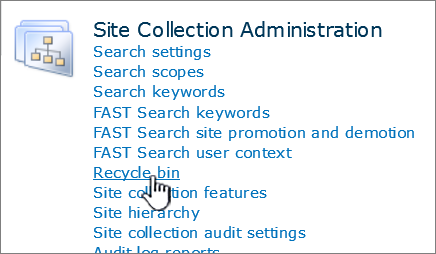
Click Recycle bin under Site Collection Administration.
-
-
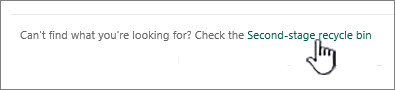
At the bottom of the Recycle Bin page, click second-stage recycle bin.
-
Do one of the following:
-
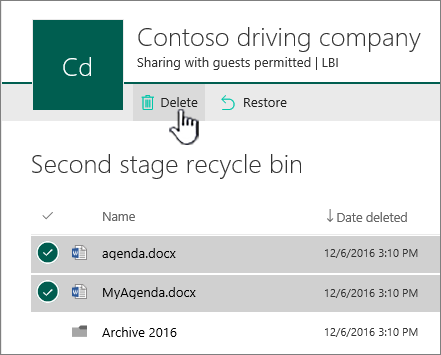
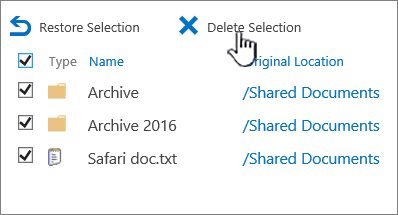
Delete one or more items Hover and click the circle next to the item(s) you want to delete and then click Delete.
-
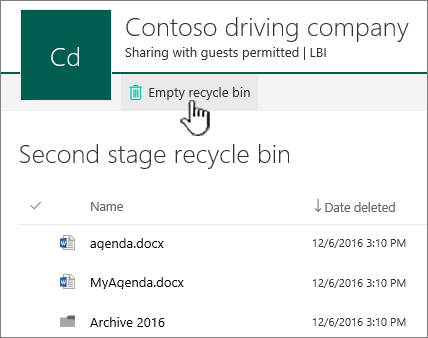
Delete all items Clear all check marks and click Empty recycle bin.
-
-
In the confirmation box, click Delete.
Delete items or empty the Second-Stage Recycle Bin in SharePoint Servers 2019 and 2016
Caution: When you delete an item from the Second-Stage or Site Collection Recycle Bin, it is permanently removed.
-
On the left Quick Launch pane of the Site page, choose Recycle Bin.
If you don't see the Recycle Bin, and you do have permissions, try the following steps.
-
Click Settings
 and then click Site settings.
 -
Click Recycle bin under Site Collection Administration.
-
-
On the Recycle Bin page click second-stage recycle bin.

-
Do one of the following:
-
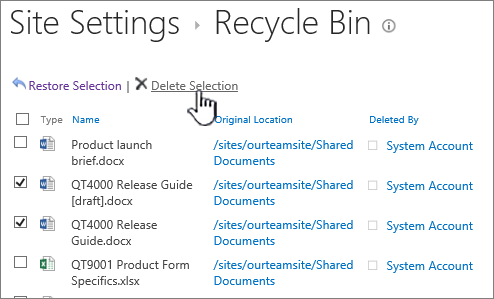
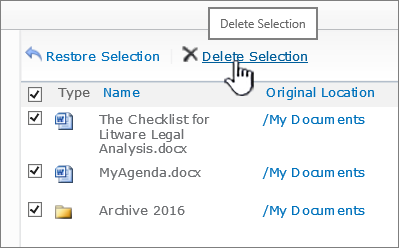
Delete one or more items Click the check box next to the item(s) you want to delete and then click Delete Selection.
-
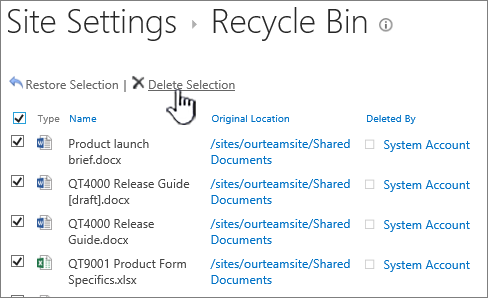
Delete all items Click the box next to Type, and then click Delete Selection.
-
-
Click OK.
Delete items or empty the Second-Stage Recycle Bin in SharePoint 2013
Caution: When you delete an item from the Second-Stage or Site Collection Recycle Bin, it is permanently removed.
-
On the left Quick Launch pane of the Site page, choose Recycle Bin.
If you don't see the Recycle Bin, and you do have permissions, try the following steps.
-
Click Settings
and then click Site settings. -
Click Recycle bin under Site Collection Administration.
-
-
In the recycle bin dialog, click Deleted from end user Recycle Bin.

-
Do one of the following:
-
Delete one or more items Click the check box next to the item(s) you want to delete and then click Delete Selection.
-
Delete all items Click the box next to Type, and then click Delete Selection.
-
-
Click OK.
Delete items or empty the Second-Stage Recycle Bin in SharePoint 2010
Caution: When you delete an item from the Second-Stage or Site Collection Recycle Bin, it is permanently removed.
-
On the left Quick Launch pane of the Site page, choose Recycle Bin.
If you don't see the Recycle Bin, and you do have permissions, try the following steps.
-
Click Site Actions
 , and then click Site settings.
 -
Click Recycle bin under Site Collection Administration.
-
-
At the top of the Recycle Bin page, click second-stage recycle bin.
-
Do one of the following:
-
Delete one or more items Click the check box next to the item(s) you want to delete and then click Delete Selection.
-
Delete all items Click the box next to Type, and then click Delete Selection.
-
-
Click OK.
Leave us a comment
Was this article helpful? If so, please let us know at the bottom of this page. Let us know what was confusing or missing. If you got here from a search and it wasn't the information you wanted, let us know what you searched for. Please include your version of SharePoint, OS, and browser. We'll use your feedback to double-check the steps and update this article.
No comments:
Post a Comment