Add images to a header or footer in Word for Mac
In addition to page numbers or text, you can add an image to your header or footer, such as a small version of your company's logo.
-
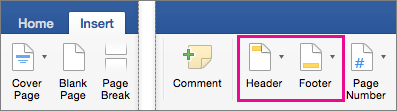
Click Insert, and then click either Header or Footer. Dozens of built in layouts appear. Click a simple one, like Blank.
-
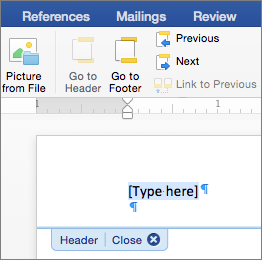
Double-click Type here in the header or footer area.
-
On the Header & Footer tab, click Picture from File and select your picture. Look for smaller images, such as one you might put on a business card or envelope. Click Insert to add the picture.
Note: Once you insert the picture, the ribbon automatically switches to the Picture Format tab in case you want to edit or resize the picture. To resize the picture, select it, and then drag the small boxes on corner of the image.
-
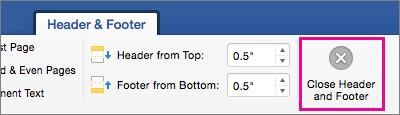
When you're finished, click Close Header and Footer on the Header & Footer tab.
Tip: If you want the picture logo to show up on only one page, see Delete a header or footer from a single page.
No comments:
Post a Comment