Use mail merge to send bulk email messages
If you have a message to send to many people via email that you want personalized for each recipient, use mail merge. You can create a batch of personalized email messages that are formatted identically and use the same text and graphics. Only specific sections of the email message vary and are personalized. Mail merge—unlike broadcasting a message to a group of people—makes each recipient of the message the sole recipient.
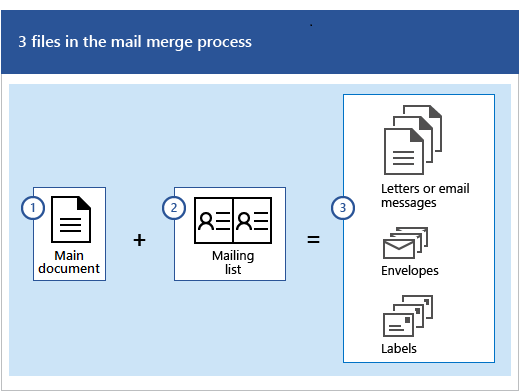
There are three documents involved in creating email messages using the mail merge process:
-
Your main document
This document is your email message, it contains text and graphics (a logo or image, for example) that are identical for each version of the merged document. -
Your mailing list
This document contains the data that is used to populate information on the letter. Your mailing list has names, for example, and your main document is the email message that will be addressed to the names in your list. -
Your merged document
This document is a combination of the main document and the mailing list. Mail merge pulls the formation from the mailing list and puts it in your main document, resulting a personalized, merged document for each person on the mailing list.
Step 1: Prepare your main document
Type the body of the email message you want to send to everyone in Word before you begin. If you're telling people about an upcoming event, for example, include the name, date, time, and location of the event. Those event details are important for everyone to know.
-
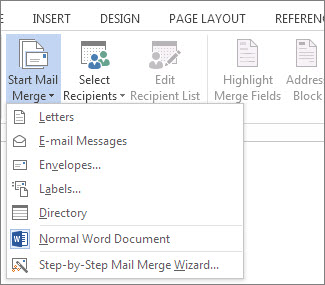
On the Mailings tab, in the Start Mail Merge group, choose Start Mail Merge > E-mail Messages.
Step 2: Set up your mailing list
In order to send emails, a MAPI-compatible email program like Outlook or Gmail needs to be installed. If you're using Outlook MAPI, make sure your versions of Word and Outlook are the same.
The mailing list is your data source. It can be a directory of Outlook contacts, an Access database, or an Office address list. It contains the records that Word uses to pull information from to build your email messages.
Tips
-
If you don't have a mailing list, you can create one during mail merge. Before you start the mail merge process, collect all of your data records, and add them to your data source. See, create a new list in Word.
-
If you're using an Excel spreadsheet, make sure the column for ZIP codes or postal codes is formatted as text so that you don't lose any zeros. For more information see, Prepare your Excel data source for a Word mail merge
-
If you want to use your Outlook contacts, make sure Outlook is your default email program. For more information see, Use Outlook contacts as a data source for a mail merge
Step 3: Link your mailing list to your email message
Now it's time to choose your recipients from a data source (an address list). Make sure your data source has a column for email addresses and that there's an email address for each person you're sending the email to.
-
On the Mailings tab, in the Start Mail Merge group, choose Select Recipients, and then choose an option.
-
Do one of the following:
-
If you don't have a mailing list, choose Type a New List and create one.
or
-
If your mailing list is in an Excel spreadsheet, an Access database, or another type of data file, choose Use an Existing List. Then browse to your list and choose Open.
or
-
If you're using your Outlook contacts, choose Choose from Outlook Contacts.
-
-
Choose File > Save as.
-
In the File name box, type a file name, and then choose Save.
Edit your mailing list
If you're sending email messages to everyone on your list, go to Step 4: Add personalized content to the email message. If you want to send emails only to certain people on your list you can narrow the list, use the steps under Edit your mailing list.
-
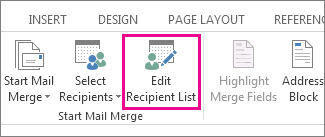
Choose Edit Recipient List.
-
Check the names of the people who you want to receive your email message.
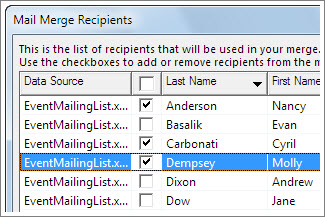
You also can sort or filter the list to make it easier to find names and addresses.
Step 4: Add personalized content to the email message
Personalize each email message by adding a person's name and address. The best practice for adding these details is to insert merge fields in your main document.
-
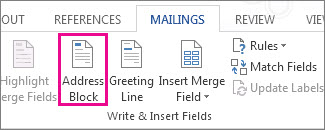
On the Mailings tab, in the Write & Insert Fields group, choose Address Block.
-
In the Insert Address Block dialog box, choose a format for the recipient's name as it will appear in the email.

-
Choose OK to insert the merge field.
-
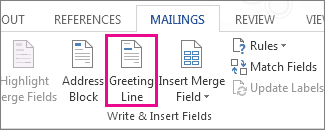
In the Write & Insert group, choose Greeting Line.
-
In the Insert Greeting Line dialog box, choose the format you want to use.
-
Choose OK to insert the merge field.
-
Choose File > Save to preserve your email.
Note: You'll need to format your email manually after inserting fields.
You can also add other fields from your data source to your email message. For more information, see Insert mail merge fields.
Verify merge field names
Make sure Word finds the names and addresses in your mailing list.
-
On the Mailings tab, in the Write & Insert Fields group, choose Match Fields.
Tip: Merge Fields also can be opened from the Insert Address Block dialog box you used to add an address block to the main document.
-
In the Match Fields dialog box, verify that the record fields that appear in the list match the names of column headings for records in your mailing list data source.
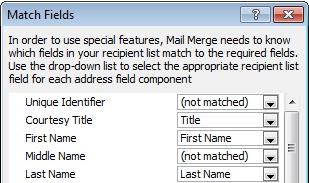
Note: There are two columns in the dialog box. The left column is a list of common names in a business record for example. The right column is the field name for the common name that is mapped to a column heading in your data source file.
-
Do one of the following:
-
If the field names shown match column headings you used for records in your mailing list data source, do nothing.
or
-
If (not matched) appears in a field name that you expected to match a column heading in your data source, choose the drop-down arrow, and then choose the field name in your mailing list data source. Repeat as necessary.
-
-
Choose OK.
Format mail merge fields
To change the font, size, or spacing of the merged content, select the merge field name and make the changes you want.
-
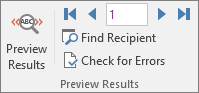
On the Mailings tab, in the Preview Results group, choose Preview Results to switch from the merged results back to the mail merge fields in your letter.
-
Choose the merge field name.
-
On the Home tab, choose the font and the font size you want to use.

-
On the Page Layout tab (Word 2013) or Layout tab (Word 2016), choose the paragraph spacing you want.

Note: Because Word treats each line in an Address Block as a paragraph, you might want to reduce the spacing between the lines.
Step 5: Preview and finish
After you add merge fields to your main document, you're ready to preview the merge results. When you're satisfied with the preview, complete the merge.
-
Choose Preview Results, and then choose the Next
 or Previous
  record button to make sure the names and addresses in the body of your letter look right.
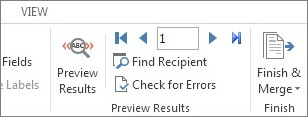
Tip: To go to the start of the list, choose the First
 record button, and to go to the end of the list, choose the Last
  record button.
 -
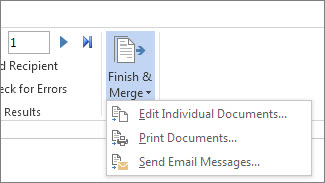
Choose Finish & Merge > Send E-mail Messages.
-
In the To box, choose the name of the email address column in your list.
Note: Word sends an individual message to each email address. You can't Cc or Bcc other recipients and you can't add attachments to the email.
-
In the Subject line box, type a subject line for the message.
-
In the Mail format box, choose HTML (the default setting) or Plain text to send the document as the body of the email message.
Important: If you send the email message as Plain text, the main document won't include any text formatting or graphics.
-
Under Send records, do one of the following:
-
Accept the default setting to merge and send All records.
or
-
Choose Current record and only the record viewable on your screen is sent the message.
or
-
Choose the last option, and in the From box, enter the record number to begin the merge, and in the To box, enter the record number to end the merge.
Note: An email is not sent to anyone with a record number excluded from the From-To range.
-
-
Choose OK to run mail merge.
Step 6: Save the personalized message
Save the email message if you plan to use it for another mail merge.
When you save the main document, you also save its connection to the data source you chose. The next time you open the main document, Word prompts you to choose whether to keep the connection to the data source.
-
If you choose Yes, the document opens showing information merged with the first record.
-
If you choose No, the connection between the main document and the data source is broken. The main document for the email becomes a standard Word document.
im very impressed with your post because this post is very beneficial for me and provide a new knowledge to me
ReplyDeleteGet Bulk Mailer