Insert, edit, and view fields in Word
Inserting fields can give you precise control over dynamic text in your document. Fields are an important part of Word, but it's good to know that many fields are inserted for you through built-in commands and features. For example, fields are at work when you insert page numbers or create a table of contents. In these cases, it's probably simpler to let Word automatically add them for you. Fields are most useful when you need placeholders for data that might change in your document and for creating form letters or labels in mail-merge documents.
These steps work for inserting any field code in Word. For a list of all field codes with detailed information about each, see List of field codes in Word.
Insert a field
-
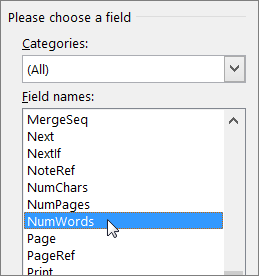
Click where you want to insert a field.
Tip: If you know the field code for the field that you want to insert, you can type it directly in your document. First press CTRL+F9, and then type the code within the brackets.
-
Click Insert > Quick Parts > Field.

-
In the Field names list, select a field name.
Tip: You can filter the list by clicking the down arrow in the Categories list.
-
Under Field properties, select any properties or options you want, and click OK.
Notes:
-
To see the codes for a particular field in the Field box, click Field Codes. For some fields, this button is clicked by default.
-
To nest a field within another field, first insert the outer, or container, field (steps 1-4 above). Then place the insertion point inside the field code where you want to insert the inner field, and repeat steps 2-4 above.
-
If you want to see the codes for a particular field in the Field dialog box, click Field Codes.
-
To nest a field within another field, first insert the outer, or container, field, by using the Field dialog box. In your document, place the insertion point inside the field code where you want to insert the inner field. Then use the Field dialog box to insert the inner field.
If you know the field code for the field that you want to insert, you can also type it directly in your document. First press CTRL+F9, and then type the code within the brackets.
About field codes and syntax
You can insert a field if you want to:
-
Add, subtract, or perform other calculations. To do so, use the = (Formula) field.
-
Work with documents in a mail merge. For example, insert ASK and FILLIN fields to display a prompt as Word merges each data record with the main document.
In other cases, it is simpler to use the commands and options that are provided in Word to add the information that you want. For example, you can insert a hyperlink by using the HYPERLINK field, but it is easier to use the Hyperlink command in the Links group on the Insert tab.
Important: You cannot insert field code brackets by typing the brace characters on the keyboard. To insert field code brackets, press CTRL+F9.
Field code syntax
Field codes appear between curly brackets ( { } ). Fields behave like formulas in Microsoft Office Excel — the field code is like the formula, and the field result is like the value that the formula produces. You can switch between displaying field codes and results in your document by pressing ALT+F9.
When you view a field code in your document, the syntax looks like this:
{ FIELD NAME Properties Optional switches }
-
FIELD NAME This is the name that appears in the list of field names in the Field dialog box.
-
Properties These are any instructions or variables that are used in a particular field. Not all fields have parameters, and in some fields, parameters are optional instead of required.
-
Optional switches These are any optional settings that are available for a particular field. Not all fields have switches available, other than those that govern the formatting of the field results.
For example, you can place the file name and path of your document in the header or footer by inserting the FILENAME field.
The syntax for the FILENAME field code with the path included looks like this:
{ FILENAME \p }
Edit a field
-
Right-click in the field, and then click Edit Field.
-
Change the field properties and options. For information about the properties and options available for a particular field, see List of field codes in Word or search on the field name in Help.
Notes:
-
For some fields, you must display the field code to edit the field. To display all the field codes in the document, press ALT+F9.
-
Some fields are edited in their own dialog boxes instead of in the Field dialog box. For example, if you right-click a hyperlink and then click Edit Hyperlink, the Edit Hyperlink dialog box opens
-
Display the field results
By default, Word displays the field results seamlessly with the content of your document so that someone reading the document is unaware that part of the content is in a field. However, fields can also be displayed with a shaded background, to make them more visible in the document.
You can make the field results blend into the content of the document by turning off the option to display fields with a shaded background and by formatting the field results, or you can call attention to fields by displaying them with a shaded background, either all the time or only when the field is selected.
You can format the field results by applying text formatting to the field or by adding formatting switches to the field code.
Change the shaded background of fields
-
Click the File > Options. (In Word 2007, click Microsoft Office Button
 , and then click Word Options.)
 -
Click Advanced.
-
Under Show document content, in the Field shading list, do one of the following:
-
To make fields stand out from the rest of the document content, select Always.
-
To make fields blend in seamlessly with the document content, select Never.
-
To make users of Word aware that they have clicked in a field, select When selected.
When the field shading option is set to When selected, the field displays a gray background when you click within the field. However, the gray shading does not indicate that the field is selected. When you select the field by double-clicking or dragging the mouse, highlighting that indicates selection is added to the gray shading.
-
Apply text formatting to a field
-
Select the field that you want to format, and then apply the formatting by using the commands in the Font group on the Home tab.
For example, to underline the name that is inserted by an AUTHOR field, select the entire field code, including brackets (or select the entire field result), and then click Underline in the Font group on the Home tab.
If you update a field, any formatting that you applied to the field results may be lost. To retain the formatting, include the \* MERGEFORMAT switch in the field code. When you insert fields by using the Field dialog box, the \* MERGEFORMAT switch is included by default.
Add a formatting switch to a field code
-
Right-click the field, and then click Edit Field.
-
Do one of the following:
-
If Field properties and Field options are displayed, select the formatting options that you want.
-
If only the field code is displayed, click Options, and then select the formatting options that you want.
If the Options button appears dimmed, additional formatting options may not be available.
-
You can use three formatting switches to format field results:
Format switch(\*)
The Format field switch (\*) defines how to display field results. The format instructions determine the following:
-
The use of uppercase and lowercase letters
-
Number formats — for example, whether 9 is displayed as ix (roman numerals) or ninth (ordinal text)
-
character formats
Format switches also retain a field result's formatting when the field is updated.
Capitalization formats:
The following is a list of switches and the items that they capitalize:
-
\* Caps This switch capitalizes the first letter of each word. For example, { FILLIN "Type your name:" \* Caps } displays Luis Alverca even if the name is typed in lowercase letters.
To select this option in the Field Options dialog box, click Title case.
-
\* FirstCap This switch capitalizes the first letter of the first word. For example, { COMMENTS \* FirstCap } displays Weekly report on sales.
To select this option in the Field Options dialog box, click First capital.
-
\* Upper This switch capitalizes all letters. For example, { QUOTE "word" \* Upper } displays WORD.
To select this option in the Field Options dialog box, click Uppercase.
-
\* Lower This switch capitalizes none of the result; all letters are lowercase. For example, { FILENAME \* Lower } displays weekly sales report.doc.
This switch has no effect if the entire field that contains the switch is formatted as small capital letters.
To select this option in the Field Options dialog box, click Lowercase.
Number formats:
The following is a list of number switches and their results:
-
\*alphabetic This switch displays results as alphabetic characters. The result has the same case as the word "alphabetic" in the field code. For example, { SEQ appendix \* ALPHABETIC } displays B (instead of 2), and { SEQ appendix \* alphabetic } displays b.
To select this option in the Field Options dialog box, click a, b, c,.
-
\*Arabic This switch displays results as Arabic cardinal numerals. For example, { PAGE \* Arabic } displays 31.
Notes:
-
If the Number format setting in the Page Number Format dialog box is not Arabic, this switch overrides the Number format setting.
-
For page numbers only, there is also an ArabicDash format, which displays results as Arabic cardinal numbers surrounded by hyphen characters. For example, { PAGE \* ArabicDash } displays - 31 -.
To select this option in the Field Options dialog box, click 1, 2, ,3, ....
-
-
\*CardText This switch displays results as cardinal text. The result is formatted in lowercase letters unless you add a format switch to specify a different capitalization. For example, { = SUM(A1:B2) \* CardText } displays seven hundred ninety, and { = SUM(A1:B2) \* CardText \* Caps } displays Seven Hundred Ninety.
To select this option in the Field Options dialog box, click One, Two, Three.
-
\*DollarText This switch displays results as cardinal text. Word inserts and at the decimal place and displays the first two decimals (rounded) as Arabic numerators over 100. The result is formatted in lowercase letters unless you add a format switch to specify a different capitalization. For example, { = 9.20 + 5.35 \* DollarText \* Upper } displays FOURTEEN AND 55/100.
To select this option in the Field Options dialog box, click Dollar Text.
-
\*Hex This switch displays results as hexadecimal numbers. For example, { QUOTE "458" \* Hex } displays 1CA.
To select this option in the Field Options dialog box, click hex ....
-
\*OrdText This switch displays results as ordinal text. The result is formatted in lowercase letters unless you add a format switch to specify a different capitalization. For example, { DATE \@ "d" \* OrdText } displays twenty-first, and { DATE \@ "d" \* OrdText \* FirstCap } displays Twenty-first.
To select this option in the Field Options dialog box, click First, Second, Third, ....
-
\*Ordinal This switch displays results as ordinal Arabic numerals. For example, { DATE \@ "d" \* Ordinal } displays 30th.
To select this option in the Field Options dialog box, click 1st, 2nd, 3rd.
-
\*roman This switch displays results as Roman numerals. The result has the same case as the word "roman" in the field code. For example, { SEQ CHAPTER \* roman } displays xi, and { SEQ CHAPTER \* ROMAN } displays XI.
To select this option in the Field Options dialog box, click I, II, III,.
Character formats and protecting previously applied formats:
The following are character formatting switches and their results:
-
\*Charformat This switch applies the formatting of the first letter of the field name to the entire result. The result of the following example has bold formatting because the R in REF is bold.
{ REF chapter2_title \* Charformat } displays Whales of the Pacific in bold text.
To add this switch, type it in the field code or in the Field codes box in the Field dialog box.
-
\*MERGEFORMAT This switch applies the formatting of the previous result to the new result. For example, if you select the name displayed by the field { AUTHOR \* MERGEFORMAT } and apply bold formatting, Word retains the bold formatting when the field is updated to display a new author name.
When you insert fields by using the Field dialog box , the \*MERGEFORMAT switch is included by default. You can turn this option off by clearing the Preserve formatting during updates check box in the Field dialog box.
Numeric format switch (\#)
The Numeric format switch (\#) specifies the display of a numeric result.
For example, the switch \# $#,##0.00 in { = SUM(ABOVE) \# $#,##0.00 } displays a result such as "$4,455.70." If the result of a field is not a number, this switch has no effect.
Note: Quotation marks are not required around simple numeric formats that do not include spaces — for example, { MarchSales \# $#,##0.00 }. For more complex numeric formats and those that include text or spaces, enclose the numeric format in quotation marks, as shown in the following examples. Word adds quotation marks to numeric format switches if you insert a field by using the Field dialog box or the Formula command in the Data group of the Layout tab (Table Tools contextual tab).
Combine the following format items to build a numeric format switch:
-
0 (zero) This format item specifies the requisite numeric places to display in the result. If the result does not include a digit in that place, Word displays a 0 (zero). For example, { = 4 + 5 \# 00.00 } displays 09.00.
-
# This format item specifies the requisite numeric places to display in the result. If the result does not include a digit in that place, Word displays a space. For example, { = 9 + 6 \# $### } displays $ 15.
-
x This format item drops digits to the left of the "x" placeholder. If the placeholder is to the right of the decimal point, Word rounds the result to that place. For example:
{ = 111053 + 111439 \# x## } displays 492.
{ = 1/8 \# 0.00x } displays 0.125.
{ = 3/4 \# .x } displays .8. -
. (decimal point) This format item determines the decimal point position. For example, { = SUM(ABOVE) \# $###.00 } displays $495.47.
Use the decimal symbol that is specified as part of the regional settings in Control Panel.
-
, (digit grouping symbol) This format item separates a series of three digits. For example, { = NetProfit \# $#,###,### } displays $2,456,800.
Use the digit grouping symbol that is specified as part of the regional settings in Control Panel.
-
- (minus sign) This format item adds a minus sign to a negative result or adds a space if the result is positive or 0 (zero). For example, { = 10 - 90 \# -## } displays -80.
-
+ (plus sign) This format item adds a plus sign to a positive result, a minus sign to a negative result, or a space if the result is 0 (zero). For example, { = 100 - 90 \# +## } displays +10, and { = 90 - 100 \# +## } displays -10.
-
%, $, *, and so on This format item includes the specified character in the result. For example, { = netprofit \# "##%" } displays 33%.
-
"example formatting for positive; negative" This format item specifies different number formats for positive and negative results, separated by a semicolon. For example, if the bookmark Sales95 is a positive value, the field { Sales95 \# "$#,##0.00;-$#,##0.00" } displays the value with regular formatting — for example, "$1,245.65". A negative value is displayed with bold formatting and a minus sign — for example, -$ 345.56.
-
"example formatting for positive; negative; zero" This format item specifies different number formats for a positive result, a negative result, and a 0 (zero) result, separated by semicolons. For example, depending on the value of the Sales95 bookmark, { Sales95 \# "$#,##0.00;($#,##0.00);$0" } displays positive, negative, and 0 (zero) values as follows: $1,245.65, ($ 345.56), $0.
-
'text' This format item adds text to the result. Enclose the text in single quotation marks. For example, { = { Price } *8.1% \# "$##0.00 'is sales tax' " } displays $347.44 is sales tax.
-
`numbereditem` This format item displays the number of the preceding item that you numbered by using the Caption command (References tab, Captions group) or by inserting a SEQ field. Enclose the item identifier, such as "table" or "figure," in grave accents (`). The sequential number is displayed in Arabic numerals. For example, { = SUM(A1:D4) \# "##0.00 'is the total of Table' `table`" } displays 456.34 is the total of Table 2.
Date-Time format switch (\@)
The Date-Time format switch (\@) specifies the display of a date or time.
For example, the switch \@ "dddd, MMMM d, yyyy" in the field { DATE \@ "dddd, MMMM d, yyyy" } displays "Friday, November 23, 2007." Combine the following date and time instructions — day (d), month (M), and year (y); hours (h) and minutes (m) — to build a date-time format. You can also include text, punctuation, and spaces.
Date instructions:
Month (M)
The letter M must be uppercase to distinguish months from minutes.
-
M This format item displays the month as a number without a leading 0 (zero) for single-digit months. For example, July is 7.
-
MM This format item displays the month as a number with a leading 0 (zero) for single-digit months. For example, July is 07.
-
MMM This format item displays the month as a three-letter abbreviation. For example, July is Jul.
-
MMMM This format item displays the month as its full name.
Day (d)
The letter d displays the day of the month or the day of the week. The letter d can be either uppercase or lowercase.
-
d This format item displays the day of the week or month as a number without a leading 0 (zero) for single-digit days. For example, the sixth day of the month is displayed as 6.
-
dd This format item displays the day of the week or month as a number with a leading 0 (zero) for single-digit days. For example, the sixth day of the month is displayed as 06.
-
ddd This format item displays the day of the week or month as a three-letter abbreviation. For example, Tuesday is displayed as Tue.
-
dddd This format item displays the day of the week as its full name.
Year (y)
The letter y displays the year as two or four digits. The letter y can be either uppercase or lowercase.
-
yy This format item displays the year as two digits with a leading 0 (zero) for years 01 through 09. For example, 1999 is displayed as 99, and 2006 is displayed as 06.
-
yyyy This format item displays the year as four digits.
Time instructions:
Hours (h)
A lowercase h bases time on the 12-hour clock. An uppercase H bases time on the 24-hour, or military, clock; for example, 5 P.M. is displayed as 17.
-
h or H This format item displays the hour without a leading 0 (zero) for single-digit hours. For example, the hour of 9 A.M. is displayed as 9.
-
hh or HH This format item displays the hour with a leading 0 (zero) for single-digit hours. For example, the hour of 9 A.M. is displayed as 09.
Minutes (m)
The letter m must be lowercase to distinguish minutes from months.
-
m This format item displays minutes without a leading 0 (zero) for single-digit minutes. For example, { TIME \@ "m" } displays 2.
-
mm This format item displays minutes with a leading 0 (zero) for single-digit minutes. For example, { TIME \@ "mm" } displays 02.
Seconds (s)
-
s This format item displays seconds without a leading 0 (zero) for single-digit seconds. For example { TIME \@ "s" displays 5.
-
ss This format item displays seconds with a leading 0 (zero) for single-digit seconds For example { TIME \@ "ss" displays 05.
A.M. and P.M. (AM/PM)
This displays A.M. and P.M. To change the A.M. and P.M. symbols for Microsoft Windows, change the regional settings in Control Panel.
-
am/pm or AM/PM This format item displays A.M. and P.M. as uppercase. For example, { TIME \@ "h AM/PM" } and { TIME \@ "h am/pm" } display 9 AM or 5 PM.
Other text and punctuation:
-
'text' This format item displays any specified text in a date or time. Enclose the text in single quotation marks. For example, { TIME \@ "HH:mm 'Greenwich mean time' " } displays 12:45 Greenwich mean time.
-
character This format item includes the specified character in a date or time, such as a : (colon), - (hyphen), * (asterisk), or space. For example, { DATE \@ "HH:mm MMM-d, 'yy" } displays 11:15 Nov-6, '99.
-
`numbereditem` This format item includes in a date or time the number of the preceding item that you numbered by using the Caption command in the Captions group (References tab), or by inserting a SEQ field. Enclose the item identifier, such as table or figure, in grave accents (`). Word displays the sequential number in Arabic numerals. For example, { PRINTDATE \@ "'Table' `table` 'was printed on' M/d/yy" } displays Table 2 was printed on 9/25/02.
Note: Quotation marks are not required around simple date-time formats that do not include spaces or text — for example, { DATE \@ MM/yy }. For more complex date-time formats and those that include spaces or text, enclose the entire date-time format in quotation marks, for example, { DATE \ @ "dddd MMMM d, yyyy', at' h:mm" }. Word adds quotation marks to date-time format switches if you insert a field by using the Date and Time command in the Text group of the Insert tab or the Field dialog box.
Control how fields are updated
By default, Word automatically updates fields when a document is opened. That way, information stays up to date. There are situations where you might not want this to happen, however. For example, you may want the date in the header to reflect a particular date rather than automatically updating to the current date every time the document is opened.
Fields can also be updated by right-clicking a field and then clicking Update Field or by clicking in a field and then pressing F9.
To manually update all the fields in the main body of a document, press CTRL+A, and then press F9. Fields in headers, footers, or text boxes must be updated separately. Click within the header, footer, or text box, press CTRL+A, and then press F9.
You can lock fields to prevent automatic or inadvertent updating of the field.
Lock or unlock a particular field
Do one of the following:
-
To lock a field so that field results are not updated, click the field, and then press CTRL+F11.
-
To unlock a field so that field results can be updated, click the field, and then press CTRL+SHIFT+F11.
Lock results of BOOKMARK, INCLUDETEXT, and REF fields
The Lock Result (\!) field switch prevents a field that is included in the result of a BOOKMARK, INCLUDETEXT, or REF field from being updated unless the field result in the original location has changed. Without this switch, Word updates fields that are included in a field result whenever the BOOKMARK, INCLUDETEXT, or REF field is updated.
For example, the field { INCLUDETEXT C:\\Sales\Qtr4 Sales.doc \! } inserts the contents of the document "Qtr4 Sales.doc," which contains a DATE field and an EMBED field. If you update the INCLUDETEXT field, the \! switch prevents Word from updating the DATE and EMBED fields in the included text unless they are first updated in the original document ("Qtr4 Sales.doc"). The switch ensures that the text inserted by the INCLUDETEXT field matches the text in the original document.
To update the DATE and EMBED fields in both locations, update fields in the original document (Qtr4 Sales.doc), and then update the INCLUDETEXT field.
Microsoft Office Tutorials: Insert, Edit, And View Fields In Word >>>>> Download Now
ReplyDelete>>>>> Download Full
Microsoft Office Tutorials: Insert, Edit, And View Fields In Word >>>>> Download LINK
>>>>> Download Now
Microsoft Office Tutorials: Insert, Edit, And View Fields In Word >>>>> Download Full
>>>>> Download LINK yB
https://compedu-knowledge.blogspot.com/
ReplyDelete