Add or delete audio in your PowerPoint presentation
You can add audio, such as music, narration, or sound bites, to your PowerPoint presentation. To record and hear any audio, your computer must be equipped with a sound card, microphone, and speakers.

Add audio from your PC
-
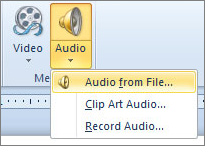
Select Insert > Audio.
-
Select Audio on My PC.
-
In the Insert Audio dialog box, select the audio file you want to add.
-
Select Insert.
Record audio
-
Select Insert > Audio.
-
Select Record Audio.
-
Type in a name for your audio file, select Record, and then speak.
Note: Your device must have a microphone enabled in order to record audio.
-
To review your recording, select Stop and then select Play.
-
Select Record to re-record your clip, or select OK if you're satisfied.
-
To move your clip, select and drag the audio icon to where you want it on the slide.
If you're using more than one audio file per slide, we recommend putting the audio icon in the same spot on a slide to find it easily.
-
Select Play.
Change playback options
Select the audio icon and then select the Audio Tools Playback tab. Then select which options you'd like to use:
-
To trim the audio, select Trim and then use the red and green sliders to trim the audio file accordingly.
-
To fade in or fade out audio, change the number in the Fade Duration boxes.
-
To adjust volume, select Volume and select the setting you prefer.
-
To choose how the audio file starts, select the dropdown arrow and select an option:
-
In Click Sequence: Plays the audio file automatically with a click.
-
Automatically: Plays automatically once you advance to the slide that the audio file is on.
-
When Clicked On: Plays audio only when the icon is clicked on.
-
-
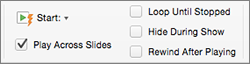
To choose how the audio plays in your presentation, select an option:
-
Play Across Slides: Plays one audio file across all slides.
-
Loop until Stopped: Plays an audio file on loop until it's stopped manually by clicking the Play/Pause button.
-
-
To have the audio play continuously across all slides in the background, select Play in Background.
Delete audio
To delete an audio clip, select the audio icon on the slide and press Delete.
What would you like to do?
Select an audio file to insert
-
In Normal view, click the slide that you want to add a sound to.
-
On the Insert tab, in the Media group, click the arrow under Audio.
-
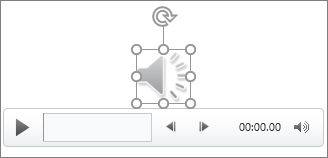
In the list, click Audio from file or Clip Art audio, locate and select the audio clip that you want, and then click Insert.
The audio icon and controls appear on the slide.
-
In Normal view or Slide Show view, click the icon and click Play to play the music or other sound.
Record audio
-
In Normal view, click the slide that you want to add a sound to.
-
On the Insert tab, in the Media group, click the arrow under Audio.
-
In the list, click Record Sound.
The Record Sound dialog box opens.
-
In the Record Sound dialog box, click Record
 , and begin speaking or playing your own audio.
 -
Click Stop
 when you're done recording. Assign a name to the recording.
Click Play
 to listen to the recording. If you're satisfied, click OK to save the recording and insert it on the slide. If you're not yet satisfied, repeat steps 4 and 5.
The audio icon and controls appear on the slide:
-
In Normal view or Slide Show view, click the icon and click Play to play the music or other sound.
Set the playback options
-
On the slide, select the audio clip icon
 .
. -
Under Audio Tools, on the Playback tab, in the Audio Options group, do one of the following:
-
To start the audio clip automatically when you show the slide, in the Start list, click Automatically.
-
To manually start the audio clip when you click it on the slide, in the Start list, click On Click.
-
To play an audio clip as you click through the slides in your presentation, in the Start list, click Play across slides.
-
To play an audio clip continuously until you stop it, select the Loop until Stopped check box.
Note: When you loop a sound, it plays continuously until you advance to the next slide.
-
Preview audio
-
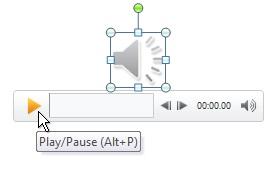
On the slide, click the Play/Pause button beneath the audio icon.
Play music for the duration of your slide show
Hide the audio icon
Important: Use this option only if you set the audio clip to play automatically, or if you created some other kind of control, such as a trigger, to click to play the clip. (A trigger is something on your slide, such as a picture, shape, button, paragraph of text, or text box, that can set off an action when you click it.) Note that the audio icon is always visible unless you drag it off the slide.
-
Click the audio clip icon
. -
Under Audio Tools, on the Playback tab, in the Audio Options group, select the Hide During Show check box.
Delete an audio clip
To delete a music clip or another sound in PowerPoint, do the following:
-
Locate the slide that contains the sound that you want to delete.
-
In Normal view, click the sound icon
or CD icon  , and then press Delete.
What would you like to do?
Add or record audio
-
In Normal view, click the slide that you want to add a sound to.
-
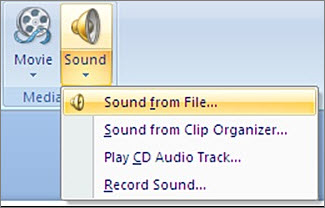
On the Insert tab, in the Media Clips group, click the arrow under Sound.
-
Do one of the following:
-
To add a sound from your computer or a network share, click Sound from File, locate the folder that contains the file, and then double-click the file that you want to add.
-
To add a sound from clip art, click Sound from Clip Organizer, locate the audio clip that you want in the Clip Art task pane, and then click to add it to the slide.
-
To play a sound from a CD running on your computer, click Play CD Audio Track, select starting and ending times and any other play options, and click OK.
-
To record and add your own audio, click Record Sound, and in the dialog box, click the Record button
to begin speaking or playing your own audio.
The audio
 icon appears on the slide.
 -
Set the playback options
-
On the slide, select the sound icon
. -
Under Sound Tools, on the Options tab, in the Sound Options group, do one of the following:
-
To start the audio clip automatically when you show the slide, in the Play Sound list, click Automatically.
-
To manually start the audio clip when you click it on the slide, in the Play Sound list, click When Clicked.
-
To play an audio clip as you click through the slides in your presentation, in the Play Sound list, click Play across slides.
-
To play an audio clip continuously until you stop it, select Loop Until Stopped.
Note: When you loop a sound, it plays continuously until you advance to the next slide.
-
Play or repeat a sound until you stop it
To repeat a sound until you stop it, or to play it for the duration of a presentation, you need to specify the stop options.
-
To adjust the settings for when the sound file stops, on the Animations tab, in the Animations group, click Custom Animation.

-
In the Custom Animation task pane, click the arrow to the right of the selected sound in the Custom Animation list, and then click Effect Options.
-
On the Effect tab, under Stop playing, do one of the following:
-
To stop the sound file with one mouse-click on the slide, click On click.
-
To stop the sound file after this slide, click After current slide.
-
To play the sound file for several slides, click After, and then set the total number of slides on which the file should play.
Note: For the last two options above, the sound should be as long as the specified display of the slides. You can see the length of the sound file on the Sound Settings tab, under Information.
-
Preview audio
-
On the slide, double-click the sound icon
.
Hide the sound icon
Important: Use this option only if you set the sound to play automatically, or if you created some other kind of control, such as a trigger, to click to play the sound. (A trigger is something on your slide, such as a picture, shape, button, paragraph of text, or text box, that sets off an action when you click it.) Note that the sound icon is always visible in Normal view unless you drag it off the slide.
-
Click the sound icon
. -
Under Sound Tools, on the Options tab, in the Sound Options group, select the Hide During Show check box.
Delete a sound
-
Click the slide that contains the sound that you want to delete.
-
In Normal view, click the sound icon
or CD icon , and then press DELETE.To delete multiple sounds, repeat steps 1 and 2 for each slide that contains sound files that you want to delete.
To add music or other audio clip to your slide show, select the slide you want and click Insert > Audio. You can add audio to a single slide, play audio automatically when a slide appears, or add a song that plays as background music during your entire presentation.
You can add your own narration or commentary to an entire presentation by recording it on the Slide Show tab. See Record your slide show for more information.
Add audio to a single slide
-
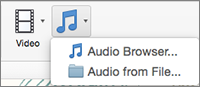
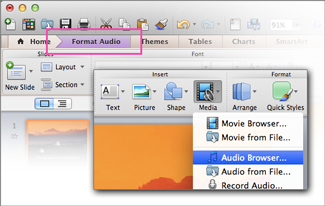
In Normal view, select the slide you want and click Insert > Audio.
-
Click Audio Browser to insert audio from iTunes, or Audio from File to insert an audio clip from your computer.
-
Select the audio clip. On the Audio Format tab, select the audio options you want.
-
(Optional) If you want to change or modify the standard audio file icon, use the picture format buttons on the Audio Format tab to add a frame, border, or other formatting effect to the audio icon.
Preview the audio
-
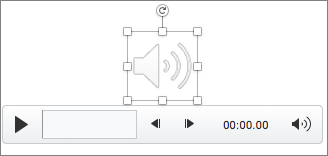
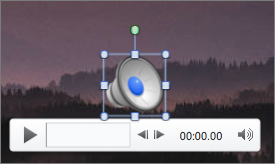
On the slide, select the audio icon, and then click Play/Pause beneath the audio icon.

Play audio automatically when a slide appears
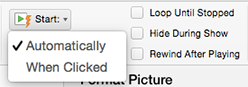
By default, during a slide show, audio plays when it is clicked. You can change it so that the audio plays automatically as soon as its slide appears.
-
In Normal view, select the slide you want and add an audio clip if you haven't already done so.
-
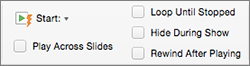
On the Audio Format tab, on the right, click Start > Automatically.
Add audio that plays during your entire presentation
-
In Normal view, select the first slide in your presentation and add an audio clip if you haven't already done so.
-
On the Audio Format tab, on the right, click Play across Slides.
Add audio that plays repeatedly
-
In Normal view, select the slide you want and add an audio clip if you haven't already done so.
-
On the Audio Format tab, on the right, click Loop Until Stopped.
(Used alone, this option means the looping sound lasts while the slide it resides on is being shown. When Loop Until Stopped is used in tandem with Play Across Slides, the looping sound continues throughout the presentation.)
Hide the Audio icon
-
Click the audio clip icon.

-
On the PowerPoint ribbon, on the Playback tab, select the Hide During Show check box.
Use this option only if you set the audio clip to play automatically. Note that the audio icon is always visible unless you drag it off the slide.
See also
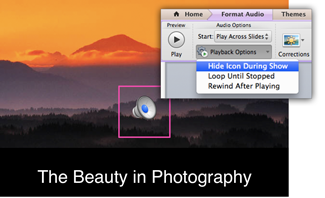
To play music or other audio across your entire presentation, set it up from the Format Audio tab.
-
Go to the Home tab and click Media > Audio Browser, then choose iTunes or GarageBand.
-
Select your audio file and drag it onto the first slide.
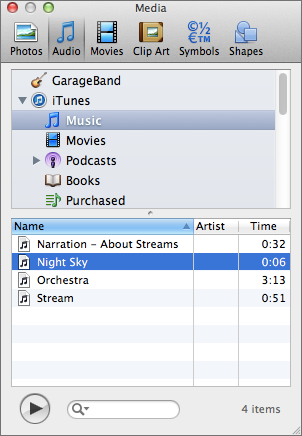
Tip: To preview a song, double-click it.
-
With the speaker icon selected, click the Format Audio tab and click Start > Play Across Slides.

Tip: If your presentation is longer than your audio, make the audio repeat by clicking Playback Options > Loop Until Stopped.
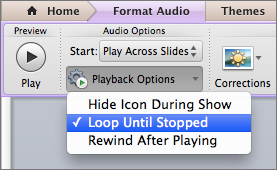
Tip: To hide the audio icon, select Hide Icon During Show.
Related articles
Adding audio to a slide isn't supported in PowerPoint Online.
If you want this feature added to PowerPoint Online, please go to our suggestion box and vote for it.
See Also
Play music or other sounds automatically when a slide appears
This is a website that allows you to download ringtones for free here.I have inserted a lot of ringtones into my slides. Because I'm using powerpoint to give a presentation on a global music project. I thought I should share it with you soon.
ReplyDelete