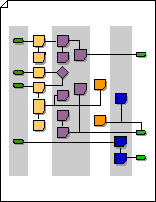
Audit diagrams document and analyze processes such as financial transactions and inventory management.
-
Start the Visio app.
-
Select the Templates tab in the backstage and then select Business > Audit Diagram.
-
Choose the audit diagram you wish to start with and select Create.
-
For each step in the process you're documenting, you're going to drag and connect flowchart shapes onto your drawing:
-
Drag a shape from a stencil onto the drawing page and position it near or over the shape you wish to connect it to. Blue triangles will appear.
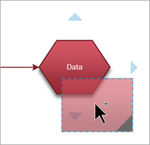
-
While still holding down the mouse button, drag the shape over one of the blue triangles so that it turns dark blue.
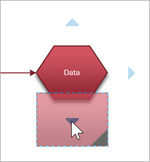
-
Release the mouse button. The shape is placed on the drawing page, and a connector is added and glued to both shapes.
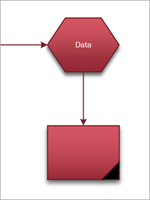
-
-
To add text to a shape, select it, and then type.
-
You can number the shapes in your flowchart to illustrate the sequence of process steps:
-
In a flowchart, select the shapes that you want to number.
-
On the View tab, select Add-Ons > Visio Extras.
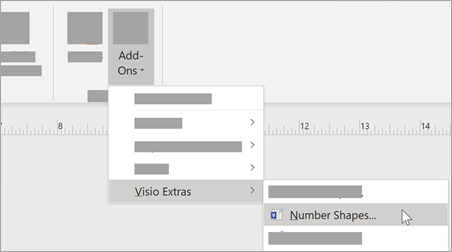
-
On the General tab, under Operation, select Auto Number. Under Apply to, click Selected Shapes, and then click OK.
Tip: To number new flowchart shapes as they are dragged onto the page, in the Number Shapes dialog box, click Continue numbering shapes as dropped on page.
-
-
In the Visio app, on the File menu, point to New, point to Business, and then click Audit Diagram.
-
For each step in the process you are documenting, drag a flowchart shape onto your drawing.
-
Connect the flowchart shapes:
-
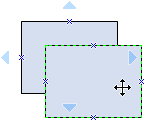
Drag a shape from a stencil onto the drawing page and position it near another shape.
-
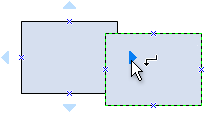
While still holding down the mouse button, move the pointer over one of the blue triangles. The triangle turns dark blue.
-
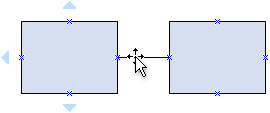
Release the mouse button. The shape is placed on the drawing page, and a connector is added and glued to both shapes.
-
-
To add text to a shape, select it, and then type.
-
You can number the shapes in your flowchart to illustrate the sequence of process steps:
-
In a flowchart, select the shapes that you want to number.
-
On the Tools menu, point to Add-Ons, and then click Number Shapes.
-
On the General tab, under Operation, click Auto Number. Under Apply To, click Selected Shapes, and then click OK.
Tip: To number new flowchart shapes as they are dragged onto the page, in the Number Shapes dialog box, click Continue numbering shapes as dropped on page.
-
No comments:
Post a Comment