Lists offer you a very flexible way to display your data. You can enable dozens of settings to let you display your data in a range of formats, specify users, create workflows, add versioning, and send RSS updates as things change.
Edit list settings
Follow these steps to open the List settings.
-
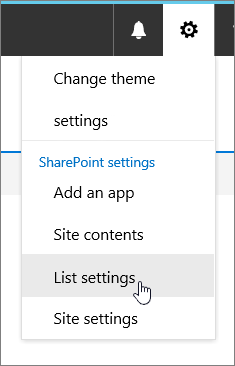
From the list you want to edit, click Settings
 and then select List settings.
Notes:
-
Does your screen look different than the examples? Your administrator may have classic experience set on the document library or you're using an earlier version of SharePoint. If you're a list or site owner, or administrator, see Switch the default experience for lists or document libraries from new or classic.
-
Some features are currently only available in classic experience. Click Return to classic SharePoint in the bottom, left corner of the page to switch to classic experience. To exit classic experience, close all SharePoint windows, and reopen.
-
-
On the List settings page, edit the settings and properties you want, such as name, description, add versioning or validation, column ordering, or adding more columns.
-
Each setting allows you to set or cancel your changes and additions. See below for more detail.
-
When you're done, return to your list to see your changes.
List settings
The following is a quick overview of what you can do in the List settings page. Each setting allows you to enable the setting, or save and cancel.
Select a heading below to open it and see the detailed information.
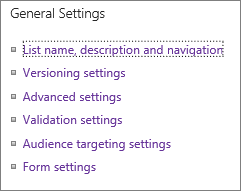
General Settings
Edit and control navigation, set up versioning, validation, and audience, and manage advanced settings.

| List name, description and navigation | Edit or change the Title of the list, description, and set whether the list shows on the Quick Launch bar. |
| Versioning settings | Set whether approval is required on submitted items, create new versions on every edit, number of submitted and approved versions, and determine who can see, edit, and approve draft items. |
| Advanced settings | Set the following
|
| Validation settings | Specify a formula to use for validation. Create a message that helps users understand what valid data looks like. |
| Audience targeting settings | Enable audience targeting column to filter contents based on a users context. |
| Rating settings | When you enable ratings, two fields are added to the content types available for this list and a rating control is added to the default view of the list or library. You can choose either "Likes" or "Star Ratings" as the way content is rated. |
| Form settings | Use Microsoft PowerApps to customize the forms for this list. You can modify the form layout, add pictures and formatted text, add custom data validation, create additional views, and add rules. Microsoft InfoPath is also provided as an option for backwards compatibility. Using PowerApps is recommended over using InfoPath. |
Permissions and Management
Manage your lists IRM, keywords, and workflow, and set permissions for the people you want to contribute and view the list.

| Delete this list | Deletes the list completely and returns you to the home page. |
| Permissions for this list | Set the list's permission levels for different user groups on the site. |
| Information Rights Management (IRM) | Enable and create a permission policy title and description, configure document access rights, and set group protection and the time frame when credentials need to be verified. |
| Workflow settings | Set workflow association types for the list, item, or folder. Add, remove, block, or restore a workflow. |
| Enterprise Metadata and Keywords Settings | Add an enterprise keyword column and enable keyword synchronization. |
| Save list as template | Saves list as a template, with or without content. SharePoint Server 2019 only. |
Communications
Set up RSS feeds to go out as list items change.

| RSS Settings | Set the following:
|
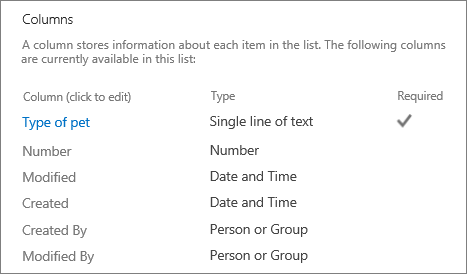
Columns
The columns settings provide the ability to show or hide columns, create or add existing columns, column ordering and column indexing.

| Edit columns | You can click the column to edit and edit the properties, such as required data, unique values, and maximum characters for a text field. |
| Create column | Create a column using one of many types. Set the name, description, and specific parameters depending on the type of column added. |
| Add from existing site columns | Add columns to your list that were used in other lists on your site. Set them to show or not on a default view. |
| Column ordering | Change the order columns appear from left to right on your list. |
| Indexed columns | Create or remove up to 20 column indices. |
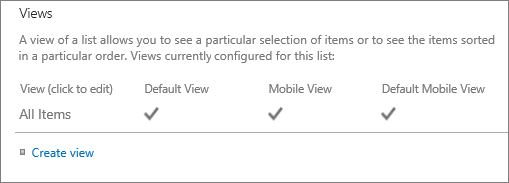
Views
See and create views

| View | See views of your list data. Click to edit items. |
| Create view | Create Standard, Datasheet, Calendar, Gantt, or Access view of your data. Each view type provides settings of its own. You can also start from an existing view. |
No comments:
Post a Comment