
With your address list set up in an Excel spreadsheet, Outlook Contacts, or a new list you created, you can use mail merge in Word to create mailing labels.
-
Go to Mailings > Start Mail Merge > Labels.
-
In the Label Options dialog box, choose your label supplier in the Label vendors list.
-
In the Product number list, choose the product number on your package of labels.
Tip: If none of the options match your labels, choose New Label, enter your label's information, and give it a name. Choose OK to add the new label to the Product number list.
-
Choose OK.
Your document now displays a table with an outline of the labels. If you don't see the table, go to Table Layout and select View Gridlines.
-
Go to File > Save to save your document.
-
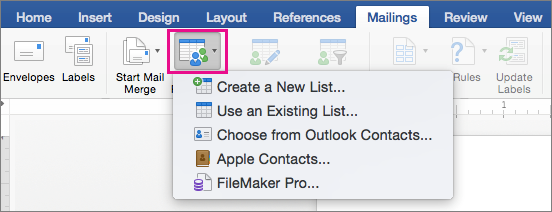
Go to Mailings > Select Recipients, and then choose an option.
For more info, see Data sources you can use for a mail merge.
-
Select OK.
-
Go to Mailings and do one of the following:
-
For just an address, select Address block. For more info, see Insert Address Block dialog.
-
For other merge fields, select Insert Merge Field. For more info, see Insert mail merge fields.
-
-
Format the fields in the first label so it looks the way you want the rest of your labels to look.
-
Select Mailings > Update Labels.
-
Go to Mailings > Preview Results.
Tip: Choose Preview Results again to view, add or remove merge fields. Select Update labels when done if you make changes.
-
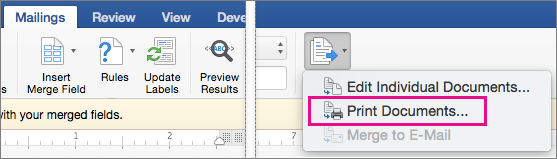
Go to Mailings > Finish & Merge > Print Documents.
Tip: To review and update each label individually before printing, go to Mailings > Finish & Merge > Edit Individual Documents. When done, go to File > Print.
See also
To create a page of labels with graphics, see Add graphics to labels
To add barcodes to your mailing list labels, see Add barcodes to labels
-
Go to Mailings > Start Mail Merge > Labels.

-
In the Label Options dialog box, choose your label supplier in the Label products list.
-
In the Product number list, choose the product number on your package of labels.
Tip: If none of the options match your labels, choose New Label, enter your label's information, and give it a name. Choose OK to add the new label to the Product number list.
-
Choose OK.
Your document now displays a table with an outline of the labels. If you don't see the outline, go to Table Layout and select View Gridlines.
-
Go to File > Save to save your document.
-
Go to Mailings > Select Recipients, and then choose an option.
For more info, see Data sources you can use for a mail merge.
-
Select OK.
-
Go to Mailings > Insert Merge Field and select the fields to show on your labels.

-
Choose OK.
-
Format the fields in the first label so it looks the way you want the rest of your labels to look.
-
Go to Mailings > Update Labels.
-
Go to Mailings > Preview Results.

Choose Preview Results again to view, add or remove merge fields. Select Update labels when done if you make changes.
-
When the labels look the way you want, go to Mailings > Finish & Merge > Print Documents.
Tip: To review and update each label individually before printing, go to Mailings > Finish & Merge > Edit Individual Documents. When you're done, go to File > Print to print the labels.

See also
When you perform a mail merge, Word inserts the records from a data source, or recipients list, into your main document. A recipients list for a mail merge operation can be an Excel sheet, the Office Address Book, a FileMaker Pro database, a Word document, or a delimited text file.
Important: You must have an existing recipients list, such as a Word document that has addresses, to complete this procedure. For more information about how to set up a recipients list, see Create a data source for a mail merge
-
On the File menu, choose New Blank Document.
A new, blank Word document opens. This becomes your main document.
-
On the View menu, choose Print Layout.
-
On the Tools menu, choose Mail Merge Manager.
-
Under 1. Select Document Type, select Create New, and then choose Labels.
-
Under Printer information, choose the type of printer that you use.
-
On the Label products pop-up menu, click the manufacturer of your labels.
Tip: For more label products, on the Label products pop-up menu, choose Other.
-
Under Product number, select the type of label that you have, and then choose OK.
Tip: For information about the margins and other characteristics of a label, choose Details.
-
In the Mail Merge Manager, under 2. Select Recipients List, choose Get List, and then select the source for the recipients list (for example, Office Address Book).
-
On the Insert Merge Field pop-up menu, choose a field name in the list (for example, FirstName).
Word adds the field name to the Sample label box.
Tip: To return to this dialog box later, in the Mail Merge Manager under 2. Select Recipients List, choose Add or remove placeholders on labels
 .
. -
Repeat step 9 for each field that you want to appear in your labels.
-
After you add all the fields that you want, choose OK.
Your field names are copied into all the labels in your main document.
-
In your main document, edit the first label to add spaces, commas, and carriage returns where you want them.
-
In the Mail Merge Manager, under 2. Select Recipients List, c Fill in the items to complete your document
 .
.Word applies the formatting that you use for the first label to all the labels.
-
To finish your labels, do one of the following:
| To | Do this |
|---|---|
| Preview your labels | In the Mail Merge Manager, under 5. Preview Results, choose View Merged Data |
| Print your labels immediately | In the Mail Merge Manager, under 6. Complete Merge, choose Merge to Printer |
| Create a document that contains your merged labels that you can save | In the Mail Merge Manager, under 6. Complete Merge, choose Merge to New Document |
 .
. .
. .
.
No comments:
Post a Comment